An Apple a Day…

Back in June, I decided to take a Wilton course at my local Michael’s in hopes of learning some nice decorating techniques for cakes. After taking Course 1, I quickly learned that you can’t do much great decorating without using butter cream icing; which works best for decorating purposes when it is made with vegetable shortening (GAG!).  I decided that I wasn’t a big fan. I would much rather decorate a cake with things that actually taste good. I still use some of the techniques that I learned, but I try to avoid using the dreaded butter cream as much as possible. I tend to try and decorate with fruit, chocolate shavings, etc. I also sometimes choose to ice cakes in my preferred icing and then make a small batch of butter cream for the decorating.

Anyway, since I love to bake and most people (mainly family) know I took that course, I am the first they come to when it is birthday cake time. So, when the Jewish holidays rolled around, my mother-in-law asked if I would mind making a birthday cake for her father instead of making a dessert for one of the holiday dinners. Of course I agreed. So now I needed to find a tasty cake that I thought everyone would love, but would also look like a birthday cake and allow for writing (without having to use the butter cream). It was also getting into the fall season, so I figured I would take that into mind as well.

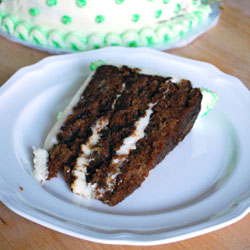
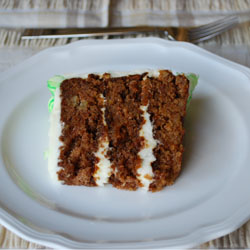
After doing a bit of searching I finally found a three layer apple cake by Martha Stewart. It would look like a birthday cake, have fall flavors that I was sure most people would enjoy and I would top it with my favorite cream cheese icing that could still be used for some decorating purposes. I think I hit all of my goals! Most importantly avoiding the BC!

The cake was moist and delicious; and everyone raved over how great it tasted. The only downfall I found was that it was a little hard to work with. The outside of the cake is quite sticky and the centers seemed to fall a bit, which makes it a bit difficult to stack without it all sticking to your hands and it requires a bit more frosting in the middle of each layer to compensate for the fallen centers. Overall though, I would make it again because it tasted great and had that homey, rustic feel to it. I think the cream cheese icing paired very nicely with it as well.
CAKE2-CROPPED

cake 2nd 1-cropped

Three-Layer Apple Cake

Courtesy of MarthaStewart.com

Cake
1/2 cup (1 stick) unsalted butter, melted, plus more for pans
2 cups all-purpose flour (spooned and leveled), plus more for pans
2 teaspoons baking soda
1/2 teaspoon baking powder
2 teaspoons ground cinnamon
1/2 teaspoon ground ginger
3/4 teaspoon salt
2 cups packed light-brown sugar
2 large eggs
4 Granny Smith apples, peeled, two coarsely grated and two diced

Icing
Vanilla Cream Cheese icing (from the Banana Bars recipe)

Preheat oven to 350 degrees. Butter three 8-inch-round cake pans (I used 9-inch b/c that is what I had); line bottoms with parchment paper. Butter, then flour paper and sides (tapping out excess); set aside.

In a medium bowl, whisk together flour, baking soda, baking powder, cinnamon, ginger, and salt; set aside. In a large bowl, whisk together butter, sugar, and eggs until well combined; fold in grated and diced apples. Add flour mixture; mix just until combined. Divide batter among prepared pans; smooth tops.

Bake until a toothpick inserted in center of cake comes out clean, 35 to 40 minutes. Cool cakes in pans 20 minutes, then invert onto wire racks; peel off parchment. Invert cakes again, and let cool completely on racks.

Assemble cake to your liking with Vanilla Cream Cheese Icing.  Refrigerate at least 1 hour (or up to 4 days). To serve, bring cake to room temperature; slice with a serrated knife.

Yields: 12 servings
Perfect Pesto & More

As you may have noticed, I was absent for about two weeks, up until two days ago. My husband and I were actually in Long Island and NYC for a wedding and vacation for a few days and then I had family visiting for a week. So it has been a bit hectic and I apologize for my lack of posting. I promise that I will be sharing some highlights from our NYC trip very soon though. Needless to say, we had some amazing food during our visit.

While wandering around the city we decided to check out the market and shops in Grand Central Terminal. We were very excited to find a Penzey’s, since we don’t have one in South Florida and have always ordered online. We were also intrigued by this little oil and vinegar shop we came across, Oliviers & Co or O & Co. I let my husband take a peak while I ran to a different store to pick something up for my mom. When I returned he seemed quite excited about what he had found in the shop. The lady pretty much let him taste every oil and vinegar in the shop, even the bottles that were priced well over $100. They also had a great selection of imported pastas. So now the question was, what do we buy? So I tasted a few and we finally made some decisions.

Our final choices included:
Gaec Salvator Extra Virgin Olive Oil – France
Basil Extra Virgin Olive Oil
Fig Vinegar – Provence
Purple Basil Vinegar – South Asia
Penne with Wheat Germ
Straccetti with Wheat Germ

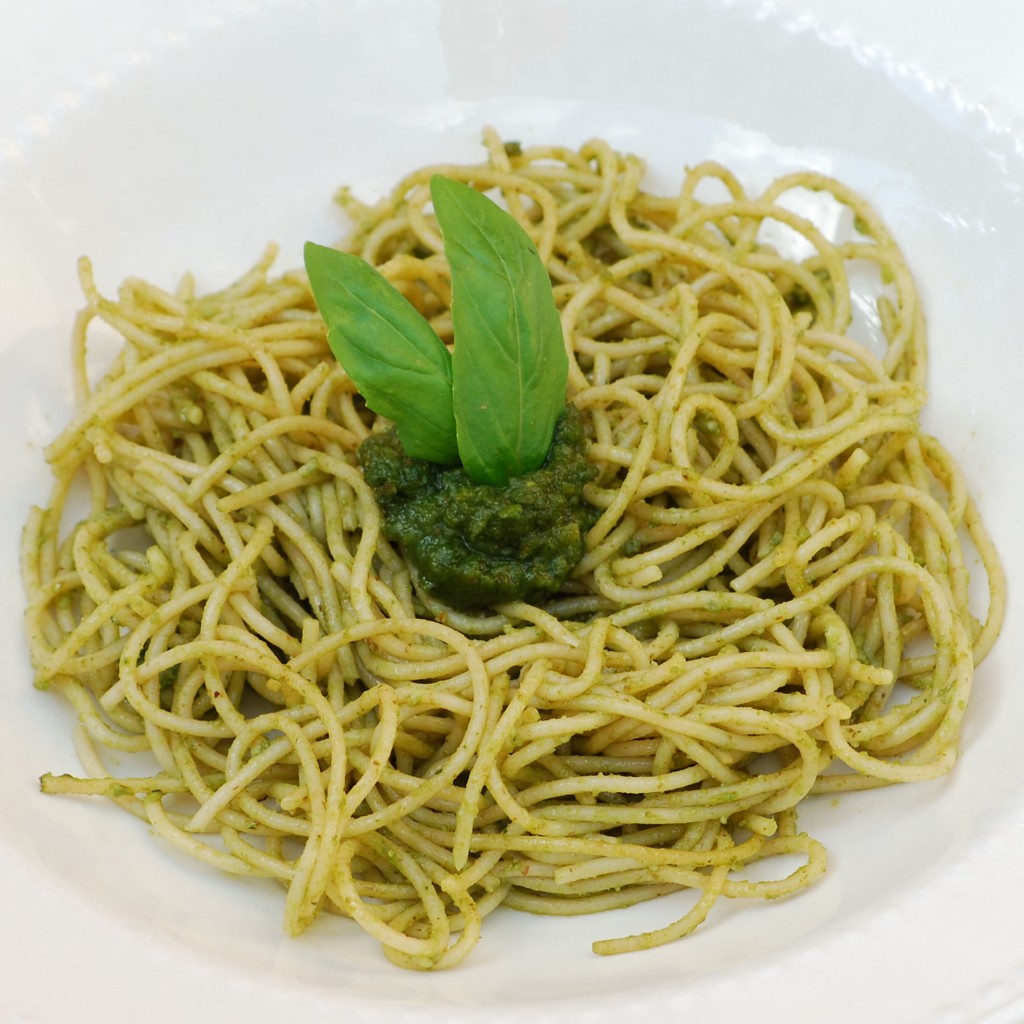
We were so excited to return from our trip and find our products were shipped right behind us and arrived a couple of days later. My husband’s birthday was quickly approaching and he loves pasta, so I knew this would be a great opportunity to try out some of our new goods. I decided to do a pasta tasting for his birthday dinner. One of the dishes would have to be pesto, because I felt that would be a great way to showcase our new Gaec Salvator. I started searching for a great, simple recipe. Of course I turned to Cook’s Illustrated and was happy to find a classic version in my The New Best Recipe book. I figured I couldn’t go wrong with that.

The outcome? A perfectly simple pesto that was made even better with our incredible EVOO.

Stay tuned for more recipes to come using our delicious new additions!

Pesto 2

Classic Pesto

courtesy of Cook’s Illustrated,
The New Best Recipe

1/4 cup almonds (pine nuts or walnuts are fine too)
3 medium garlic cloves, unpeeled
2 cups packed fresh basil leaves
2 tablespoons fresh parsley leaves (optional-I did not use)
7 tablespoons extra virgin olive oil
Salt
1/4 cup freshly grated Parmesan cheese

Toast the nuts in a small, heavy skillet over medium heat, stirring frequently, until just golden and fragrant, 4-5 minutes. Transfer the nuts to a plate.

Add the unpeeled garlic to the empty skillet. Toast, shaking pan occasionally, until fragrant and the color of the cloves deepens slightly, about 7 minutes. Let the garlic cool, then peel and chop.

Combine the basil and parsley (if using) in a heavy-duty zipper-lock plastic bag. Pound the bag with the flat side of a meat pounder or rolling pin until all the leaves are bruised.

Place the nuts, garlic, pounded herb(s), oil, and 1/2 tsp. salt in a food processor. Process until smooth, stopping as necessary to scrape down the sides of the workbowl. Transfer the mixture to a small bowl, stir in the Parmesan cheese, and adjust the salt to taste.

The surface of the pesto can be covered with a sheet of plastic wrap or a thin film of oil and refrigerated for up to 3 days.

Yields: about 3/4 cup

The Best Challah Yet!

I always love to take on challenges, so when I met my Jewish husband I decided that it would be necessary for me to learn to cook some of the traditional holiday foods. I especially made this a goal when we moved away from his family and wanted to make sure that he was still able to enjoy the dishes he grew up on. Of course it is easy to go to the store and buy many of these foods in easy to make boxed, jarred or frozen versions, but anyone who has placed these “foods” in their mouth knows that they can be down right disgusting and sometimes not even seem edible. So again, it would be a necessity to learn how to make some things from scratch.

Challah is actually one of the items you can find in most bakeries and can be down right delicious when bought from the store. Why wouldn’t I take the easy way out though? I would much rather take on the trial and errors of finding the perfect recipe, even if it does take hours to produce one loaf. Call me crazy, but I live for that sort of thing.

Luckily it seems that it has only taken me two recipes to find a version that we love. Last year I took a stab at Cook’s Illustrated version, which was recommended by Melissa from It’s Melissa’s Kitchen. It turned out great and everyone raved over it. For some reason though I was antsy to try out a different version this year and I turned to Smitten Kitchen. I hadn’t tried any of Deb’s recipes yet, but I had always drooled over them in my Google Reader. So, I decided to give her version a try. Boy am I glad that I did! Although I really enjoyed the Cook’s Illustrated version, I think Deb’s is the new favorite. I enjoyed the texture and consistency of hers a bit more. Not to discredit CI because this is obviously a personal preference and CI has never steered me wrong with anything else. I actually have an amazing cookie recipe coming soon that is one of theirs; so stay tuned for that.

Okay, so back to the challah. I loved everything about this challah, the flavor, the texture and the look. When I brought it to my husband’s family, they all raved over it and said it was better than Publix, so I took that as a good sign as well. The only problem I ran into with this version was the instructions for braiding it. My husband was nice enough to run upstairs mid braiding to find me a helpful video to follow. It made the braiding process incredibly easy and I recommend taking a look at it before you get started.

Oh, and can I mention that there is nothing much better than the smell of fresh baked challah slithering through your home.

challah whole

challah 2nd 3

Best Challah

courtesy of Smitten Kitchen

1 1/2 packages active dry yeast (1 1/2 tablespoons)
1 tablespoon plus 1/2 cup sugar
1/2 cup olive or vegetable oil, plus more for greasing the bowl
5 large eggs
1 tablespoon salt
8 to 8 1/2 cups all-purpose flour
1/2 cup raisins per challah, plumped in hot water and drained (optional)
Poppy or sesame seeds for sprinkling (optional)

In a large bowl, dissolve yeast and 1 tablespoon sugar in 1 3/4 cups lukewarm water.

Whisk oil into yeast, then beat in 4 eggs, one at a time, with remaining sugar and salt. Gradually add flour. When dough holds together, it is ready for kneading. (You can also use a mixer with a dough hook for both mixing and kneading, but be careful if using a standard size KitchenAid–it’s a bit much for it, though it can be done.)

Turn dough onto a floured surface and knead until smooth. Clean out bowl and grease it, then return dough to bowl. Cover with plastic wrap, and let rise in a warm place for 1 hour, until almost doubled in size. Dough may also rise in an oven that has been warmed to 150 degrees then turned off. Punch down dough, cover and let rise again in a warm place for another half-hour.

At this point, you can knead the raisins into the challah, if you’re using them, before forming the loaves. To make a 6-braid challah follow the instructions on this video for the braiding process (I personally did not have success following the written instructions from Smitten Kitchen).

Beat remaining egg and brush it on loaves. Either freeze breads or let rise another hour.

If baking immediately, preheat oven to 375 degrees and brush loaves again. Sprinkle bread with seeds, if using. If freezing, remove from freezer 5 hours before baking.

Bake in middle of oven for 30 to 40 minutes, or until golden. (If you have an instant read thermometer, you can take it out when it hits an internal temperature of 190 degrees.) Cool loaves on a rack.

Note from Deb: Any of the three risings can be done in the fridge for a few hours, for more deeply-developed flavor. When you’re ready to work with it again, bring it back to room temperature before moving onto the next step.

Time: about 1 hour, plus 2 1/2 hours’ rising
Yield: 2 loaves

Finding Balance and a CSA

We reside in a society that generally struggles with the balancing act of busy careers, home lives, making good food choices, and making good choices for the environment, all while trying to make everyone happy. Yes, you do have the group of people who are willing to change their whole lifestyle to live perfectly green while producing their own healthful foods, staying organic and keeping waste at an extreme bare minimum. Unfortunately you also have the group at the other end of the spectrum that doesn’t want to take the time to think twice about what they are putting into their bodies and who also don’t care about waste or don’t want to believe that our environment will go down in shambles if we don’t take better care of if. Then there is the huge group of us average people caught in the middle. The people who want to eat well and be mindful of the environment, but can’t exactly manage or afford to stop their career and live on a farm while residing in a completely green home. Not only that but the price of eating healthy and organic comes with a cost that the average American can’t afford; especially for an entire family. So, what can we “in the middle” people do to make sure we are making the best choices for our bodies and for our environment? Well, first you must remember that you don’t have to change your whole life overnight; it’s the little things that can actually add up and make a difference.

I do think that people in general are becoming more mindful of these matters. I am sure you go to the stores and notice more and more people bringing their own reusable bags with them. I was recently surprised to hear that many people are starting to use cloth napkins at meals instead of purchasing paper napkins. Not only are you saving paper, you are also saving money. Most are becoming more aware of water bottles as well and are starting to carry reusable containers for their beverages. I know I personally try to think about everything I need out of the refrigerator when I am cooking and try to only make one or two trips in, rather than reopening it every time I need something. So, these are small things that many are starting to do, which as a whole can make a huge difference on the environment and save people money in the end.

While we are managing to find simple ways to reduce waste, I think many of us still struggle on the eating healthful part. We want to eat things that are good for us, but it can be expensive and many don’t think they have the time to cook or prepare meals. Well, I may have a solution for many of these people. Not only a solution for eating healthful and nutritious foods, but doing so at a reasonable cost and while helping the environment. It’s called a CSA or Community Supported Agriculture. This is something that I recently learned of and became a part of in my community. This is a way for people to buy locally grown seasonal produce direct from the farmer at an incredibly reasonable price. Not only are you supporting a local business while getting fresh from the farm produce, but you are reducing the pollution caused by produce being trucked all over the country and even sometimes shipped across the world as well as on packaging. You may think, well isn’t all produce fresh from the farm? Technically, yes, but it could be days and even weeks before that produce actually makes it to your local grocery store after being picked. With a CSA you are in most cases getting produce that was harvested within 24 hours of you receiving it. Not only that, but many CSA’s also run strictly organic. You usually pick up or have a delivery every one or two weeks, depending on your subscription. Your box will contain whatever is seasonal and ready for harvesting at that time. This is also a great way to experiment with new produce that you may have never tried before. This type of resource will generally motivate people to take more time to cook because they are interested in using this abundance of fresh food at their fingertips. They will also find it easy to throw quick dishes together without a lot of effort.  Not only that but for those of you with children, it generally gets them motivated and excited to eat more veggies because they can feel involved in picking up the goodies straight from “their” farm.

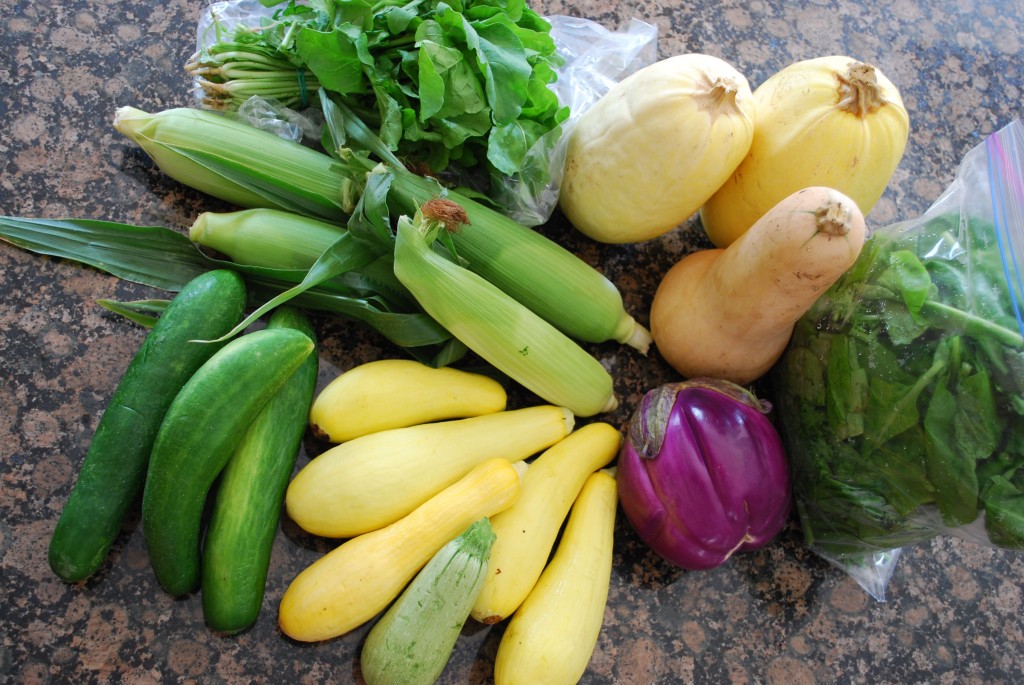
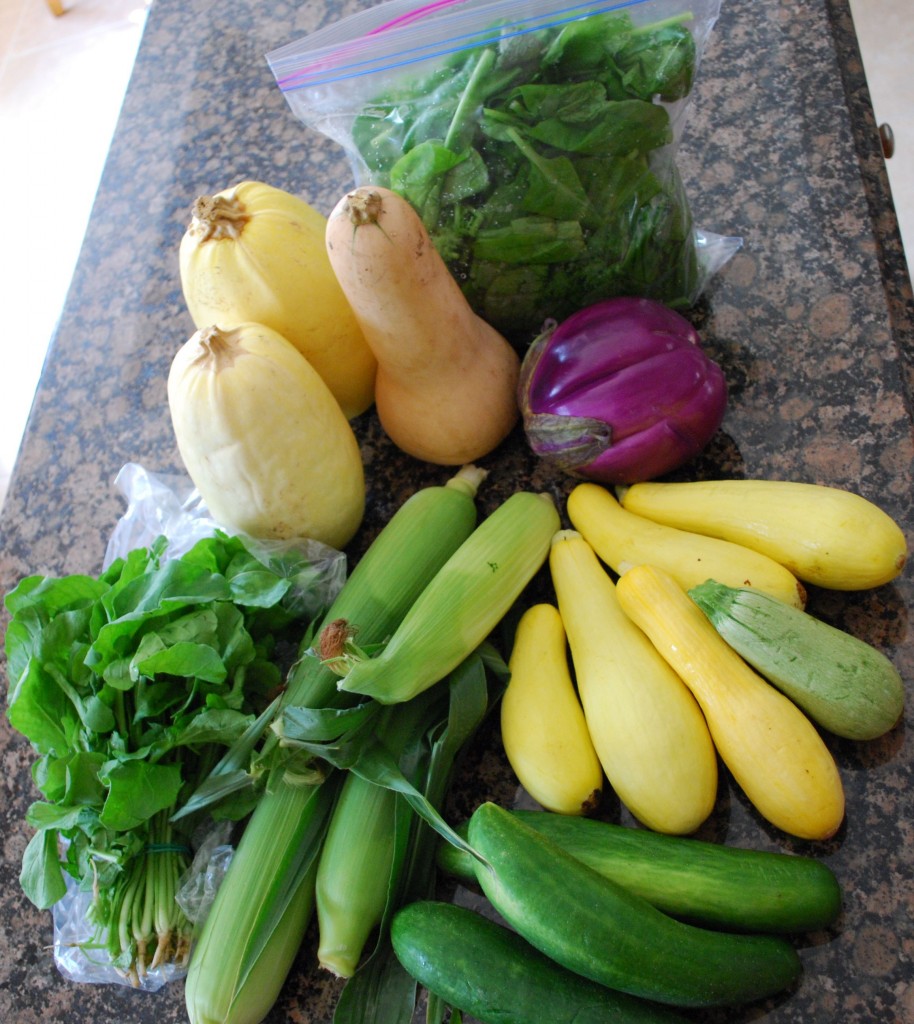
There are many benefits to joining a CSA and it is a small choice that can make a positive impact on the environment, your local community, your health and your bank account. If you would like to find out more about CSA’s and whether there are any available in your area, please visit www.LocalHarvest.org. Below I have also shared some pictures and information regarding our first box from our local CSA, Green Cay Produce (Farming Systems Research, Inc.). Stay tuned for many recipes to come using our wonderful local produce!

veggies

veggies 2

Our first box, which is a full share that will last us two weeks, included summer squash, zucchini, spaghetti squash, butternut squash, corn, cucumbers, eggplant, arugula and mustard greens.