A Taste from Chef Allen Susser

Instead of posting a recipe inspired by a previous Taste of the Nation chef this week, I decided to post about the chef who made the South Florida Taste of the Nation events what they are today…Chef Allen Susser.

Picture courtesy of www.jannorris.com

Recently I had the opportunity to go try out a new Delray Beach restaurant called Taste Gastropub. James Beard Award recipient, Chef Allen Susser, owner of the acclaimed Chef Allen’s Seafood Grill in Aventura, is the consulting chef for the new restaurant, which opened on April 12, 2010.

The new hot spot has somewhat of a retro feel, with the food having an emphasis on products sourced from small farmers and local fishermen. The menu ranges from bar snacks to hearty entrees. All of the plates are on the smaller side, somewhat similar to a tapas. There is even an adorable mini candy bar they will bring right to your table, with gummies and m&m’s, just to name a few. There is indoor seating, as well as outdoor seating on the front patio or in the fabulous outdoor courtyard area.

Our experience was quite nice. We sat in the outdoor courtyard and had a waiter full of personality. We sipped on some of their signature cocktails and enjoyed a number of their small dishes. Our table started out with some of the smaller snack size choices, which included Hot Potato Chips with Onion, Garlic and Chive Dip, as well as their Triple Cooked French Fries. I personally loved the potato chips and dip.

We then moved on to somewhat larger dishes which included, Laughing Bird Shrimp Ceviche with grapefruit, gin and corn nuts; Niman Ranch Skirt Steak with Roquefort Butter and Garlic Herb Frites; Peeky Toe Crabcake “Po’ Boy”; and the Korean Style Spare Ribs. I personally tasted the Ceviche, which was fabulous. The shrimp were so tender, and the grapefruit was an excellent addition. I also sampled the Crabcakes and the Skirt Steak, which were nice choices as well.

They have a fun filled selection of desserts to finish off your meal, including homemade Almond Joy bars and Kit-Kats. I had the Pecan Pie with Praline Pecan Ice Cream; I have to admit that it was my favorite part of the meal. My husband and one of our friends both had the Key Lime Pie, which is quite tasty as well. We also had the opportunity to sample the mini candy bar, complete with baby scoops to help yourself to the selection of nostalgic treats.

It was a great night out and a very enjoyable experience. If you are in the area you should definitely give Taste Gastropub a try.

Don’t forget, if you are going to be in South Florida on May 13th you should get your tickets to Taste of the Nation Fort Lauderdale. Just visit www.strengthsouthflorida.org to purchase your tickets. As one of my readers you can enjoy 10% off the ticket rate by entering discount code*: WEBFTL.

*Discount code only good for the Fort Lauderdale  event.

Death by Brownie…and a special cause.

I would like to start off by saying that I have been given the amazing opportunity to team up with Share Our Strength South Florida! I am extremely excited to work with such an amazing organization and have the opportunity to join my passion with a very important cause. Not only that, but my readers can look forward to some fun features and opportunities in the coming weeks.

If you haven’t seen the PSAs usually shown on the Food Network, and you aren’t familiar with Share Our Strength, let me fill you in a bit. Share Our Strength® is the leading national organization working to end childhood hunger in America. They weave together a net of community groups, activists and food programs to catch every at-risk child and make sure no kid in America grows up hungry.

One of the many events that Share Our Strength hosts in order to raise funds for the nationwide program is Taste of the Nation. Share Our Strength’s Taste of the Nation® is the nation’s premier culinary benefit dedicated to making sure no kid in America grows up hungry. Each spring, the nation’s hottest chefs and mixologists donate their time, talent and passion at more than 40 Taste of the Nation events across the United States and Canada, with one goal in mind: to raise the critical funds needed to end childhood hunger.

I am lucky enough to have one of the events hosted in my local area, Fort Lauderdale, on May 13th. I am excited to have the opportunity to attend the event and can’t wait to share the experience with all of you.

If you live in South Florida (or want to pay a visit) and would rather experience this amazing event on your own, you can visit www.strengthsouthflorida.org to purchase tickets. Not only that, but I am offering my readers 10% off the ticket rate. Just enter discount code*: WEBFTL.

Okay, so what does all of this have to do with the blog you ask?? Well, in honor of the Fort Lauderdale Taste of the Nation, I am going to be doing a series of posts dedicated to the food served at past Taste of the Nation events, and the chefs who created it. So look for my weekly Taste of the Nation posts to see what dishes of the past have inspired me to make a version of my own.

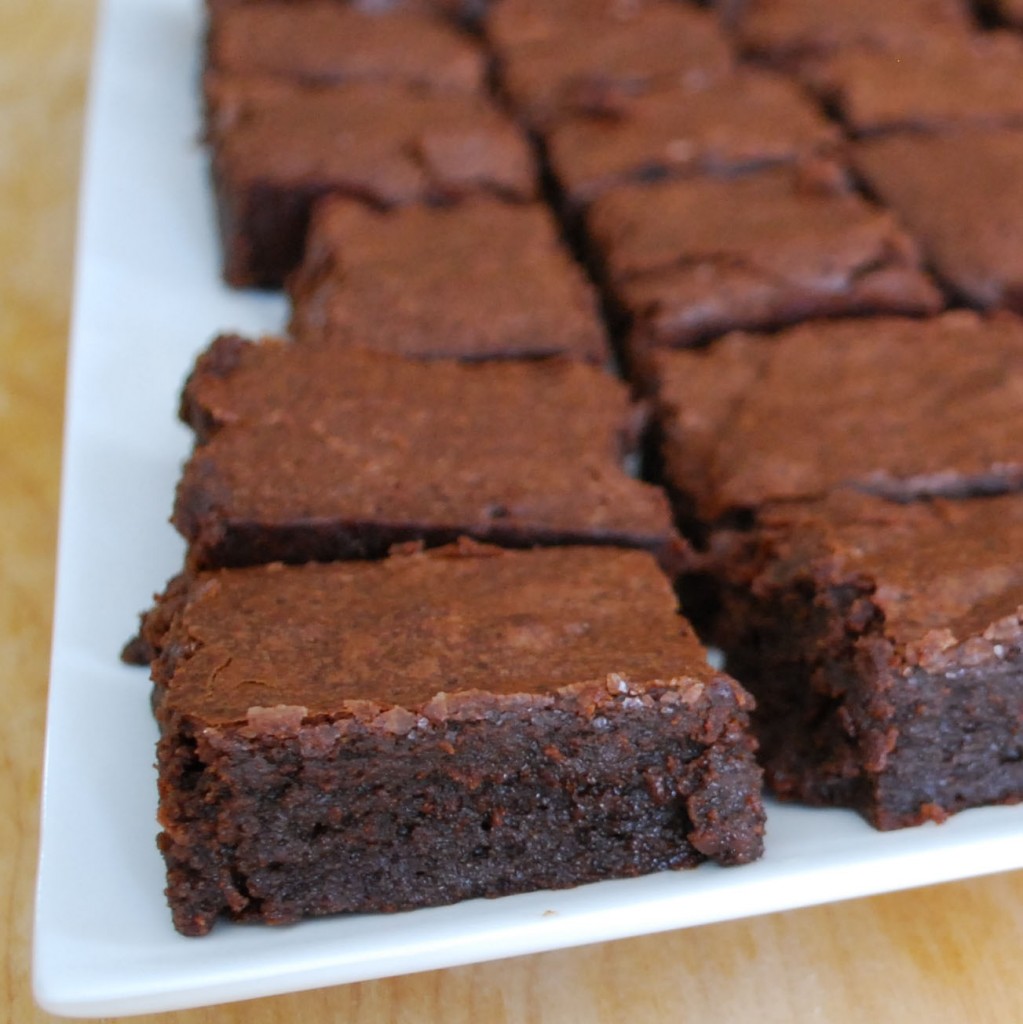
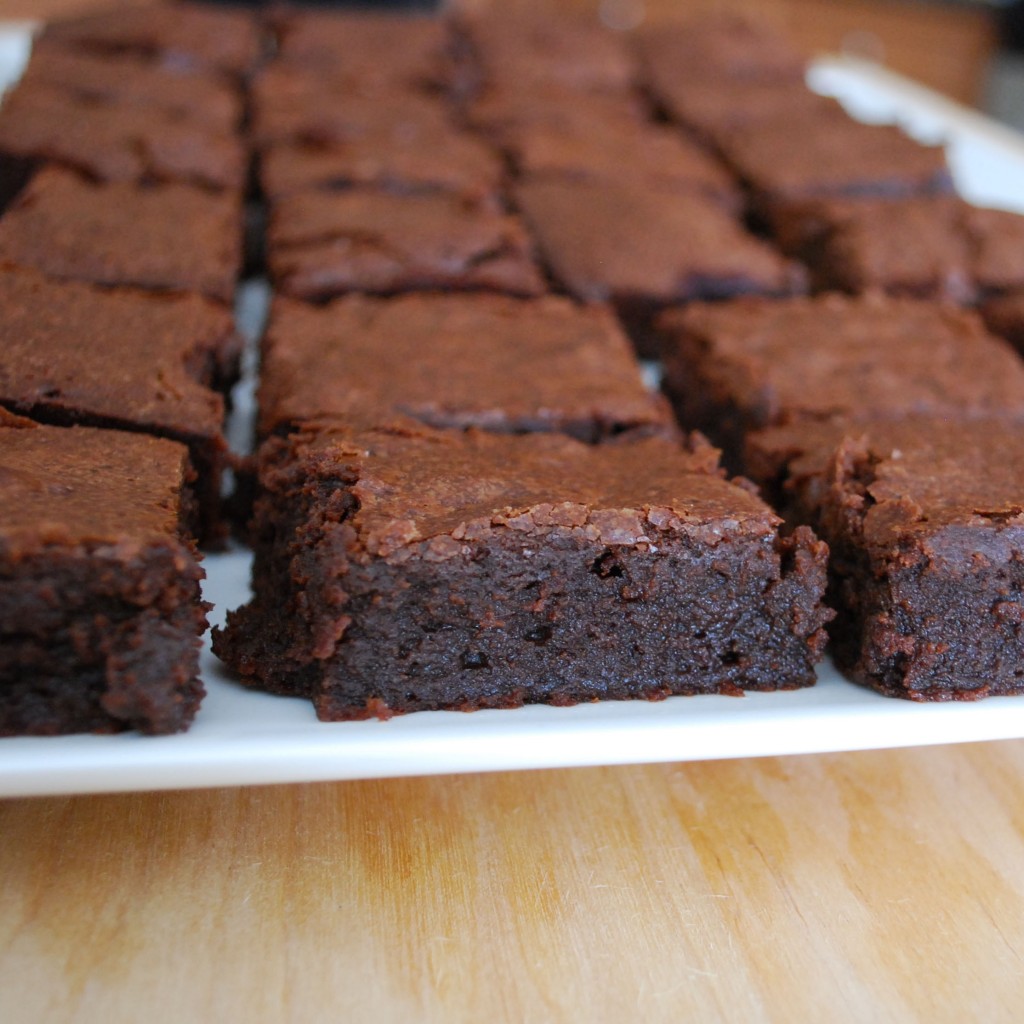
To kick this series off, I was inspired by Chef Christine Najac, from Really Good Cookies in Boca Raton, FL.  What did she make??  Chocolate Fudge Brownies!  It’s a classic comfort food that most people can’t resist, especially kids.  We are doing this for the kids, right?

Since I don’t have Chef Christine’s personal recipe, I had to venture out to find a recipe of my own.  Thanks to the blog, The Piggly Wiggly, I didn’t have to venture too far.  She introduced me to a  brownie recipe that has been awarded best brownie honors from America’s Test Kitchen, The Today Show, and Oprah’s O Magazine.  I mean come on…Oprah wouldn’t lie!!  I must say that this was one incredible brownie.  If you have a chocolate craving, this will DEFINITELY fulfill it.  Richness….that would be the perfect word to describe it.

Okay, enough talking already!  You go check out Share Our Strength South Florida and Taste of the Nation, and I will get on with giving you this incredible recipe!

On second thought, jot down the recipe first and then go check out the sites while you wait for the brownies to bake in the oven.

*Discount code only good for the Fort Lauderdale  event.

Fudgy Brownies

courtesy of Baked: New Frontiers In Baking (Matt Lewis and Renato Poliafito), via The Piggly Wiggly

1-1/4 cups flour
1 teaspoon salt
2 Tablespoon dark cocoa powder
11-oz quality dark chocolate (60-72%), chopped coarsely (I used Ghirardelli 60% Cacao Bittersweet Chocolate Chips)
2 sticks unsalted butter, cut into 1 inch cubes
1 teaspoon instant espresso powder (I used instant coffee powder)
1-1/2 cups granulated sugar
½ cup light brown sugar
5 large eggs, room temperature
2 tsp vanilla extract

Preheat oven to 350 degrees. Butter the sides and bottom of a glass or light colored metal pan 9x13x2 pan. I prefer to line my pan with parchment paper for easy release.

In a medium bowl, whisk together the flour, the salt, and cocoa powder.

Configure a large sized double boiler. Place the chocolate, the butter, and the instant espresso powder in the bowl of the double boiler and stir occasionally until the chocolate and butter are completely melted and combined.

Turn off the heat, but keep the bowl over the water of the double boiler and add both the granulated and brown sugars. Whisk the sugars until completely combined and remove the bowl from the pan. Mixture should be room temperature.

Add 3 eggs to the chocolate/butter mixture and whisk until just combined. Be sure NOT to over-mix! Add the remaining 2 eggs and whisk until just combined, but don’t over mix.

Add the vanilla and stir until combined. Do not over beat the batter at this stage or your brownies will be cakey.

Sprinkle the flour/cocoa/salt mix over the chocolate. Using a spatula (DO NOT USE A WHISK), fold the dry into the wet until there is just a trace amount of the flour/cocoa mix visible.

Pour the mixture into the pan and smooth the top with your spatula.

Bake the brownies for 30 minutes (rotate the pan half-way through baking) and check to make sure the brownies are completely done by sticking a toothpick into the center of the pan. The brownies are done when the toothpick comes out with a few moist crumbs.

Cool the brownies completely before cutting and serving.

A Spring Twist on Cupcakes

I hope everyone had a very happy Easter, or at least a fabulous weekend. In the spirit of Easter and Spring I wanted to do something fun and festive, especially for the little ones that I knew would be present during the family gathering today. When I saw these little bird’s nest cupcakes I thought they would be the perfect sweet treat. After all, my only instructions were to bring dessert and to make sure there was chocolate involved! So that I did. I decided to rely on my favorite cupcake combination….yellow cake with chocolate frosting. Oh how I love thee!

In the end I not only had a tasty dessert (that included chocolate), but also an eye catching one. These were a crowd pleaser and really weren’t that difficult to make. The worst part was keeping the chocolate “nest” pieces from melting during the decorating process. Then again, who’s going to complain about a little melted chocolate on their fingers??

Bird’s Nest Cupcakes

idea courtesy of Bakers Royale

1. Prepare your preferred cupcake and frosting (see recipes below).
2. Use any egg shaped candy for the “eggs.” I used Hershey’s chocolate eggs.
3. For the nest look, melt some chocolate and spread it to a 1/8 of an inch on parchment. Cool in fridge for 5 minutes. Once removed, starting at one end of the parchment roll it to the other end. Your chocolate will crack in shreds. For 12 cupcakes I used around a half of a bag of mini chocolate chips for melting.
4. Work quickly as the chocolate tends to melt from the warmth of your hands. If it does, return the chocolate to the fridge for a few minutes.

Yellow Cupcakes
courtesy of Joy of Baking

1/2 cup unsalted butter, room temperature
2/3 cup granulated white sugar
3 large eggs
1 teaspoon pure vanilla extract
1 1/2 cups all purpose flour
1 1/2 teaspoons baking powder
1/4 teaspoon salt
1/4 cup milk

Preheat oven to 350 degrees F (177 degrees C) and line 12 muffin cups with paper liners.

In the bowl of your electric mixer, or with a hand mixer, beat the butter and sugar until light and fluffy. Add the eggs, one at a time, beating well after each addition. Beat in the vanilla extract.

In a separate bowl whisk together the flour, baking powder, and salt.

With the mixer on low speed, alternately add the flour mixture and milk, in three additions, beginning and ending with the flour. Scrape down the sides of the bowl as needed.

Evenly fill the muffin cups with the batter and bake for about 18-20 minutes or until nicely browned and a toothpick inserted into a cupcake comes out clean. Remove from oven and place on a wire rack to cool. Once the cupcakes have completely cooled, frost with icing.

Chocolate Buttercream Frosting
adapted from Evan’s Kitchen Ramblings

2 sticks unsalted butter, room temperature
2 cups powdered sugar, sifted
1/2 cup cocoa powder, sifted
1 tablespoon milk

Whisk the butter in a mixing bowl for about 6-8 minutes, until pale and creamy.

Add the powdered sugar, cocoa powder and milk and whisk for another 6 minutes, until fluffy and creamy. Pipe or spread onto cooled cupcakes.

An Update and a Romantic Treat

My blog, how I have missed it so! I feel like I haven’t cooked in forever, and I know I haven’t updated this poor blog in forever. I feel like my kitchen is almost a stranger to me at this point. We’ve even bought a few pieces of the cherished Le Creuset since I updated last, but the sad part is I haven’t even used it yet! Don’t worry, it has been broken in a few times, but unfortunately for me, it’s been by my husband.  I will get there though, eventually.

My absence is for good reason though; I got a job! Not only did I get a job, but I got a fabulous job that I am loving so much. The only downside is that my free time has been non-existent, which means my hobbies have been put on the back burner. The good news is that I have every intention of figuring out how to manage my time to where I can put my all into this fabulous new job and still have time to do the things I love, like cook and blog. So please hang in there with me because I promise there will be more fabulous stuff to come.

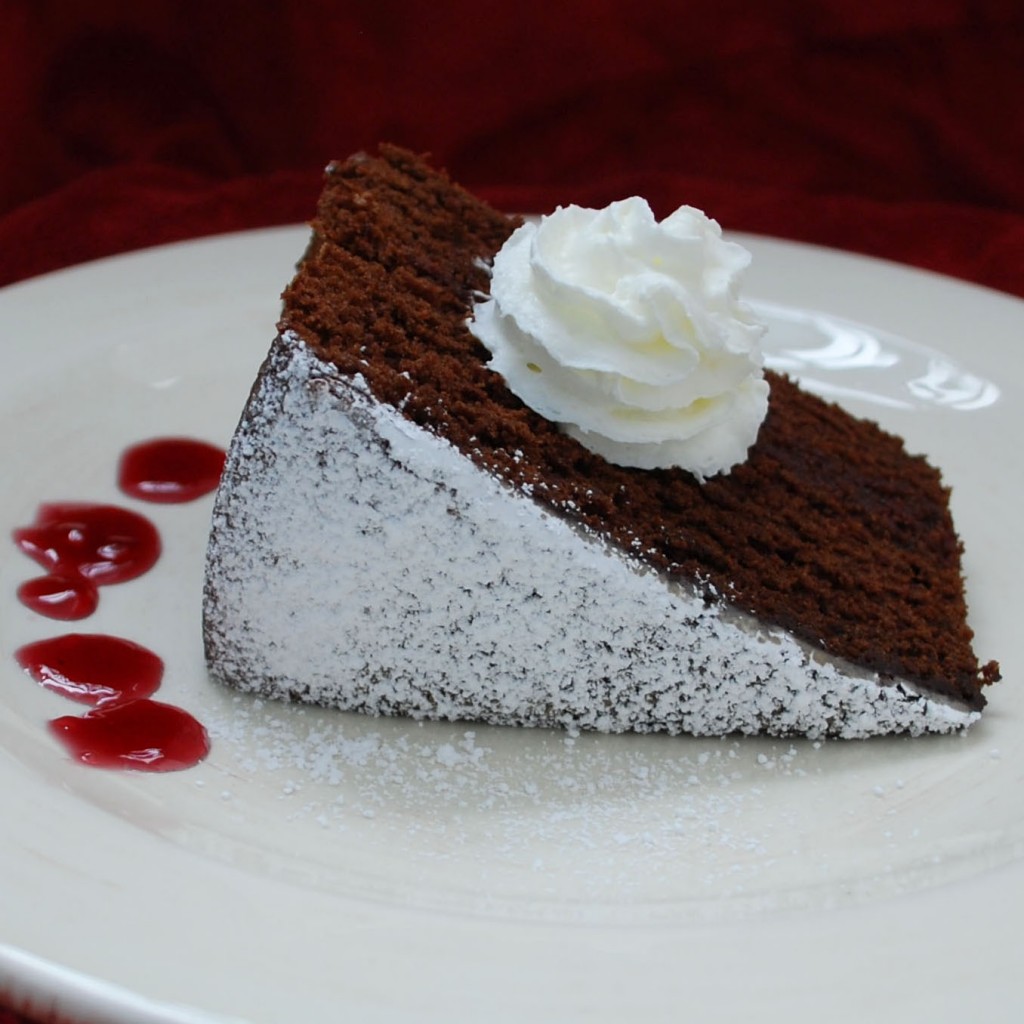
With that all said, it is now time to share with you a recipe that I have been holding on to now since December!  I think this is the perfect time to pass it along though because it would be a great choice for that little romantic holiday we have coming around the corner. It is something that I saw in a Food & Wine magazine and it intrigued me from the first moment I spotted it.  Red wine, chocolate and whipped cream; need I say more?? I think that has romance written all over it! Did I mention that those ingredients resulted in a cake? Yes, a divinely decadent cake. The best part about it is that it is very simple to make, but will wow a crowd (or just that someone special – whichever you choose).

cake 2-crop big

Chocolate Red Wine Cake

Courtesy of Epicurious and Food & Wine

2 cups (250 g/1/2 lb) flour
3/4 cup (100 g/3 1/4 oz) cocoa
1 1/4 teaspoons baking soda
1/2 teaspoon salt
3/4 cup (175 g/6 oz) butter
1 3/4 cup (350 g/15 oz) sugar
2 eggs
1 teaspoon vanilla
1 1/4 cups (300 ml/1/2 pt) well-rounded red wine
confectioners’ sugar (for dusting)

Wine Jelly
1/2 cup (125 g/4 oz) Concord grape jelly
2 to 3 tablespoons red wine

Heat the oven to 350°F (175°C/Gas 4). Butter the 9 inch cake pans, line each pan with a round of parchment paper, and brush again with butter. Sprinkle the pans with flour, discarding the excess.

Sift flour with the cocoa, baking soda, and salt into a bowl; set aside. Cream the butter in an electric mixer, beat in the sugar, and continue beating until the mixture is light and fluffy, 3 to 5 minutes. Add the eggs, one by one, and then the vanilla, and continue beating 1 to 2 minutes. Sift a third of the flour over the butter mixture and fold them together, using a spoon. Fold in a third of the wine. Add the remaining flour and wine alternately in two batches.

Spread batter in the prepared pans and bake in the oven until the cakes start to shrink from the sides of the pan, 30 to 35 minutes; a metal skewer inserted in the center should come out clean. Let the cakes cool 10 minutes in the pans, then turn them out on a rack to cool completely.

Meanwhile make the wine jelly: Melt the jelly with the wine over low heat, stirring gently until combined. Let it cool.

Shortly before serving, sandwich the cake with the cooled jelly. Sprinkle the top with confectioners’ sugar and transfer the cake to a plate to serve. Top with whipped cream and and a little drizzle of wine jelly if you desire!

A Holiday Worthy Appetizer

According to the looks of my Google Reader, it is definitely the holiday season, and there is no doubt that everyone has sweet treats on their mind. I have seen so many incredible recipes for cookies, cakes, bars and candy. I am pretty sure I have enough recipes saved to last me for a few holiday seasons to come, and I would like to thank you fabulous cooks/bakers out there for sharing them.

With that said, we can’t possibly live off of sweet treats alone for the next month. Although many of you may beg to differ, I think even my large sweet tooth will need a break here and there.

With the holidays comes entertaining, and with entertaining usually comes a need for appetizers. I know when I entertain I like to make as much as possible from scratch.  There is just something about people enjoying something that you created. Although, I have learned from experience that if you want to enjoy yourself, you have to pick and choose your battles. For some reason though, it always seems like the great sounding appetizers are also time consuming, and are best prepared right before serving. Obviously the last thing you want to be doing when your guests arrive is slaving in the kitchen with those appetizers. Well my friends, I have found an appetizer that is not only a cinch to make, but will make your taste buds forget all about those sweet treats we have come to love this time of year.

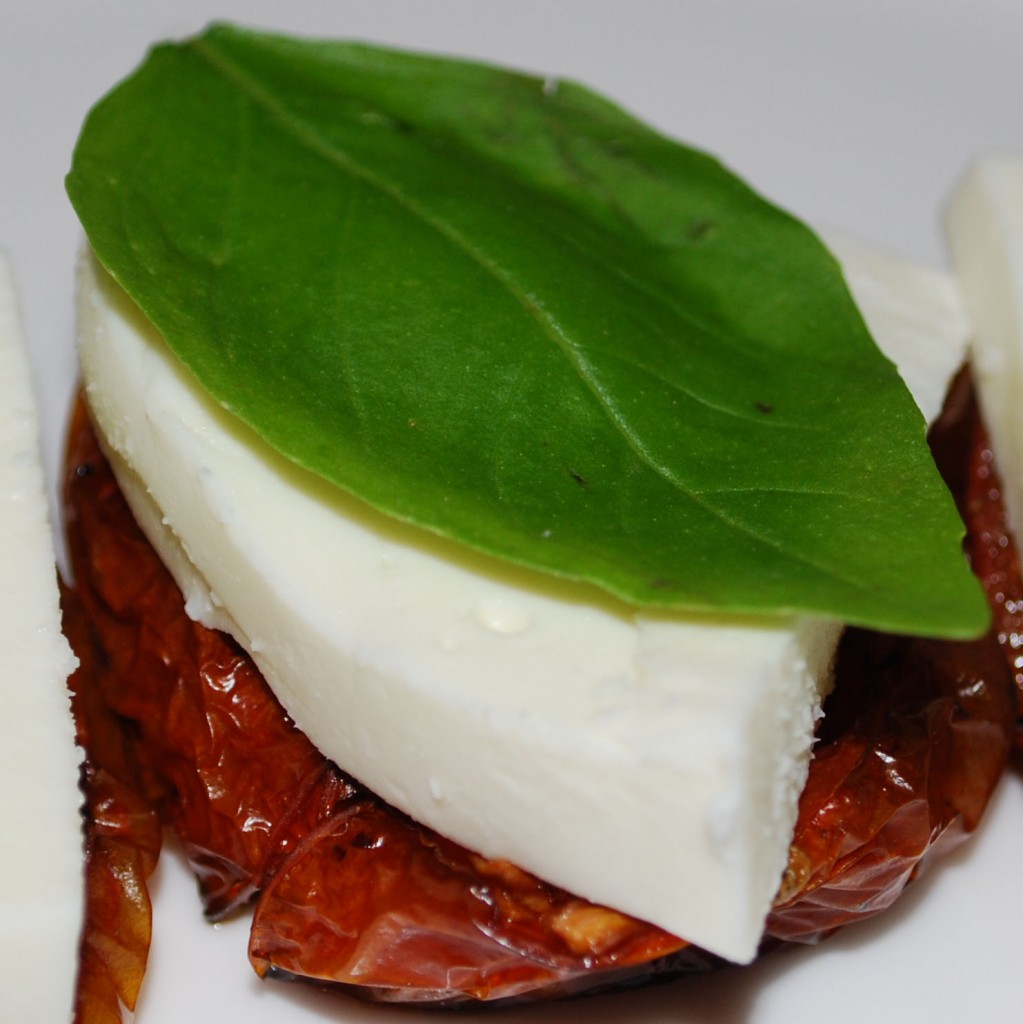
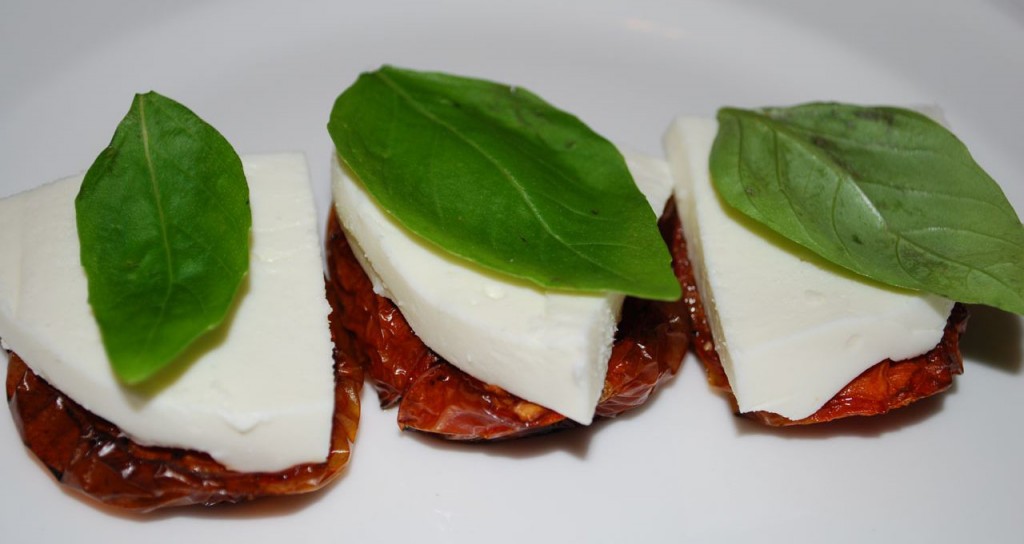
The fabulous Ina Garten has come through once again. When I saw her make a roasted tomato caprese salad, there was no doubt in my mind that I would have to try it. Oh, and try it I did! Twice actually! I made it for my husband as part of his birthday dinner, and we fell in love with it. After raving about it to my dad, he insisted that I make it for him as well. So, when my dad’s birthday rolled around last week, I was sure to put it on the menu for his birthday dinner as well. He loved it, my stepmom loved it, and my husband and I loved it all over again.

It is a must try recipe! It is simple, doesn’t call for a lot of ingredients, and (although it takes a while to cook) it doesn’t take much prep time at all. What more can you ask for? I promise, it will be a hit!

tomatoes 3-1

tomatoes big

Roasted Tomato Caprese Salad

courtesy of Food Network and Barefoot Contessa

12 plum tomatoes, halved lengthwise, seeds (not cores) removed
1/4 cup good olive oil, plus more for drizzling
1 1/2 tablespoons balsamic vinegar
2 large garlic cloves, minced
2 teaspoons sugar
Kosher salt and freshly ground black pepper
16 ounces fresh salted mozzarella
12 fresh basil leaves, julienned (or left whole)

Preheat the oven to 275 degrees F.

Arrange the tomatoes on a sheet pan, cut sides up, in a single layer. Drizzle with 1/4 cup of olive oil and the balsamic vinegar. Sprinkle with the garlic, sugar, 1 1/2 teaspoons salt, and 1/2 teaspoon pepper. Roast for 2 hours until the tomatoes are concentrated and begin to caramelize. Allow the tomatoes to cool to room temperature.

Cut the mozzarella into slices slightly less than 1/2-inch thick. If the slices of mozzarella are larger than the tomatoes, cut the mozzarella slices in half. Layer the tomatoes alternately with the mozzarella on a platter and scatter the basil on top. Sprinkle lightly with salt and pepper and drizzle lightly with olive oil. Serve at room temperature.

Note:  I left the basil whole the first time I made it, but the second time we julienned it.  Personally, I preferred it julienned and found it easier to eat that way.

Yields: approximately 6 servings

Back with a sweet treat!

I want to begin by saying thank you to anyone who contacted me, wondering where I was. I really appreciate your concern. I am back now and I apologize for my absence over the past month. I took a little break so I could put some extra concentration into my ongoing job hunt. I needed some time to work on writing samples, track down previous work samples and revamp some things. I am thrilled there has been some interest shown, so now I will just hope that good things are coming my way. My wish is to start the new year out with a new job, so please send the job dust my way!

Okay, on to the task at hand. It’s time to get back in the kitchen and do what I love. You are all obviously not here to listen to my job woes, you are here for that stuff that satisfies our taste-buds and fills our bellies with goodness. Well my friends, I have a good one for you today. I have to give you something great to make up for my absence, right? I don’t think this will disappoint.

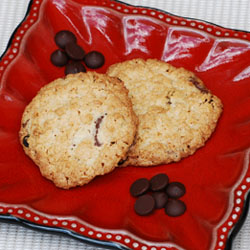
Hands down, chocolate chip cookies have always been my favorite of the cookie family; that is until my husband influenced me. He loves oatmeal cookies. Not just oatmeal cookies, but oatmeal raisin chocolate chip cookies! Now, I am usually trying to find healthier versions of recipes, but when my husband’s birthday rolled around I knew I had to give him the good stuff. He isn’t really a fan of cake, but I knew a great cookie would win his heart over. So, of course I turned to my trusty Cook’s Illustrated book; which never disappoints. That is where I found, in my opinion, the best oatmeal cookie recipe. A plump, soft center with slightly crispy edges, and full of raisin and chocolate chip goodness. Not only did they win his heart over, but they won mine too. I think this cookie has taken the position as my new favorite cookie.

Enjoy the treat, and I will be back soon with an amazing appetizer recipe; just in time for the holidays!

cookie 1-cropped

cookie 2

Chewy Oatmeal Raisin Chocolate Chip Cookies

adapted from Cook’s Illustrated, The New Best Recipe

1 1/2 cups (7 1/2 ounces) unbleached all-purpose flour
1/2 teaspoon baking powder
1/2 teaspoon salt
16 tablespoons (2 sticks) unsalted butter, softened but still cool
1 cup packed (7 ounces) light brown sugar
1 cup (7 ounces) granulated sugar
2 large eggs
3 cups old fashioned rolled oats
3/4 cup raisins
3/4 cup semi-sweet chocolate chips

Adjust the oven racks to the low and middle positions and heat the oven to 350 degrees. Line 2 large baking sheets with parchment paper or spray them with nonstick cooking spray.

Whisk flour, baking powder, and salt together in a medium bowl.

Either by hand or with an electric mixer, beat the butter on medium speed until creamy. Add the sugars; beat until fluffy, about 3 minutes. Beat in the eggs, one at a time.

Stir the dry ingredients into the butter-sugar mixture with a wooden spoon or large rubber spatula. Stir in the oats, raisins and chocolate chips.

Working with a generous 2 tablespoons of dough each time, roll the dough into 2-inch balls. Place the balls on the prepared baking sheets, spacing them at least 2 inches apart.

Bake until the cookie edges turn golden brown, 22 to 25 minutes, rotating the baking sheets front to back and top to bottom halfway through the baking time. Let the cookies cool on the baking sheets for 2 minutes. Transfer the cookies with a wide metal spatula to a wire rack. Let cool at least 30 minutes.

Yields: approximately 2 dozen cookies.

*In the case that you don’t want to overindulge too much, these cookies freeze well too!

An Apple a Day…

Back in June, I decided to take a Wilton course at my local Michael’s in hopes of learning some nice decorating techniques for cakes. After taking Course 1, I quickly learned that you can’t do much great decorating without using butter cream icing; which works best for decorating purposes when it is made with vegetable shortening (GAG!).  I decided that I wasn’t a big fan. I would much rather decorate a cake with things that actually taste good. I still use some of the techniques that I learned, but I try to avoid using the dreaded butter cream as much as possible. I tend to try and decorate with fruit, chocolate shavings, etc. I also sometimes choose to ice cakes in my preferred icing and then make a small batch of butter cream for the decorating.

Anyway, since I love to bake and most people (mainly family) know I took that course, I am the first they come to when it is birthday cake time. So, when the Jewish holidays rolled around, my mother-in-law asked if I would mind making a birthday cake for her father instead of making a dessert for one of the holiday dinners. Of course I agreed. So now I needed to find a tasty cake that I thought everyone would love, but would also look like a birthday cake and allow for writing (without having to use the butter cream). It was also getting into the fall season, so I figured I would take that into mind as well.

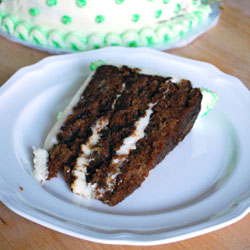
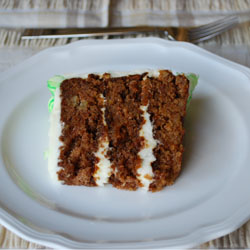
After doing a bit of searching I finally found a three layer apple cake by Martha Stewart. It would look like a birthday cake, have fall flavors that I was sure most people would enjoy and I would top it with my favorite cream cheese icing that could still be used for some decorating purposes. I think I hit all of my goals! Most importantly avoiding the BC!

The cake was moist and delicious; and everyone raved over how great it tasted. The only downfall I found was that it was a little hard to work with. The outside of the cake is quite sticky and the centers seemed to fall a bit, which makes it a bit difficult to stack without it all sticking to your hands and it requires a bit more frosting in the middle of each layer to compensate for the fallen centers. Overall though, I would make it again because it tasted great and had that homey, rustic feel to it. I think the cream cheese icing paired very nicely with it as well.

CAKE2-CROPPED

cake 2nd 1-cropped

Three-Layer Apple Cake

Courtesy of MarthaStewart.com

Cake
1/2 cup (1 stick) unsalted butter, melted, plus more for pans
2 cups all-purpose flour (spooned and leveled), plus more for pans
2 teaspoons baking soda
1/2 teaspoon baking powder
2 teaspoons ground cinnamon
1/2 teaspoon ground ginger
3/4 teaspoon salt
2 cups packed light-brown sugar
2 large eggs
4 Granny Smith apples, peeled, two coarsely grated and two diced

Icing
Vanilla Cream Cheese icing (from the Banana Bars recipe)

Preheat oven to 350 degrees. Butter three 8-inch-round cake pans (I used 9-inch b/c that is what I had); line bottoms with parchment paper. Butter, then flour paper and sides (tapping out excess); set aside.

In a medium bowl, whisk together flour, baking soda, baking powder, cinnamon, ginger, and salt; set aside. In a large bowl, whisk together butter, sugar, and eggs until well combined; fold in grated and diced apples. Add flour mixture; mix just until combined. Divide batter among prepared pans; smooth tops.

Bake until a toothpick inserted in center of cake comes out clean, 35 to 40 minutes. Cool cakes in pans 20 minutes, then invert onto wire racks; peel off parchment. Invert cakes again, and let cool completely on racks.

Assemble cake to your liking with Vanilla Cream Cheese Icing.  Refrigerate at least 1 hour (or up to 4 days). To serve, bring cake to room temperature; slice with a serrated knife.

Yields: 12 servings

Perfect Pesto & More

As you may have noticed, I was absent for about two weeks, up until two days ago. My husband and I were actually in Long Island and NYC for a wedding and vacation for a few days and then I had family visiting for a week. So it has been a bit hectic and I apologize for my lack of posting. I promise that I will be sharing some highlights from our NYC trip very soon though. Needless to say, we had some amazing food during our visit.

While wandering around the city we decided to check out the market and shops in Grand Central Terminal. We were very excited to find a Penzey’s, since we don’t have one in South Florida and have always ordered online. We were also intrigued by this little oil and vinegar shop we came across, Oliviers & Co or O & Co. I let my husband take a peak while I ran to a different store to pick something up for my mom. When I returned he seemed quite excited about what he had found in the shop. The lady pretty much let him taste every oil and vinegar in the shop, even the bottles that were priced well over $100. They also had a great selection of imported pastas. So now the question was, what do we buy? So I tasted a few and we finally made some decisions.

Our final choices included:
Gaec Salvator Extra Virgin Olive Oil – France
Basil Extra Virgin Olive Oil
Fig Vinegar – Provence
Purple Basil Vinegar – South Asia
Penne with Wheat Germ
Straccetti with Wheat Germ

We were so excited to return from our trip and find our products were shipped right behind us and arrived a couple of days later. My husband’s birthday was quickly approaching and he loves pasta, so I knew this would be a great opportunity to try out some of our new goods. I decided to do a pasta tasting for his birthday dinner. One of the dishes would have to be pesto, because I felt that would be a great way to showcase our new Gaec Salvator. I started searching for a great, simple recipe. Of course I turned to Cook’s Illustrated and was happy to find a classic version in my The New Best Recipe book. I figured I couldn’t go wrong with that.

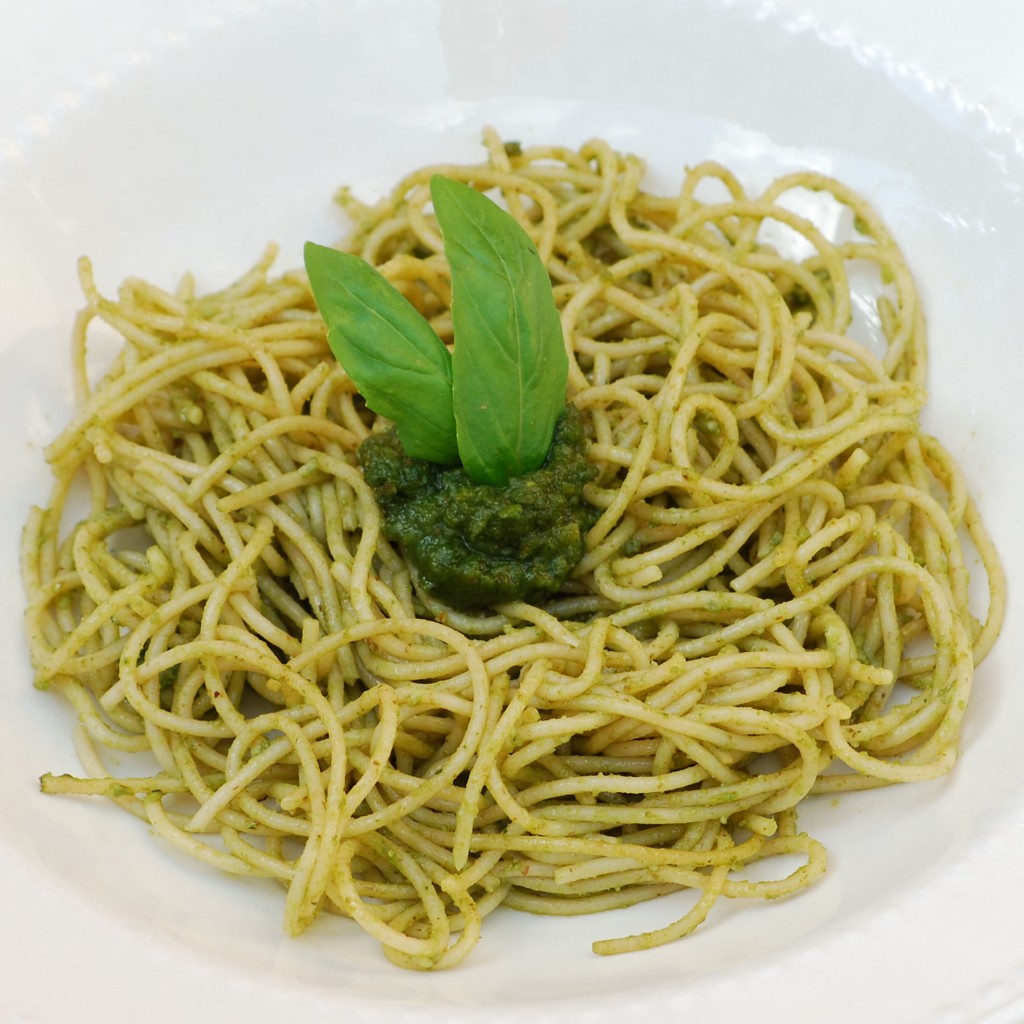
The outcome? A perfectly simple pesto that was made even better with our incredible EVOO.

Stay tuned for more recipes to come using our delicious new additions!

Pesto 2

Classic Pesto

courtesy of Cook’s Illustrated,
The New Best Recipe

1/4 cup almonds (pine nuts or walnuts are fine too)
3 medium garlic cloves, unpeeled
2 cups packed fresh basil leaves
2 tablespoons fresh parsley leaves (optional-I did not use)
7 tablespoons extra virgin olive oil
Salt
1/4 cup freshly grated Parmesan cheese

Toast the nuts in a small, heavy skillet over medium heat, stirring frequently, until just golden and fragrant, 4-5 minutes. Transfer the nuts to a plate.

Add the unpeeled garlic to the empty skillet. Toast, shaking pan occasionally, until fragrant and the color of the cloves deepens slightly, about 7 minutes. Let the garlic cool, then peel and chop.

Combine the basil and parsley (if using) in a heavy-duty zipper-lock plastic bag. Pound the bag with the flat side of a meat pounder or rolling pin until all the leaves are bruised.

Place the nuts, garlic, pounded herb(s), oil, and 1/2 tsp. salt in a food processor. Process until smooth, stopping as necessary to scrape down the sides of the workbowl. Transfer the mixture to a small bowl, stir in the Parmesan cheese, and adjust the salt to taste.

The surface of the pesto can be covered with a sheet of plastic wrap or a thin film of oil and refrigerated for up to 3 days.

Yields: about 3/4 cup

The Best Challah Yet!

I always love to take on challenges, so when I met my Jewish husband I decided that it would be necessary for me to learn to cook some of the traditional holiday foods. I especially made this a goal when we moved away from his family and wanted to make sure that he was still able to enjoy the dishes he grew up on. Of course it is easy to go to the store and buy many of these foods in easy to make boxed, jarred or frozen versions, but anyone who has placed these “foods” in their mouth knows that they can be down right disgusting and sometimes not even seem edible. So again, it would be a necessity to learn how to make some things from scratch.

Challah is actually one of the items you can find in most bakeries and can be down right delicious when bought from the store. Why wouldn’t I take the easy way out though? I would much rather take on the trial and errors of finding the perfect recipe, even if it does take hours to produce one loaf. Call me crazy, but I live for that sort of thing.

Luckily it seems that it has only taken me two recipes to find a version that we love. Last year I took a stab at Cook’s Illustrated version, which was recommended by Melissa from It’s Melissa’s Kitchen. It turned out great and everyone raved over it. For some reason though I was antsy to try out a different version this year and I turned to Smitten Kitchen. I hadn’t tried any of Deb’s recipes yet, but I had always drooled over them in my Google Reader. So, I decided to give her version a try. Boy am I glad that I did! Although I really enjoyed the Cook’s Illustrated version, I think Deb’s is the new favorite. I enjoyed the texture and consistency of hers a bit more. Not to discredit CI because this is obviously a personal preference and CI has never steered me wrong with anything else. I actually have an amazing cookie recipe coming soon that is one of theirs; so stay tuned for that.

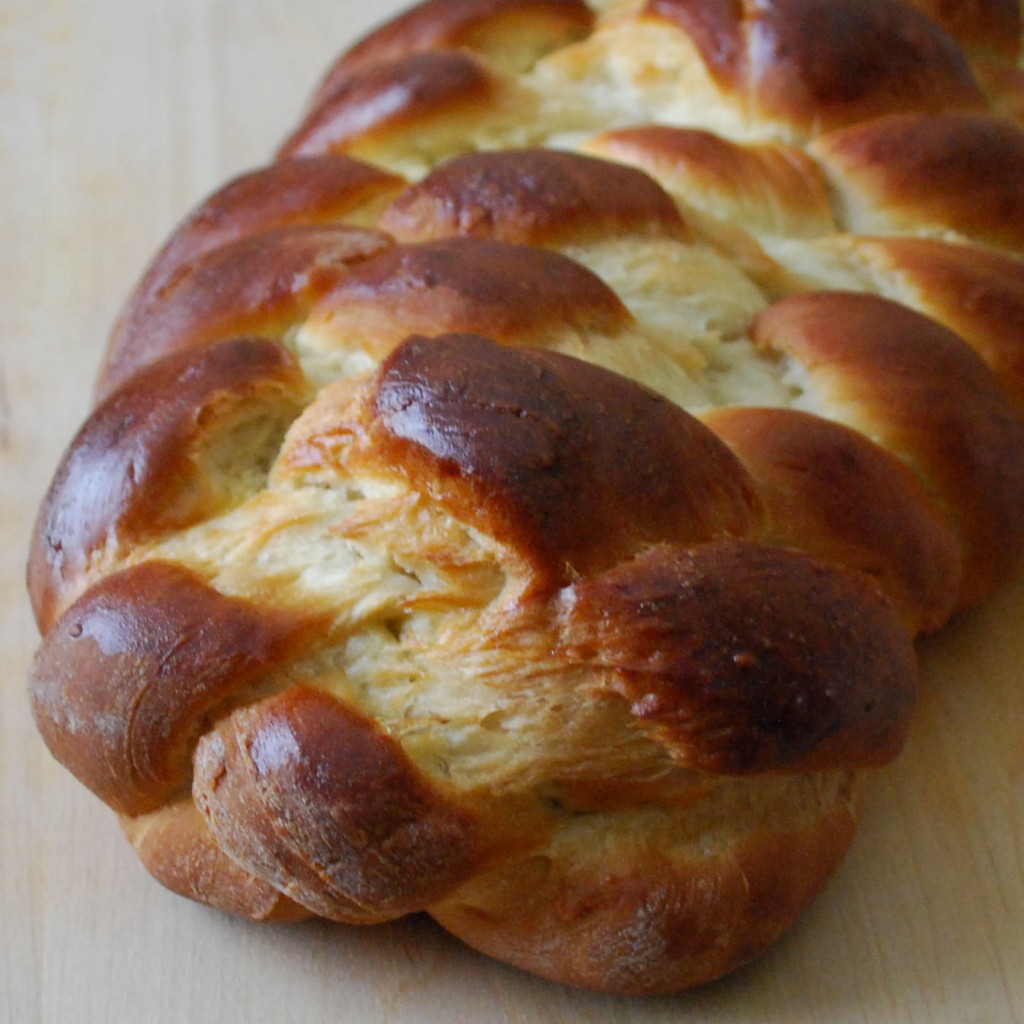
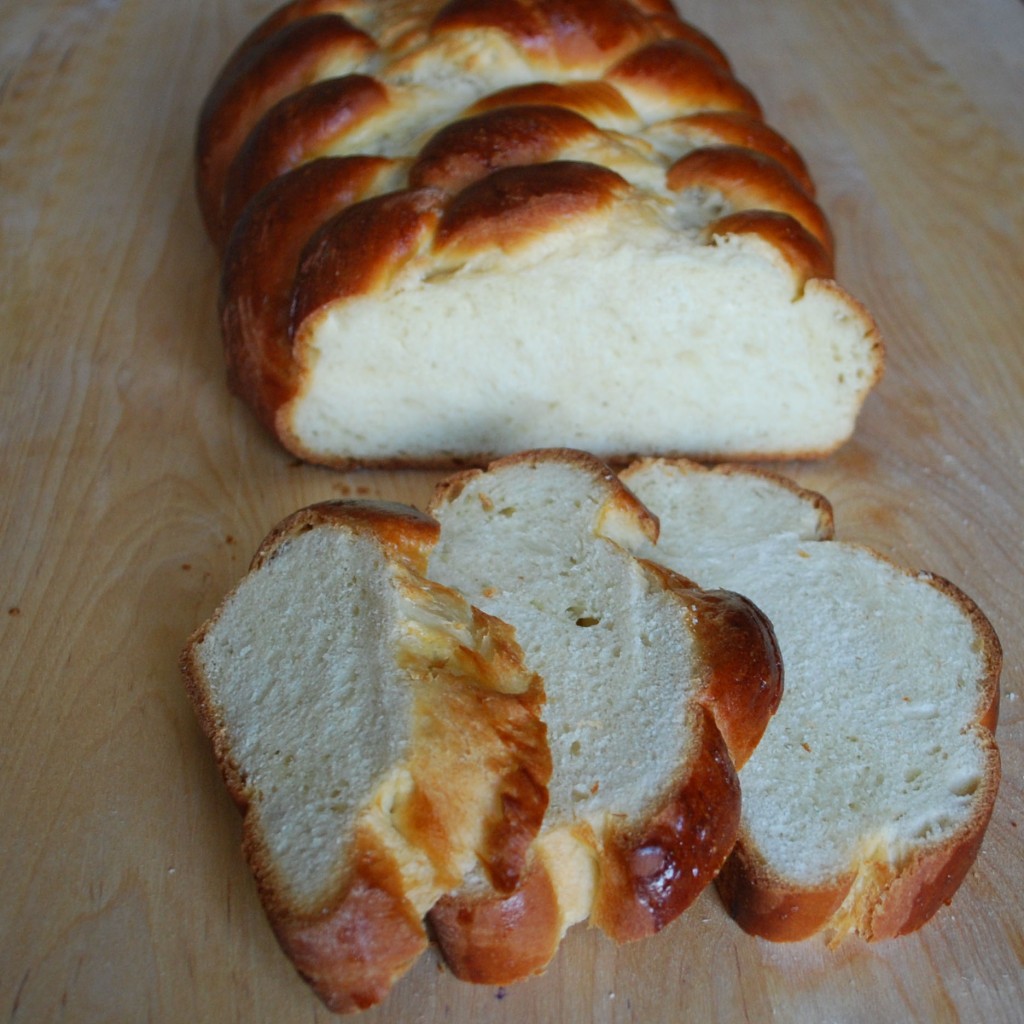
Okay, so back to the challah. I loved everything about this challah, the flavor, the texture and the look. When I brought it to my husband’s family, they all raved over it and said it was better than Publix, so I took that as a good sign as well. The only problem I ran into with this version was the instructions for braiding it. My husband was nice enough to run upstairs mid braiding to find me a helpful video to follow. It made the braiding process incredibly easy and I recommend taking a look at it before you get started.

Oh, and can I mention that there is nothing much better than the smell of fresh baked challah slithering through your home.

challah whole

challah 2nd 3

Best Challah

courtesy of Smitten Kitchen

1 1/2 packages active dry yeast (1 1/2 tablespoons)
1 tablespoon plus 1/2 cup sugar
1/2 cup olive or vegetable oil, plus more for greasing the bowl
5 large eggs
1 tablespoon salt
8 to 8 1/2 cups all-purpose flour
1/2 cup raisins per challah, plumped in hot water and drained (optional)
Poppy or sesame seeds for sprinkling (optional)

In a large bowl, dissolve yeast and 1 tablespoon sugar in 1 3/4 cups lukewarm water.

Whisk oil into yeast, then beat in 4 eggs, one at a time, with remaining sugar and salt. Gradually add flour. When dough holds together, it is ready for kneading. (You can also use a mixer with a dough hook for both mixing and kneading, but be careful if using a standard size KitchenAid–it’s a bit much for it, though it can be done.)

Turn dough onto a floured surface and knead until smooth. Clean out bowl and grease it, then return dough to bowl. Cover with plastic wrap, and let rise in a warm place for 1 hour, until almost doubled in size. Dough may also rise in an oven that has been warmed to 150 degrees then turned off. Punch down dough, cover and let rise again in a warm place for another half-hour.

At this point, you can knead the raisins into the challah, if you’re using them, before forming the loaves. To make a 6-braid challah follow the instructions on this video for the braiding process (I personally did not have success following the written instructions from Smitten Kitchen).

Beat remaining egg and brush it on loaves. Either freeze breads or let rise another hour.

If baking immediately, preheat oven to 375 degrees and brush loaves again. Sprinkle bread with seeds, if using. If freezing, remove from freezer 5 hours before baking.

Bake in middle of oven for 30 to 40 minutes, or until golden. (If you have an instant read thermometer, you can take it out when it hits an internal temperature of 190 degrees.) Cool loaves on a rack.

Note from Deb: Any of the three risings can be done in the fridge for a few hours, for more deeply-developed flavor. When you’re ready to work with it again, bring it back to room temperature before moving onto the next step.

Time: about 1 hour, plus 2 1/2 hours’ rising
Yield: 2 loaves

Finding Balance and a CSA

We reside in a society that generally struggles with the balancing act of busy careers, home lives, making good food choices, and making good choices for the environment, all while trying to make everyone happy. Yes, you do have the group of people who are willing to change their whole lifestyle to live perfectly green while producing their own healthful foods, staying organic and keeping waste at an extreme bare minimum. Unfortunately you also have the group at the other end of the spectrum that doesn’t want to take the time to think twice about what they are putting into their bodies and who also don’t care about waste or don’t want to believe that our environment will go down in shambles if we don’t take better care of if. Then there is the huge group of us average people caught in the middle. The people who want to eat well and be mindful of the environment, but can’t exactly manage or afford to stop their career and live on a farm while residing in a completely green home. Not only that but the price of eating healthy and organic comes with a cost that the average American can’t afford; especially for an entire family. So, what can we “in the middle” people do to make sure we are making the best choices for our bodies and for our environment? Well, first you must remember that you don’t have to change your whole life overnight; it’s the little things that can actually add up and make a difference.

I do think that people in general are becoming more mindful of these matters. I am sure you go to the stores and notice more and more people bringing their own reusable bags with them. I was recently surprised to hear that many people are starting to use cloth napkins at meals instead of purchasing paper napkins. Not only are you saving paper, you are also saving money. Most are becoming more aware of water bottles as well and are starting to carry reusable containers for their beverages. I know I personally try to think about everything I need out of the refrigerator when I am cooking and try to only make one or two trips in, rather than reopening it every time I need something. So, these are small things that many are starting to do, which as a whole can make a huge difference on the environment and save people money in the end.

While we are managing to find simple ways to reduce waste, I think many of us still struggle on the eating healthful part. We want to eat things that are good for us, but it can be expensive and many don’t think they have the time to cook or prepare meals. Well, I may have a solution for many of these people. Not only a solution for eating healthful and nutritious foods, but doing so at a reasonable cost and while helping the environment. It’s called a CSA or Community Supported Agriculture. This is something that I recently learned of and became a part of in my community. This is a way for people to buy locally grown seasonal produce direct from the farmer at an incredibly reasonable price. Not only are you supporting a local business while getting fresh from the farm produce, but you are reducing the pollution caused by produce being trucked all over the country and even sometimes shipped across the world as well as on packaging. You may think, well isn’t all produce fresh from the farm? Technically, yes, but it could be days and even weeks before that produce actually makes it to your local grocery store after being picked. With a CSA you are in most cases getting produce that was harvested within 24 hours of you receiving it. Not only that, but many CSA’s also run strictly organic. You usually pick up or have a delivery every one or two weeks, depending on your subscription. Your box will contain whatever is seasonal and ready for harvesting at that time. This is also a great way to experiment with new produce that you may have never tried before. This type of resource will generally motivate people to take more time to cook because they are interested in using this abundance of fresh food at their fingertips. They will also find it easy to throw quick dishes together without a lot of effort.  Not only that but for those of you with children, it generally gets them motivated and excited to eat more veggies because they can feel involved in picking up the goodies straight from “their” farm.

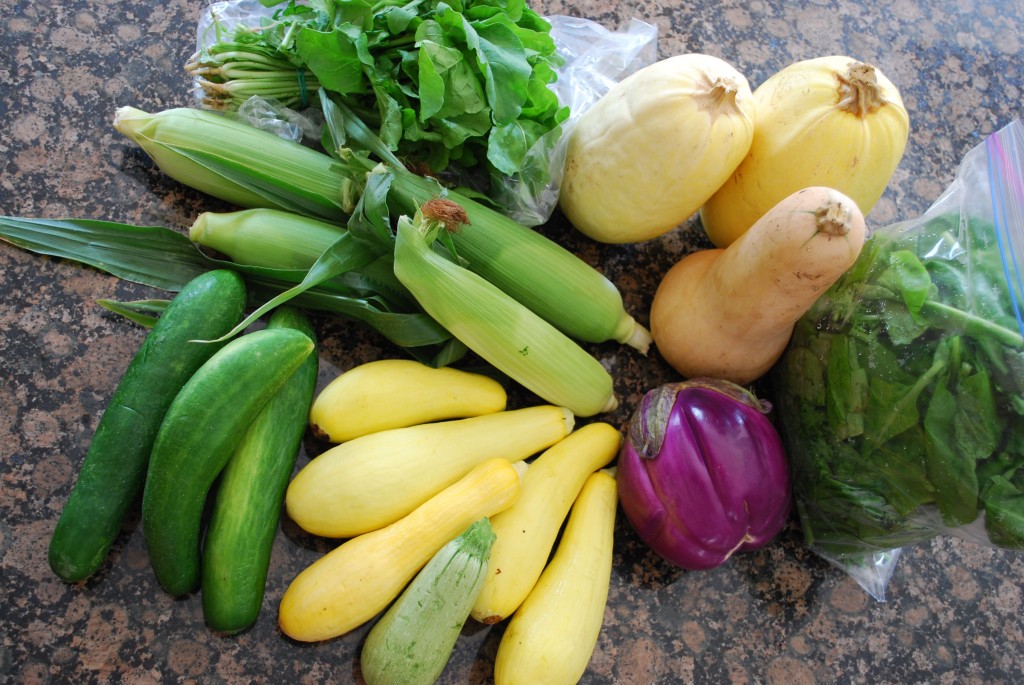
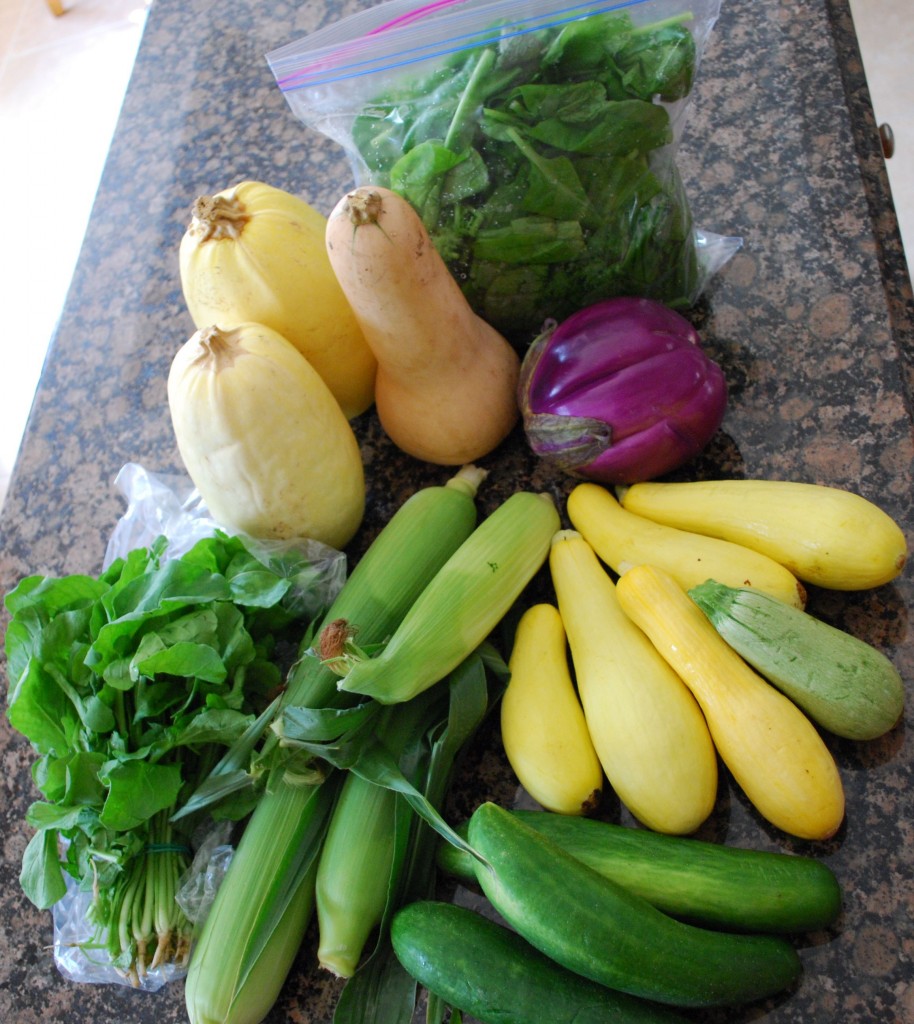
There are many benefits to joining a CSA and it is a small choice that can make a positive impact on the environment, your local community, your health and your bank account. If you would like to find out more about CSA’s and whether there are any available in your area, please visit www.LocalHarvest.org. Below I have also shared some pictures and information regarding our first box from our local CSA, Green Cay Produce (Farming Systems Research, Inc.). Stay tuned for many recipes to come using our wonderful local produce!

veggies

veggies 2

Our first box, which is a full share that will last us two weeks, included summer squash, zucchini, spaghetti squash, butternut squash, corn, cucumbers, eggplant, arugula and mustard greens.