Yes, you heard me right!

I absolutely love soup. Even though I live in a place where it is at least in the 80’s, if not the 90’s most of the year, I can eat soup all of the time. Maybe it’s because I am cold natured and once the air conditioning hits below 75 I am chilled. I don’t know, but I am not going to complain because soup is an easy meal that can be made a million healthy ways. I love the fact that it is usually hearty, but it doesn’t have to be laden with fat, calories and sodium to be that way.

With that said, you are probably thinking that cream based soups are definitely out of the question then. Wrong! A fellow blogger of mine, Cara at Cara’s Cravings, is always coming up with healthy, yet delicious and satisfying meal ideas. She is amazing at thinking outside of the box. Well, a while back I found a recipe on her blog for a Creamy Asparagus Soup. The word’s “Amazingly Healthy” were also placed in front of the title. This was definitely something I was going to have to try!

So, you ask, how does she make this so called “creamy” soup creamy while still keeping it healthy? Don’t you dare snub your nose at this when I tell you!!! Cottage Cheese. Yes, I said cottage cheese. As we all know, this is something that you either like or you loathe. I am pretty sure most people loathe it because of it’s not so appealing texture. I mean it is instilled in us from a young age that chunks in dairy products aren’t usually a good sign, except of course with cottage cheese. Well, I assure you that this “creamy” soup will in fact be creamy and not chunky. The trick is pureeing the cottage cheese so it actually has a completely smooth texture and resembles a cream substance. I honestly thought this was genius and would have never thought to do it on my own. As Cara reminds us in her post, not only are you making a soup creamy without guilt, but you are also adding a good amount of protein and calcium to your dish.

So, Cara dared us to make this for our non-cottage cheese eating husbands, which I did. The first time I made this I made it exactly the way she did. Although my husband was a bit freaked out by the thought of the cottage cheese, he did admit that it was a great soup and that if he didn’t know, then he would not be able to tell there was cottage cheese in it. Well, I decided to make it again recently, but try it with different veggies. Instead of asparagus I included broccoli and cauliflower. It turned out just as fabulous as the asparagus version. So I send you off to go try the cottage cheese method and experiment with it a bit. I assure you, you will not be disappointed.
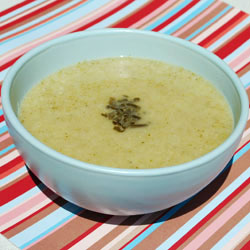
Brocc Soup OS 3 cropped

Creamy Broccoli and Cauliflower Soup

adapted from Cara’s Cravings

1 tsp olive oil
1/4 cup chopped onion
2 garlic cloves, minced
12 oz. of fresh broccoli/cauliflower mix (or 6 oz. of each)
freshly ground salt & pepper
1/4-1/2 teaspoon garlic powder
1/4-1/2 teaspoon oregano
1 teaspoon lemon juice
2 cups chicken broth
6oz low fat cottage cheese
1/4 cup nonfat milk

Wash the broccoli and cauliflower, and chop into small pieces, about 1/4-1/2″. Heat olive oil in a saucepan over medium heat. Add onion and cook for about 7 minutes, until softened and translucent. Add garlic and cook 1 minute more. Add broccoli and cauliflower, salt & pepper, lemon juice and seasoning and stir to combine. Add chicken broth; this should be enough to just cover the vegetables in the pan. Bring to a boil, then reduce heat, cover, and simmer for about 10-15 minutes until vegetables are tender.

Blend together the cottage cheese and milk in a blender or in a separate container using an immersion blender, until completely smooth. Set aside.

Remove the soup from heat and process until smooth, either using an immersion blender or by transferring to a food processor or blender. Return to medium-low heat and gently stir in cottage cheese mixture. Bring to a boil, and cook for 1-2 minutes to let it fully thicken.

*Notes:

-Cara used Penzey’s Greek seasoning in her version instead of the spice blend. If you have the Greek seasoning, feel free to use 1 tsp. of that in place of the garlic powder, oregano and lemon juice that I used.

-I have used both a blender and an immersion blender, I recommend the immersion blender over the regular blender if you have the choice.

-Be sure to blend the cottage cheese until it is COMPLETELY smooth. If you don’t get it completely smooth, then you will have small chunks in your soup.

-You can also make this soup vegetarian by using vegetable stock/broth.

Yields 4 smaller servings

Approximate Nutrition Facts (according to Spark Recipe)
Serving Size: about 2 ladles full
Calories: 92.1
Total Fat: 2.6 g
Saturated Fat: 1.7 g
Polyunsaturated Fat: 0.4 g
Monounsaturated Fat: 0.6 g
Cholesterol: 10.3 mg
Carbohydrates: 8.5 g
Dietary Fiber: 2.7 g
Protein: 9 g

*The sodium content is going to vary depending on the type of stock/broth that you use. I recommend using a low sodium version. I used a cottage cheese that had a 4% fat content, feel free to use something less.
The lighter side of Rollatini

My husband and I love Italian food. As a matter of fact, my husband would eat Italian every night if you would let him. So I struggle at times to figure out how to satisfy our Italian cravings while still keeping it on the healthful side. Instead of being heavy on pasta I try to think of lighter ways to incorporate the flavors of Italian cooking. That way we can have the comfort of the food, but without the guilt.

After spending some time catching up on the past two months worth of cooking magazines that I hadn’t gotten around to, I had a spark of inspiration. I’ll be honest, I am still a bit green when it comes to designing my own recipes. I get a tad anxious in the kitchen when I don’t have the safety net of a tried and true recipe. I am learning to experiment though and I am getting more comfortable with it each time. My biggest motivation to do this is the fact that I want to make more healthful dishes, but I don’t want them to be bland and I want to base them off of the more indulgent flavors we love so much. So I took a stab at it and below is what I got. A tasteful and healthful combination of eggplant, chicken, green beans, sun-dried tomatoes and homemade San Marzano marinara (I’ll get that recipe to you soon); along with the flavors of Italian spices and a bit of indulgence with Italian cheese.

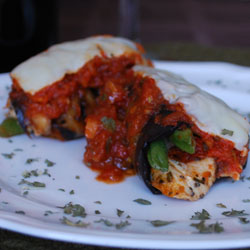
rollatini-cropped

Eggplant and Chicken Rollatini

1 medium eggplant
extra virgin olive oil
salt and pepper
2 boneless skinless chicken breasts
garlic powder
Italian seasoning
about 25 fresh green beans
2 cloves of garlic, minced
pinch of crushed red pepper flakes
2 tablespoons water
5 sun-dried tomato halves, chopped (dry or packed in oil)
2 cups of your favorite marinara sauce
12 thin slices of mozzarella cheese

Slice the eggplant thin, cutting length-wise (you should get about 12 slices). Soak the eggplant in cold water for 20-30 minutes. Remove from water and pat dry.

If you are using dry sun-dried tomatoes, place the halves in hot water and let soak until ready for use (about 20 minutes).

Preheat your oven to 350 degrees F, and heat your grill to medium-high heat.

Using an oil sprayer, spray each piece of eggplant on both sides, as well as season with salt and pepper. Set aside. Take chicken breasts and season both sides with salt, pepper, garlic powder and Italian seasoning. Place chicken on grill and cook about 6 minutes on each side. In the meantime, place the eggplant on the grill as well and cook about 3-minutes on each side.

Heat a small pan, sprayed with olive oil, over medium-low heat. Add the green beans, garlic, salt & pepper, and crushed red pepper. Saute (continuing on medium-low) about 5 minutes. Add 2 tablespoons water, cover and increase heat to medium-high; let steam for an additional 2-3 minutes. When tender, remove from heat.

Assembly:

Cut each chicken breast into thin slices. Take a piece of eggplant and lay it flat, place two chicken slices on the bottom end, top with two green beans. Then place a couple of pieces of sun-dried tomato over the chicken and green beans. Carefully roll the ingredients into the eggplant and place in a 9×13 inch casserole dish. Continue assembling and lining in the dish until all of the eggplant, chicken and green beans are used.

Spoon the marina sauce over the rolled eggplant. Place a slice of mozzarella over the top of each roll. Place in the oven and bake 20-30 minutes, or until heated through.

*I served this with a small side of whole wheat pasta tossed with garlic and a bit of extra virgin olive oil.

Servings: about 3

Black-Bean Soup with a Kick

If my husband had his way, he would eat a vegetable (preferably broccoli) and a starch with his dinner every night. Don’t get me wrong, he is not a picky meat and potatoes kind of guy, but he would still be completely content with the simplicity of those side dishes on a daily basis. Me on the other hand, would probably give up eating altogether before I would eat the same stark meals day after day. So I am always on a mission to find new, but healthy side dishes to compliment our meals. I mean let’s face it, we could all eat mac n’ cheese, loaded potatoes and every other calorie laden side dish every day of the week if our waistlines and arteries would let us, but that is not realistic. At least it isn’t in my world. So that leads us back to finding the healthy, but tasty and satisfying variety of dishes.

After plastering the title of boring eater to my husband, I will now give him some credit because he is the one who suggested black bean soup over our fairly regular black beans the other night. Although I was the one who raced up the stairs in hopes of beating him to a great recipe. See, he will look for a recipe and then try to change it in every way possible in order to not follow the recipe. In many cases this leads to a fabulous dish (b/c he is a great cook), but in other cases he turns into the spice monster and tends to “over flavor” the dish. So I raced to my computer and immediately went to Epicurious.com, which is my new favorite recipe source. One of the first recipes I pulled up was one from the December 2008 issue of Gourmet magazine. I thought it was going to be something a little too obscure for our simple dinner, but surprisingly it was a simple yet delicious sounding concoction. I passed it along to the anti-recipe guy, since I was going to put him in charge of making it, and to my surprise he said it sounded great! No only that, but he made the recipe without altering it beyond recognition. Of course we did change it up a tiny bit, but for the most part it was great the way it was.

So we now have a new side dish to add to our repertoire and my husband actually followed a recipe without completely changing every element. Don’t get me wrong though, I may like to give my hubby a hard time, but he is an amazing cook and I love him dearly.

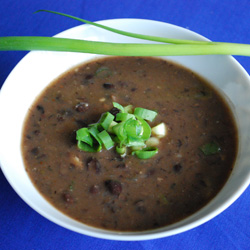
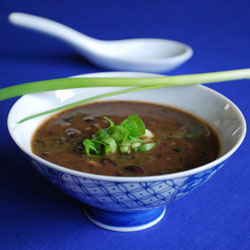
BB soup 1-cropped

BB soup 2-cropped

Spicy Black-Bean Soup

adapted from Gourment 12/08 via Epicurious.com

2 teaspoons olive oil
1 medium white onion, finely chopped
2 garlic cloves, minced
1 fresh jalapeño (2 inches), seeded and minced
1 teaspoons chili powder
1 teaspoons ground cumin
1 teaspoon dried oregano
2 (15-ounces) cans black beans, 1 drained and rinsed, 1 with liquid (we use low sodium)
2 1/2 cups chicken stock/broth (use 2 cups if you prefer it thicker)
1 bay leaf
Green Onion, chopped for garnish

*Use vegetable stock to make this dish vegetarian.

Heat oil in a 4-to 5-quart heavy pot over medium-high heat, then sauté onion, garlic, and jalapeño with chili powder, cumin, and oregano until onion is beginning to brown, 6 to 8 minutes. Add beans, stock/broth, and bay leaf and simmer, covered, stirring occasionally, until soup has thickened slightly, about 15 minutes.

Transfer about 1 cup soup to a blender and purée (use caution when blending hot liquids). Return to pot and reheat over medium-low heat, stirring frequently. Discard bay leaf. Season with salt if desired. Add green onion for garnish.

Yields 4-6 servings

Approximate Nutrition Facts (according to Spark Recipe)
Calories: 229.7
Total Fat: 3.9 g
Saturated Fat: .09 g
Polyunsaturated Fat: 0.5 g
Monounsaturated Fat: 0.9 g
Cholesterol: 3.1 mg
Carbohydrates: 44.8 g
Dietary Fiber: 11.6 g
Protein: 13.6 g

*Please note that these are very approximate nutrition facts since one can of beans was rinsed from it’s liquid. This is also why I left the sodium out b/c it was not going to be accurate at all.  These facts were also based on the amounts for 4 servings.

Spice up your night.

I subscribe to quite a few cooking magazines, as I am always looking for new ideas and forms of inspiration. One of my favorites is Cooking Light. I know some people out there don’t like the magazine as much as they used to and I do admit I was getting a little tired of it myself while reading the past few issues. Well, I received my September issue a week or two ago and I was surprised to see that they have given the magazine somewhat of a face lift. I have to say, I am really liking it. The last few issues prior to this one seemed to be lacking in the recipe and food department. I really hope they keep up this new format because it has so much information on ingredients, nutrition and a huge variety of recipes.

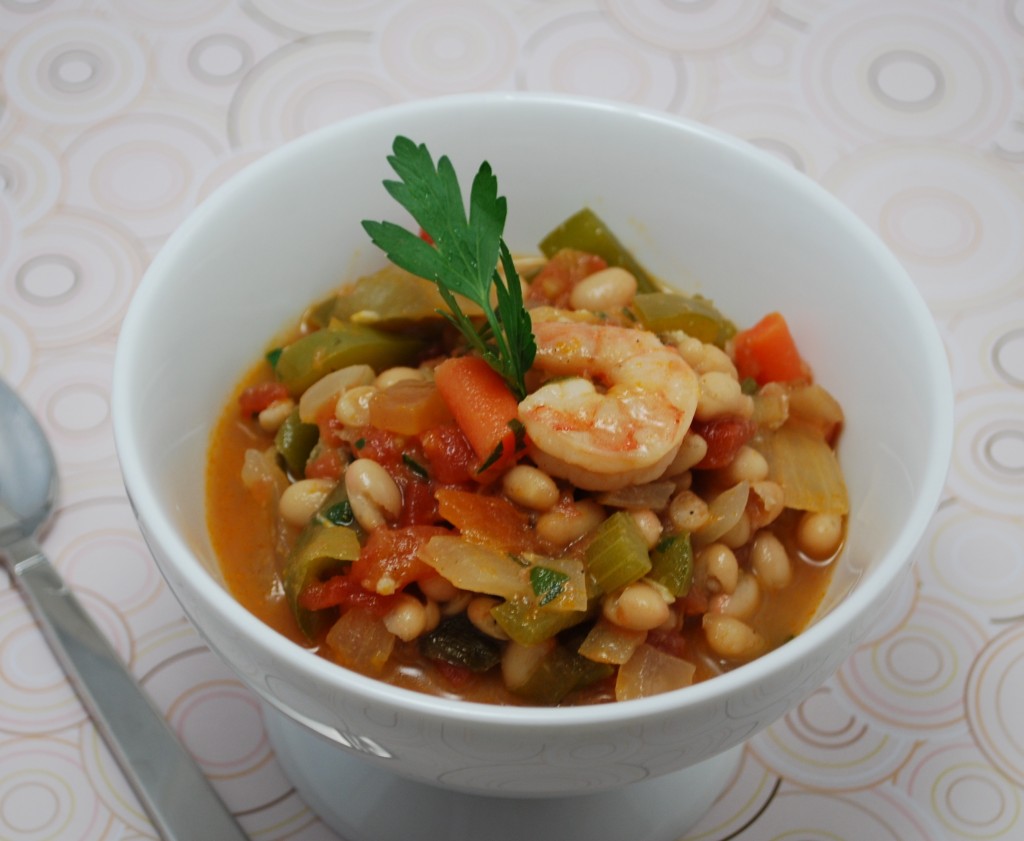
Okay, so why did I give that shout out to Cooking Light? No, I am not getting paid to endorse the magazine. Like I mentioned, this issue had a great variety of recipes. So, of course I made one. I love one pot dishes, so anytime I come across a great one pot dish, I am all over it. This particular recipe was for a Creole Shrimp and Sausage Stew. This dish was really tasty and will be perfect for the cool days to come. Well, the cool days to come for my friends to the north. I most likely won’t be seeing a cool day at least until December or January. This recipe is also a great base recipe for switching things up. You can pretty much use it to clean out your refrigerator if you have some veggies to use up. You can also make it as spicy or tame as you like; I used the spicy Rotel and it gave it quite a kick.  We ate it over brown rice and it made for the perfect meal.

newest-stew

Creole Shrimp and Sausage Stew

Adapted from Cooking Light

2 teaspoons olive oil
1 cup green bell pepper, chopped
1/2 cup onion, chopped
1/4 cup celery, chopped
1/4 cup carrots, chopped
1 cup thinly sliced turkey or chicken sausage (about 6 ounces)
2 cloves of garlic, minced
3/4 cup fat-free, less-sodium chicken broth
1 (10-ounce) can diced tomatoes and green chiles, undrained (such as Rotel)
8 ounces peeled and deveined medium shrimp
1 (15-ounce) can of white beans, rinsed and drained
2 tablespoons chopped fresh parsley

Heat a large saucepan over medium-high heat. Add oil to pan; swirl to coat. Add bell pepper, onion, carrot and celery to pan; saute on medium-high heat about 5 minutes. Add garlic and sausage to the pan; sauté 3 minutes or until the veggies are tender, stirring occasionally. Add broth and tomatoes; bring to a boil. Stir in shrimp and beans; cover, reduce heat, and simmer 6 minutes or until shrimp are done. Sprinkle with parsley.

Yields 4 servings

Approximate Nutrition Facts (according to Spark Recipe)
Serving size: about 1 cup
Calories: 298.2
Total Fat: 6.3 g
Saturated Fat: 1.7 g
Polyunsaturated Fat: 0.9 g
Monounsaturated Fat: 2.1 g
Cholesterol: 117.1 mg
Sodium: 863.8 mg
Carbohydrates: 32.2 g
Dietary Fiber: 6.9 g
Protein: 27.2 g

Goulash, but not really.

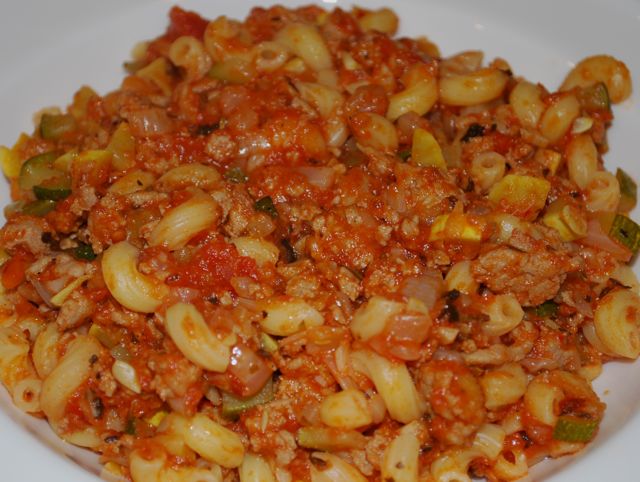
You know how we all have a few meals that we grew up on and will always stick in our memory? This was one of those meals and it was a favorite of mine. My mom made it, my Nana made it, etc. The only thing that seems kind of funny to me now as an adult and as someone who is always looking through recipes, is that my family always called it goulash. Looking at the photo you will see that this is definitely not the goulash you will find on the menu somewhere. Even though that is the case, it will always be “goulash” to me, so please excuse my inaccurate naming of the dish.

I must also confess that this isn’t the exact dish I grew up on. Again, now that I am an adult and try to be very conscious of my food choices I decided to put my own twist on the dish to make it a bit more well rounded. The version that I grew up on was simply pasta, ground meat, onion and homemade tomato sauce. I decided to make it a bit healthier by using ground turkey, whole wheat pasta and adding veggies to the mix. In the end you have a nice comforting meal that you don’t have to feel guilty about.

goulash

Nana’s “Goulash”

Olive Oil
1 small to medium zucchini, chopped
1 small to medium yellow squash, chopped
1 medium onion, diced
2 cloves of garlic, minced
1 1/2 tsp. Italian seasoning
8 oz. ground turkey (I used 93/7)
1 tsp. garlic powder
1 tsp. paprika
crushed red pepper to taste
salt and pepper
2 cups of your favorite marinara sauce
4 oz. whole wheat elbows or rotini

Bring a pot of water to boil. Add pasta and cook according to time listed on the box.

Heat a pan on the stove and spray with olive oil. Add the zucchini, squash and onions. Saute for a couple of minutes and then add garlic and Italian seasoning. Continue cooking on medium heat.

Heat another pan and add the ground turkey. Add garlic powder, paprika, crushed red pepper and salt & pepper to taste. Continue on medium heat until cooked through.

When the veggies reach your desired tenderness, add the cooked ground turkey, marinara sauce and the drained pasta. Simmer to let flavors combine, about 5 minutes.

Yields 2 large servings

Approximate Nutrition Facts (according to sparkrecipe.com)
Calories: 453.4
Total Fat: 12.8 g
Cholesterol: 80 mg
Sodium: 149.6 mg
Carbohydrates: 63.3 g
Dietary Fiber: 11.5 g
Protein: 33.3 g

*Please note that the nutrition facts can vary greatly based on the type of sauce, meat and pasta that is used as well as the amount of salt added to the dish.  These facts were based on the 93/7 ground turkey, homemade san marzano sauce and Ronzoni Healthy Harvest Rotini.

My Farewell to Summer

September has landed, which starts to bring on the thoughts of fall. Unfortunately, living in south Florida I am not lucky enough to have that hint of crispness in the air like my friends in the north. I must say that I am still thrilled that fall is upon us because it is my favorite time of the year. The thought of fall and winter just gives me the warm fuzzies inside.  It must be the northerner in me, even though I’m a native to Florida (my roots are from the north though).

The only problem with the coming of fall is my love/hate relationship with the food. I love to cook heartier comfort foods during this time of year, BUT I also miss the fruits and veggies of summer. I will admit that I am lucky to live in Florida though because the passing of the brutal summer temperatures will bring in our fresh local produce, which our northern friends are saying farewell to. Unfortunately our local winter produce doesn’t include the fresh berries of the summer though. Oh how I love fresh summer berries. I know that I can resort to the frozen variety, but it doesn’t come close the fresh ones. After my last couple of visits to the grocery store I have realized that the end of the berries has come for this year. With that said, I leave you with one last glimpse of fresh summer fruit and what has become one of my favorite breakfast choices.

Waffle

In case you are interested for next season, my nutritious breakfast treat consists of:

Honey Oat Kashi Waffle
Fresh Strawberries
Fresh Blueberries
Fresh Raspberries
A drizzle of Crystal’s Own Maine Wild Blueberry Honey

Finger Lickin Good

Like most people, I am always looking for new chicken recipes. I mean it is just that go-to meat that you always have in your house that is healthy and versatile. You honestly can do a million and one things with it, but of course when you are trying to think of something new, you draw a blank. Well, at least I do. Therefore, any time I come across a new chicken recipe I am sure to put it in safe keeping for those, “I don’t know what I want for dinner,” nights.

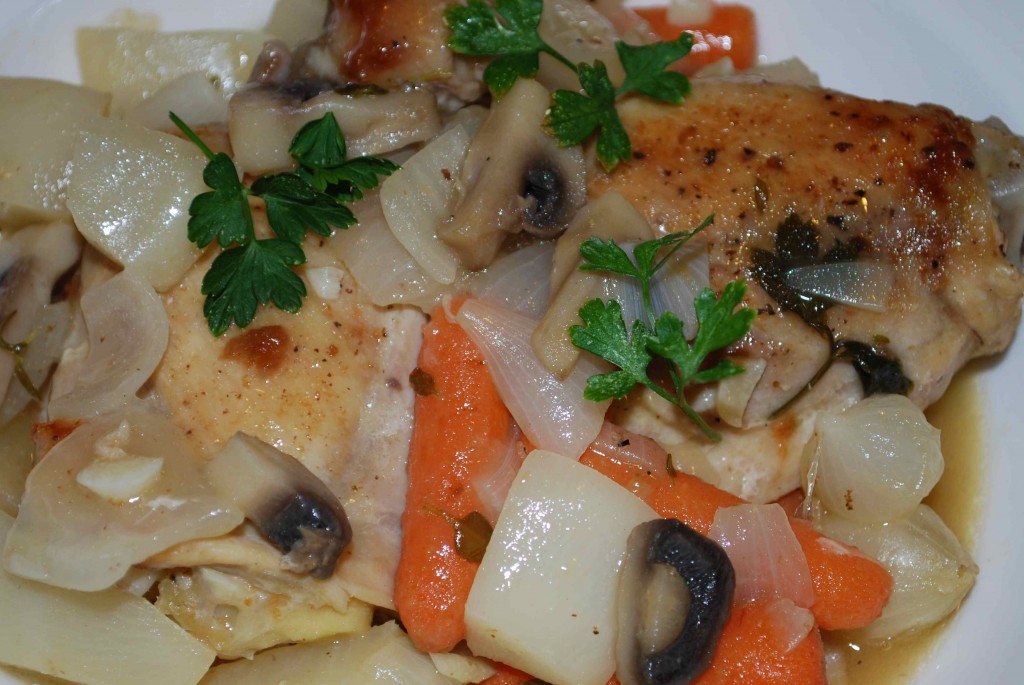
I love chicken, but I tend to steer away from dishes that call for chicken on the bone unless it is a whole chicken or it’s being cooked on the grill and eaten with your hands. I don’t like to have to pick chicken off the bone when it is in some type of mixed dish (i.e. chicken cacciatore). Let’s be honest, you can only get so much meat off of the bone with a fork and knife.  Ironically, when I saw a recipe in Cooking Light for Braised Chicken with Vegetables, I just couldn’t resist it. The picture just made the dish look so appetizing and it made me forget about my dislike of picking through chicken that was surrounded by a gravy like substance.

It was a very tasty dish and I must say that I enjoyed it, even though I had to pick through my food.  Unfortunately my version is missing the peas sine Greg told me there were peas in the freezer when really they were lima beans (yuck). I did add some sliced mushrooms to the mix though.

braised chicken

Braised Chicken with Baby Vegetables and Peas

Courtesy of Cooking Light

2 tbs. butter, divided
2 bone-in chicken breast halves, skinned
2 bone-in chicken thighs, skinned
2 chicken drumsticks, skinned
1/2 tsp. salt
1/4 tsp. freshly ground black pepper
2 (14-ounce) cans fat-free, less-sodium chicken broth
1 cup dry white wine
1/2 tsp chopped fresh thyme
12 baby turnips, peeled (about 8 ounces) (I cut up a large turnip)
12 baby carrots, peeled (about 8 ounces)
12 pearl onions, peeled (about 8 ounces) (I used frozen)
6 white mushrooms, sliced
6 fresh flat-leaf parsley sprigs
2 bay leaves
2 tbs. all-purpose flour
3/4 cup fresh green peas
2 tbs. chopped fresh flat-leaf parsley

Melt 1 tablespoon butter in a Dutch oven over medium-high heat. Sprinkle chicken evenly with salt and pepper. Add chicken to pan; sauté 5 minutes on each side or until browned. Remove from pan.

Add broth to pan; cook 1 minute, scraping pan to loosen browned bits. Add wine and next 7 ingredients (through bay leaves); stir. Add chicken to pan, nestling into vegetable mixture; bring to a boil. Cover, reduce heat, and simmer 20 minutes or until chicken is done. Discard bay leaves and parsley sprigs. Remove chicken and vegetables from the pan.

Place a zip-top plastic bag inside a 2-cup glass measure. Pour cooking liquid into bag; let stand 10 minutes (fat will rise to the top). Seal bag; carefully snip off 1 bottom corner of bag. Drain drippings back into pan, stopping before fat layer reaches opening; discard fat. Return liquid to pan. Bring liquid to a boil; cook until reduced to 1 1/2 cups (about 5 minutes).

Melt remaining 1 tablespoon butter in a small skillet. Add flour, stirring until smooth. Add flour mixture to cooking liquid; cook 2 minutes or until slightly thick, stirring constantly. Return chicken and vegetable mixture to pan; stir in peas. Cook 3 minutes or until thoroughly heated. Garnish with chopped parsley.

Yields 4 servings

Nutrition Facts (according to Cooking Light)
Calories: 324
Total Fat: 11.4 g
Cholesterol: 100 mg
Sodium: 818 mg
Carbohydrates: 22.1 g
Dietary Fiber: 5.2 g
Protein: 32.6 g

Morning Glories

It’s no secret that I love baked goods. If I could eat a fresh muffin, scone, pastry, etc. for breakfast everyday I would. Unfortunately if I did this then I would probably have to spend the other half of everyday in the gym. So every once in a while I try to come to a compromise; make something yummy but do it on the healthy side. That is where these Morning Glory muffins come in.

When I saw these muffins I knew they would be the perfect “compromise” to my regular breakfast of egg whites and fruit. They would be a nice fresh baked muffin filled with fruit, yogurt, oats and loads of other good for you stuff. So I gathered my ingredients and got to work.

These were definitely tasty muffins; they were flavorful and had more of a dense consistency to them. I must admit that the Honey Bran Muffins are still at the top of my list for healthful muffins though. Not to say the Morning Glories weren’t good, because they were, I think I just prefer a more cake-like texture to my muffins. Overall I recommend these and I think it is a great base recipe to tweak to your liking. It is also a great way to use up ripe bananas.

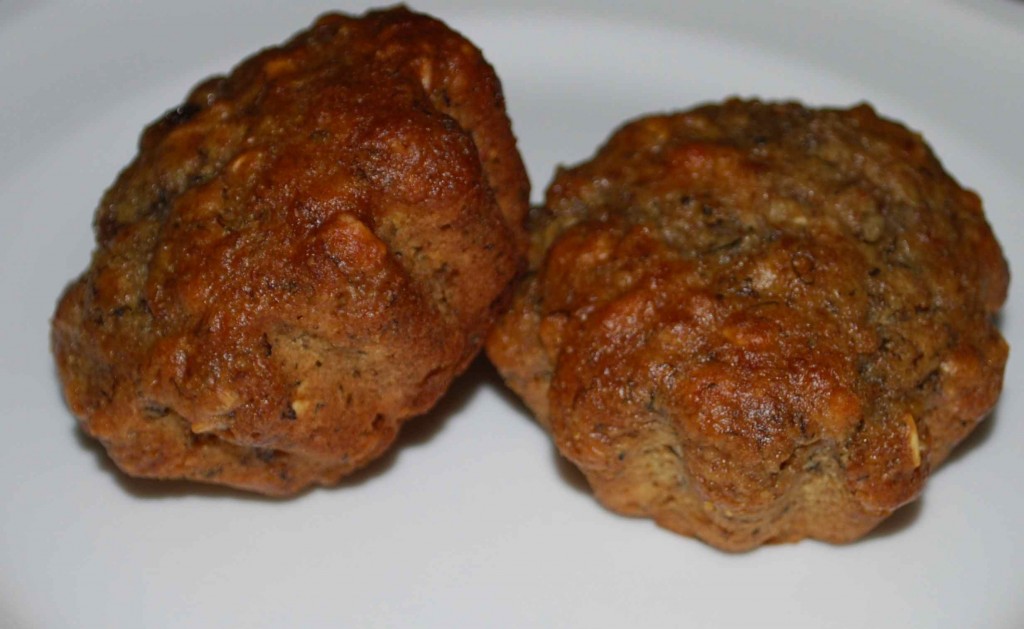
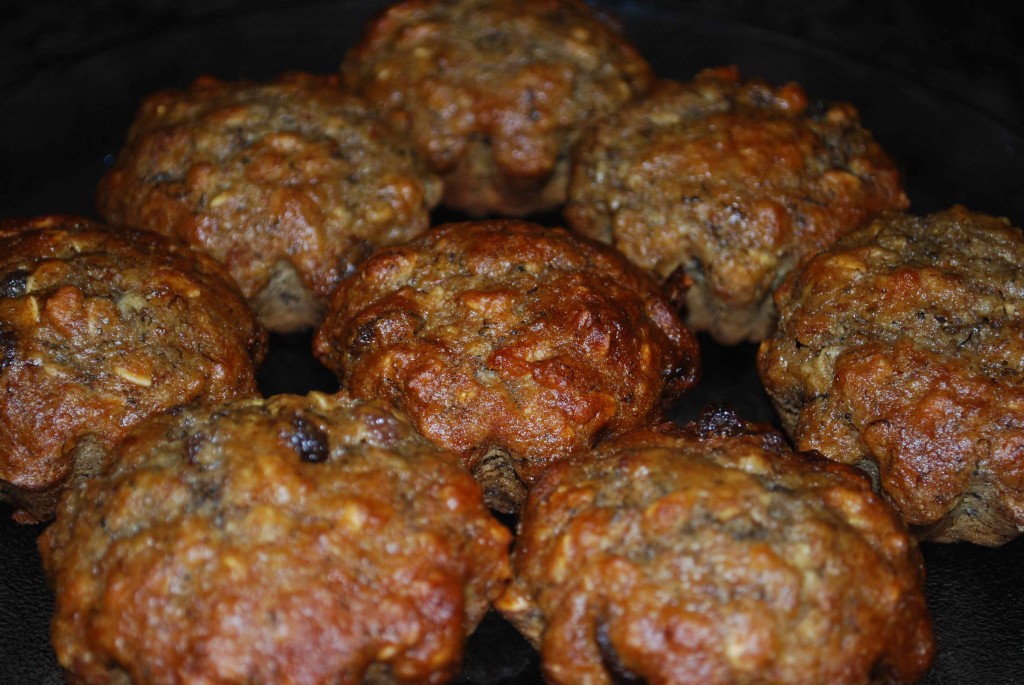
Oh, and if you are wondering why they look a little weird in the shape department, it’s because I used my silicone baking cups that have a flower-like edge on them.  The pictures don’t do them much justice and kind of make them look like blobs.

mg-muffins

mg-muffins-2

Morning Glory Muffins

Adapted from Cooking Light

Cooking spray
1 cup whole wheat flour (about 4 3/4 ounces)
1/2 cup all-purpose flour (about 2 1/4 ounces)
1 cup regular oats
3/4 cup packed brown sugar
1 tablespoon wheat bran
2 teaspoons baking soda
1/4 teaspoon salt
1 cup plain fat-free yogurt
1 cup mashed ripe banana (about 2)
1 large egg
3/4 cup raisins

Preheat oven to 350°.

Place 18 muffin cup liners in muffin cups; coat liners with cooking spray.
Lightly spoon flours into dry measuring cups, and level with a knife. Combine flours and next 5 ingredients (through salt) in a large bowl; stir with a whisk. Make a well in center of mixture. Combine yogurt, banana, and egg; add to flour mixture, stirring just until moist. Fold in raisins.

Spoon batter into prepared muffin cups. Bake at 350° for 20 minutes or until muffins spring back when touched lightly in center. Remove muffins from pans immediately; cool on a wire rack.

Yields 18 muffins

Nutrition Facts
Serving size: 1 muffin
Calories: 127.9
Total Fat: 0.8 g
Cholesterol: 12.1 mg
Sodium: 235.4 mg
Carbohydrates: 28.2 g
Dietary Fiber: 2 g
Protein: 3.4 g

Greek Inspired Stuffed Peppers

I grew up eating stuffed peppers, although we only had them on occasion since my mother and I were the only ones who enjoyed them. If you think about it, it’s a great way to get your vegetables, protein and starch all into one compact entrée. I also love this meal because it is very versatile; you can do just about anything to change it up. I guess stuffed peppers are kind of like a pizza.  You have your base and then you can add whatever your choice toppings, or in this case mix-ins, are until you are blue in the face.

Of course the stuffed peppers that I grew up on were the traditional ones; the standard pepper stuffed with ground beef, rice, diced onion and topped with tomato sauce. When I decided to make them for dinner the other night I wanted to spruce them up a bit. Not only did I want to make them a bit healthier, but I also wanted to make a few additions. So, I decided to go with a Greek inspired version. I also opted to use turkey burger and barley instead of the beef and rice. The addition of the spinach, Greek peppers and black olives gave a nice extra element of flavor. I am sure it would be great with kalamata olives too (which would be a bit more Greek); and feel free to add some feta cheese to the top as well.

Not only is this a great way to use up what’s in your refrigerator, but it also makes for great leftovers.

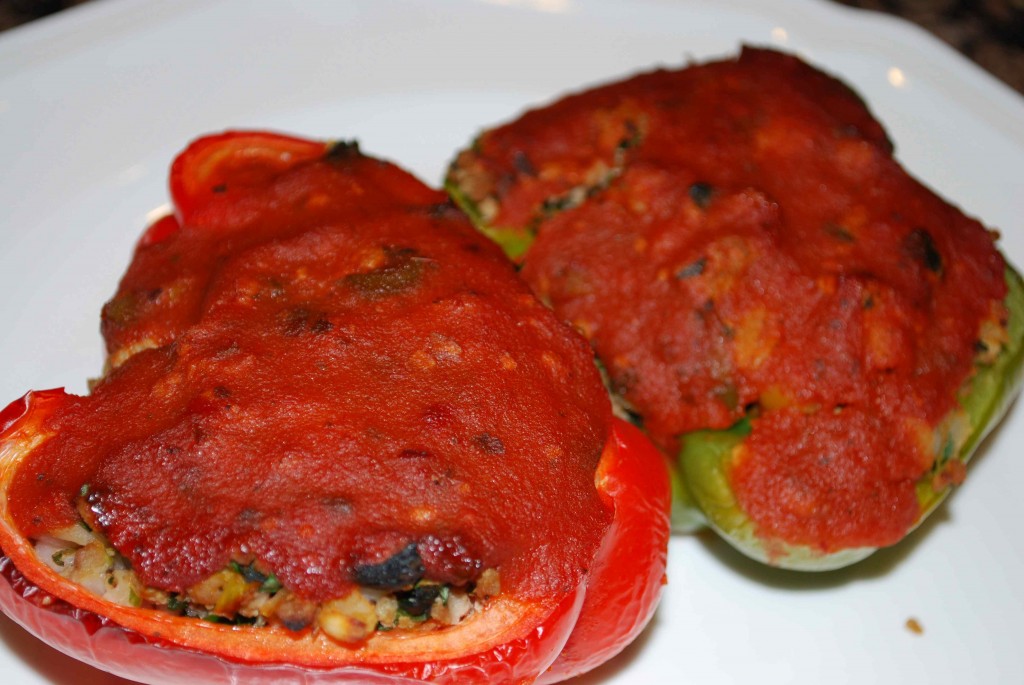
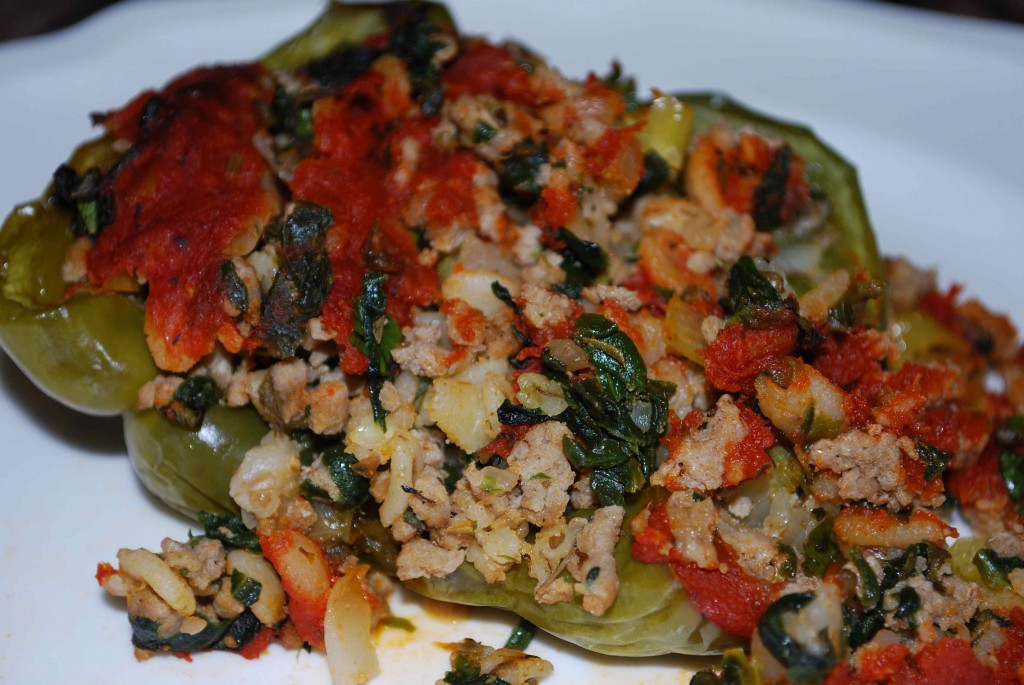
stuffed-peppers

stuffed-peppers-2

Greek Inspired Stuffed Peppers

3 bell peppers (your choice of color), halved vertically
1 cup cooked barley
2 tsp. olive oil (or coat the bottom of the pan with olive oil spray)
½ cup onion, chopped
½ lb. ground turkey
2 tsp. dried oregano
1 tsp. garlic powder
½ of a 10-ounce package of frozen chopped spinach, thawed and squeezed dry
8 large black olives, sliced
4 Greek peppers, chopped
salt and pepper to taste
1 cup of your favorite tomato sauce (store bought or homemade)

Preheat oven to 350 degrees.

Begin preparing barley on the stove top.
Place your six pepper halves, cut side up into a large casserole dish (9×13).

Heat olive oil in a large skillet over medium to medium-high heat. Add the diced onion to the pan and sauté; about 2 minutes. Add the ground turkey, oregano, garlic powder and salt & pepper to the pan and cook until onions are translucent and the meat is cooked through.

Place the meat mixture into a large bowl, combine with cooked barley, spinach, olives and chopped Greek peppers. Fill each pepper half with the mixture. Spoon tomato sauce over the top of each filled pepper.

Place in the oven and bake for about 30 minutes or until peppers are tender.

Yields: 3 servings

Nutrition Facts
Serving size: 2 pepper halves
Calories: 421.7
Total Fat: 13.6 g
Cholesterol: 81 mg
Sodium: 1,284.1 mg
Carbohydrates: 53.3 g
Dietary Fiber: 13.1 g
Protein: 30 g

*note that I used my olive oil sprayer, so the nutrition does not include the 2 tsp. of olive oil.

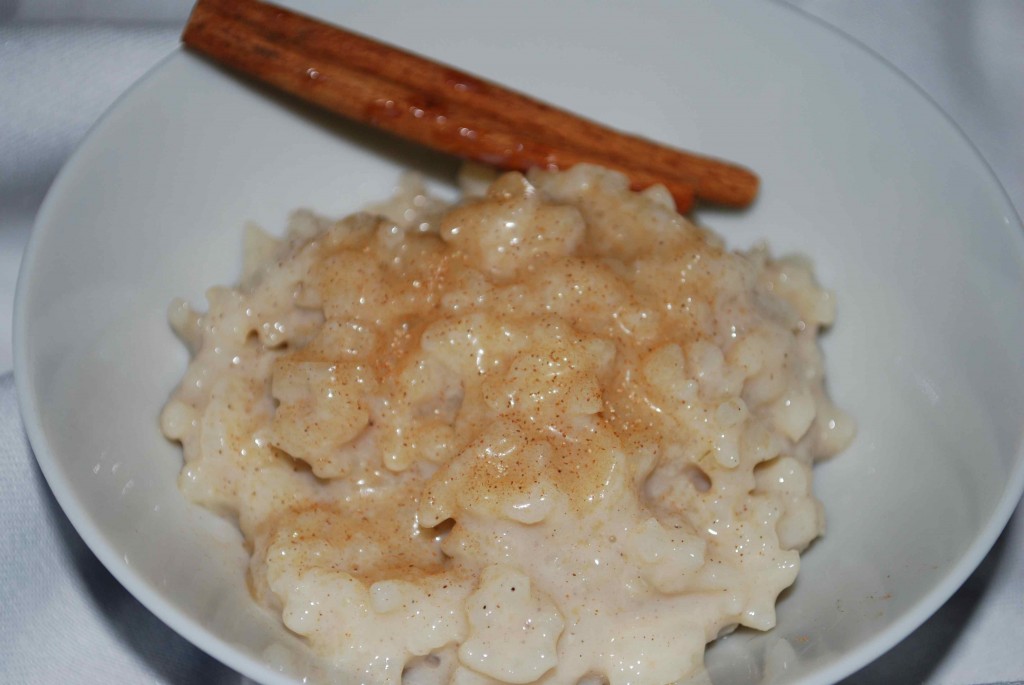
Lightened Up Rice Pudding

It is absolutely no secret that I have a sweet tooth. Unfortunately you mix that with the fact that I gain 10 pounds by just looking at dessert and it doesn’t make for a great combination. At least my waistline doesn’t think so. With that said, I am always looking for sweet treats that I don’t have to feel guilty about.

When we lived in Clearwater we used to frequent a little Greek restaurant that we loved. A few times I indulged in their rice pudding and thought it was delicious. I never really thought to make some of my own until I recently saw a recipe for a lightened up version. I figured that it was nutritious and would tame my sweet tooth, so I couldn’t go wrong.

The recipe was very easy to make and it could feed quite a few people. I actually took some over to my grandmother and she really enjoyed it. It is light and slightly less sweet than your traditional rice pudding. It’s perfect for an evening treat when you are craving a little something sweet.

rice-pudding1

Very Vanilla Rice Pudding

Courtesy of The Food You Crave by Ellie Krieger

2 cups water
1 cup Arborio rice
3 cups vanilla soy milk
¼ cup sugar
Pinch of salt
1 cinnamon stick
½ tsp. vanilla extract
¼ tsp. ground cinnamon, plus more for dusting
¼ tsp. ground nutmeg, plus more for dusting

Preheat oven to 375 degrees.

Bring the water to a boil in a medium, heavy, ovenproof saucepan. Add the rice, cover, reduce the heat to low, and simmer until the rice is nearly cooked, about 20 minutes.

In a large bowl, whisk together the soy milk, sugar, and salt. When the rice is cooked and still hot, add the soy milk mixture and cinnamon stick. Cover, place in the oven, and cook for 45 minutes.

Remove from the oven, uncover, and remove the cinnamon stick. Stir in vanilla, ground cinnamon, and nutmeg. The pudding will be slightly liquidy; the liquid will continue to absorb into the rice and thicken as the pudding cools. Distribute among 8 bowls. Dust with more cinnamon and nutmeg. Serve warm or at room temperature. The pudding will keep in the refrigerator in an airtight container for about 3 days.

Yields: 8 servings

Nutrition Facts (according to book)
Serving size: 2/3 cup
Calories: 154
Total Fat: 2 g
Cholesterol: 1.7 mg
Sodium: 59 mg
Carbohydrates: 36 g
Dietary Fiber: 0.7 g
Protein: 5 g