An Apple a Day…

Back in June, I decided to take a Wilton course at my local Michael’s in hopes of learning some nice decorating techniques for cakes. After taking Course 1, I quickly learned that you can’t do much great decorating without using butter cream icing; which works best for decorating purposes when it is made with vegetable shortening (GAG!).  I decided that I wasn’t a big fan. I would much rather decorate a cake with things that actually taste good. I still use some of the techniques that I learned, but I try to avoid using the dreaded butter cream as much as possible. I tend to try and decorate with fruit, chocolate shavings, etc. I also sometimes choose to ice cakes in my preferred icing and then make a small batch of butter cream for the decorating.

Anyway, since I love to bake and most people (mainly family) know I took that course, I am the first they come to when it is birthday cake time. So, when the Jewish holidays rolled around, my mother-in-law asked if I would mind making a birthday cake for her father instead of making a dessert for one of the holiday dinners. Of course I agreed. So now I needed to find a tasty cake that I thought everyone would love, but would also look like a birthday cake and allow for writing (without having to use the butter cream). It was also getting into the fall season, so I figured I would take that into mind as well.

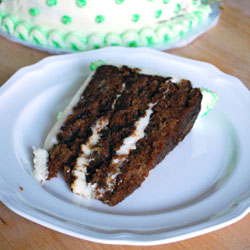
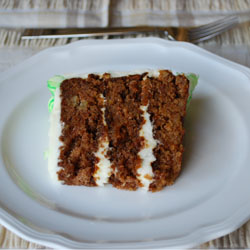
After doing a bit of searching I finally found a three layer apple cake by Martha Stewart. It would look like a birthday cake, have fall flavors that I was sure most people would enjoy and I would top it with my favorite cream cheese icing that could still be used for some decorating purposes. I think I hit all of my goals! Most importantly avoiding the BC!

The cake was moist and delicious; and everyone raved over how great it tasted. The only downfall I found was that it was a little hard to work with. The outside of the cake is quite sticky and the centers seemed to fall a bit, which makes it a bit difficult to stack without it all sticking to your hands and it requires a bit more frosting in the middle of each layer to compensate for the fallen centers. Overall though, I would make it again because it tasted great and had that homey, rustic feel to it. I think the cream cheese icing paired very nicely with it as well.
CAKE2-CROPPED

cake 2nd 1-cropped

Three-Layer Apple Cake

Courtesy of MarthaStewart.com

Cake
1/2 cup (1 stick) unsalted butter, melted, plus more for pans
2 cups all-purpose flour (spooned and leveled), plus more for pans
2 teaspoons baking soda
1/2 teaspoon baking powder
2 teaspoons ground cinnamon
1/2 teaspoon ground ginger
3/4 teaspoon salt
2 cups packed light-brown sugar
2 large eggs
4 Granny Smith apples, peeled, two coarsely grated and two diced

Icing
Vanilla Cream Cheese icing (from the Banana Bars recipe)

Preheat oven to 350 degrees. Butter three 8-inch-round cake pans (I used 9-inch b/c that is what I had); line bottoms with parchment paper. Butter, then flour paper and sides (tapping out excess); set aside.

In a medium bowl, whisk together flour, baking soda, baking powder, cinnamon, ginger, and salt; set aside. In a large bowl, whisk together butter, sugar, and eggs until well combined; fold in grated and diced apples. Add flour mixture; mix just until combined. Divide batter among prepared pans; smooth tops.

Bake until a toothpick inserted in center of cake comes out clean, 35 to 40 minutes. Cool cakes in pans 20 minutes, then invert onto wire racks; peel off parchment. Invert cakes again, and let cool completely on racks.

Assemble cake to your liking with Vanilla Cream Cheese Icing.  Refrigerate at least 1 hour (or up to 4 days). To serve, bring cake to room temperature; slice with a serrated knife.

Yields: 12 servings
I can smell fall, even if I can’t feel it!

I want to preface this with the fact that fall is my favorite time of the year. Now that I am back in Florida, I miss the chilly weather and the beautiful foliage. This is the time of year that I yearn to live somewhere in the north.

With that being said, can I tell you that I wanted to throw something at my TV the other night! My husband was flipping through the channels and stopped at a news station. The weather just happened to come on and I was watching it, even though I know it is a joke in South Florida. Well, the meteorologist proceeded to talk about how we are going to get a little cold front. What?? A cold front this early?? We don’t get cool weather (that being the 70’s) until at least December. I had this moment of extreme excitement, like a little giddy school girl. He then proceeds to say that the temperatures will be in the low 90’s with less humidity. What??? How dare he play with my emotions like that! Who in their right mind would utter the words “cold front” and “temperatures in the 90’s” in the same sentence?

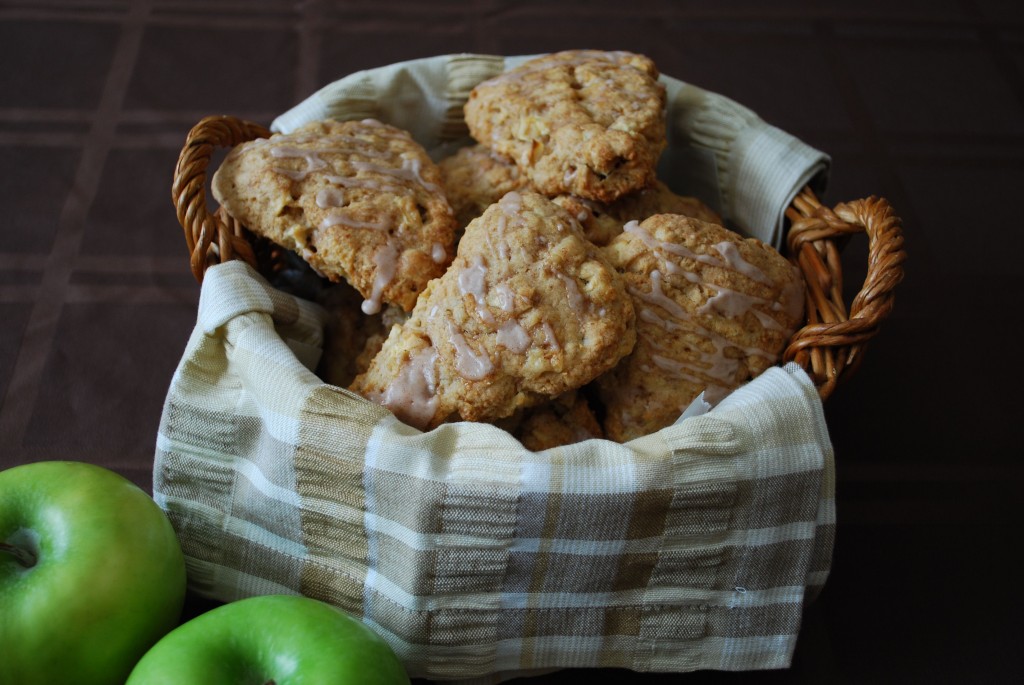
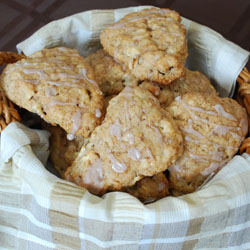
So now I had to find a way to mend my broken little heart. What better way than to make Cinnamon Apple Scones? I knew that would bring my fall spirit back and shining. I came across this recipe while going through my Google Reader the other night. Again, it was a great contribution from the wonderful Katie at Good Things Catered. I knew I would have to make these ASAP! The only problem is, I don’t like baking full batches of things to keep in our house. I say that because it means the full batch will be consumed by my husband and I. Last time I checked, my waistline didn’t cooperate with that so kindly. Well, it just so happened I was also trying to find a couple of treats that would ship well to my husband’s cousin in college. It looks like she will be getting some scones in her package!

So off I went to bake some fall flavored goodies. As soon as my house started to fill with the scents of apples and spice, my memories of that wretched weatherman began to diminish. So now I can spend the week filling my spirits with fall goodness, even if I have to come to reality when I walk out of my front door and the 90 degree heat hits me.

Oh yeah, and these tasted delicious too!

scone retake 1 cropped

scone small

Apple Cinnamon Scones

adapted from Good Things Catered

2 1/4 cups all purpose flour
1/3 cup light brown sugar
1 tablespoon baking powder
1 1/2 teaspoons cinnamon
1/4 teaspoon nutmeg
1/8 teaspoon cloves
1/4 teaspoon salt
1 stick (8 Tbsp) butter, chilled and cut into small pieces
1 egg
1/4 cup applesauce (I used unsweetened)
1/4 cup milk
1 teaspoon vanilla extract
2 cups apples, cored, peeled and diced (about 2 medium to large apples)

Cinnamon Glaze:
4 1/2 tablespoons powdered sugar
1/8 teaspoon cinnamon
2 teaspoons water

Preheat oven to 350 degrees F. and line 2 baking sheets with parchment paper.

In a small bowl, combine egg, applesauce, milk, and vanilla; whisk to combine thoroughly and set aside.

In a large bowl combine flour, sugar, baking powder, cinnamon, nutmeg, cloves, and salt; whisk to combine.

Using a pastry cutter or two knives, cut butter into flour until all pieces are smaller than pea-sized. Add apples and toss to coat.

Add wet ingredients to dry and mix in lightly with fork until dough just comes together. Turn dough out onto well floured work surface and pat into a large ball. Cut dough in half. Shape half of dough into a flat disk shape and cut into 8 slices.

Place on baking sheet and repeat with other half of dough. Bake until they turn slightly brown, about 25-30 minutes.

Remove from oven and let cool on baking sheets for 10 minutes. Transfer to a wire rack and let cool completely.

In a small bowl, combine the powdered sugar, cinnamon and water; whisk until completely smooth. When scones have cooled completely, drizzle the glaze across the top of each with a spoon or fork. Let dry completely before storing.

Yields 16 Scones

Heavenly Banana Bars

I try and pull inspiration for recipes and cooking techniques from all different sources. I watch my fair share of Food Network, subscribe to a ton of magazines, own quite a few cook books and frequent some cooking boards online. Those are the places that I probably get most of my inspiration from. Although those are all wonderful resources, I am always looking for something new to change things up a bit. I recently started visiting Tastespotting and Food Gawker, and they have become wonderful resources. Not only do you get to look at beautiful food photography, but all of those photos are linked to great recipes and ideas. I love these sites too because there is such a variety of information.

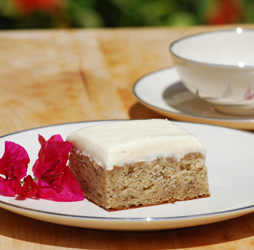
During one of my recent visits I saw a photo of delicious looking cake slices. They looked yummy enough for me to click and see where they led to. The photo took me to an adorable blog called My Baking Addiction, which is put out by Jamie. Not only did I find a fabulous sounding recipe, but I also found a wonderful new site for sweet treats! After reading over the recipe and seeing that I had two sad looking bananas hanging in my kitchen, I knew I had to make this for the Labor Day get together we would be attending.

Oh, and did I mention that this cake is topped with cream cheese icing?? This little recipe was just winning my heart over more and more by the minute. And win my heart over it did! Not only my heart, but the hearts of just about everyone who tried it. My uncle, who never eats desserts, came over and took three pieces on a plate to hide away for himself for later. Thank goodness I made the last minute decision to cut the larger pieces I made in half in order to create more, haha.

I should also mention that this is a very easy, fuss free recipe. How could you go wrong with an amazingly delicious cake that that doesn’t take a whole lot of effort? I suggest you go out and make this as soon as possible!

DSC_0054-cropped

Banana Bars with Vanilla Cream Cheese Icing

adapted from My Baking Addiction, originally seen on allrecipes.com

Cake:
1/2 cup butter, softened
1 1/2 cups white sugar
2 eggs
1 cup plain Greek yogurt (I actually mixed a little plain with a bit of vanilla flavored that I had on hand)
1 teaspoon vanilla extract
2 cups all-purpose flour
1 teaspoon baking soda
1/4 teaspoon salt
1 teaspoon cinnamon
1 cup mashed ripe bananas (about 2 large bananas)

Icing:
2 (8) ounce package cream cheese, softened (I used 1/3 less fat)
1 stick unsalted butter, softened
1 1/2 lbs. confectioners’ sugar ( adjust sugar for desired thickness and sweetness)
2 teaspoons vanilla extract

Preheat oven to 350 degrees F. Grease a 9×13 inch pan.

In a large bowl, cream together the butter and sugar until smooth. Beat in the eggs, one at a time, then stir in the yogurt and vanilla.

Combine the flour, baking soda, salt and cinnamon; stir into the batter. Finally, mix in the mashed banana. Spread evenly into the prepared pan.

Bake for 25-30 minutes in the preheated oven, until a toothpick inserted into the center comes out clean. Allow bars to cool completely before frosting with the cream cheese icing.

In the bowl of your mixer fitted with the paddle attachment, mix cream cheese and butter until smooth. Gradually add in the confectioners’ sugar and mix until smooth and creamy. Stir in vanilla extract. Spread on cooled cake.  Refrigerate until ready to serve.

*This recipe creates a large amount of icing.  You could probably get away with making half of the recipe to ice this cake.  Although, there is nothing wrong with having leftover cream cheese icing hanging out in your refrigerator!

What to do with the buttermilk..

I decided to make a red velvet cake for Father’s Day this year (I’ll blog about it as soon as I get the pictures from my mom). The recipe called for buttermilk and as I went shopping for the ingredients I found out that I couldn’t buy just a small container of buttermilk, I had to buy a whole liter. Now what do I do with the 3 cups of buttermilk I have left in my refrigerator?? I went to the ladies on the What’s Cooking board to see if they had any tried and true recipes that call for buttermilk. I received four or five recipes that all sounded great so I then had to figure out which to make. Since I would be making this on a weeknight after work (which means I will be exhausted) I decided to go with one that would be the least messiest and the least amount of work. I went with a pound cake. Thanks to thatgirlang I ended up with a great cake that was a crowd pleaser at work. Thanks Angie! This also gave me the opportunity to use a pretty bundt pan that I received as a bridal shower gift and completely forgot I had.

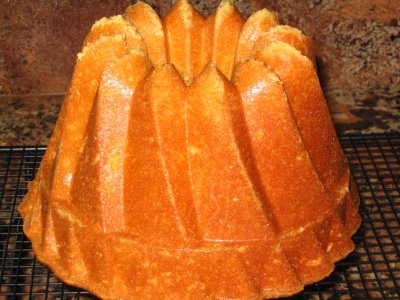
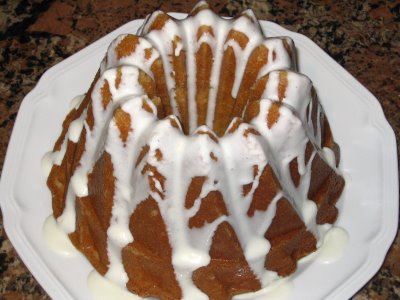
I have been trying to experiment and be more creative in the kitchen rather than always following recipes word for word, so I took her base recipe for the cake and modified it a tiny bit. Since the cake had lemon extract in it I decided to add some lemon zest as well. I also seem to find that pound/bundt cakes can be a bit bland for my taste so I chose to add a cream cheese glaze to it. I crossed my fingers that it would all turn out okay in the end and luckily it did. I was also so excited that my cake came out of the pan perfectly! I was a little worried because of the design aspects of the pan but I guess all of the greasing and flouring paid off, whew!

It was a delicious cake; very moist and tasty. It is a perfect cake to serve during breakfast or brunch because it isn’t terribly sweet. Everyone kept complimenting on how beautiful it was. I couldn’t take much credit on that though…the pan did all of that work, lol. ; )

cake1

Buttermilk Pound Cake with Cream Cheese Glaze

adapted from Angie’s recipe at Angie’s Simple Cooking
3 cups all-purpose flour, sifted
1/4 tsp. baking soda
1/2 tsp. salt
1 cup butter
3 cups white sugar
6 eggs
1 tsp. lemon extract
1 tsp. vanilla extract
1 cup buttermilk
zest of 1 lemon
cream cheese glaze (recipe follows)

Preheat oven to 325 degrees F. Grease and flour one 9 or 10 inch tube pan. Mix together the flour, baking soda and salt. Set aside.

In a large bowl, beat butter with sugar. Mix in the eggs, one at time, beating well after each addition. Stir in the lemon and the vanilla extracts. Gently mix in flour mixture alternately with the buttermilk. Stir in the lemon zest. Pour batter into the prepared pan.

Bake in preheated oven for 90 minutes. Keep an eye on it though because mine was done in 75 minutes. Do not open oven door until after one hour. When cake begins to pull away from the side of the pan it is done. Let cool in pan for 10 minutes, then turn out onto a wire rack and cool completely.

Note: I ended up moving the oven rack to the notch just under the center because as the cake started to rise it got a little too close to the top of the oven and I was afraid it would burn.

cake-glaze

Cream Cheese Glaze

adapted from Martha Stewart’s Baking Handbook
4 oz. cream cheese, softened
1/2 cup confectioners’ sugar, sifted
pinch of salt
1 tbs. freshly squeezed lemon juice (I added an additional 1/4 tsp.)
3 tbs. milk
1 tsp. lemon zest (about 1/2 of a lemon)

Beat together the cream cheese, sugar and salt until all is incorporated. Add the lemon juice and milk, mix well. Stir in the lemon zest. Pour over the cooled cake.

Note: If the glaze is too think, add milk 1 tsp. at a time.