A Grandma Approved Treat

When we go to family gatherings I always try to bring a sweet treat. I love to bake but I don’t do as much as I would like because it is just Greg and I. So I jump at any opportunity I can find to make some yummy baked goods.

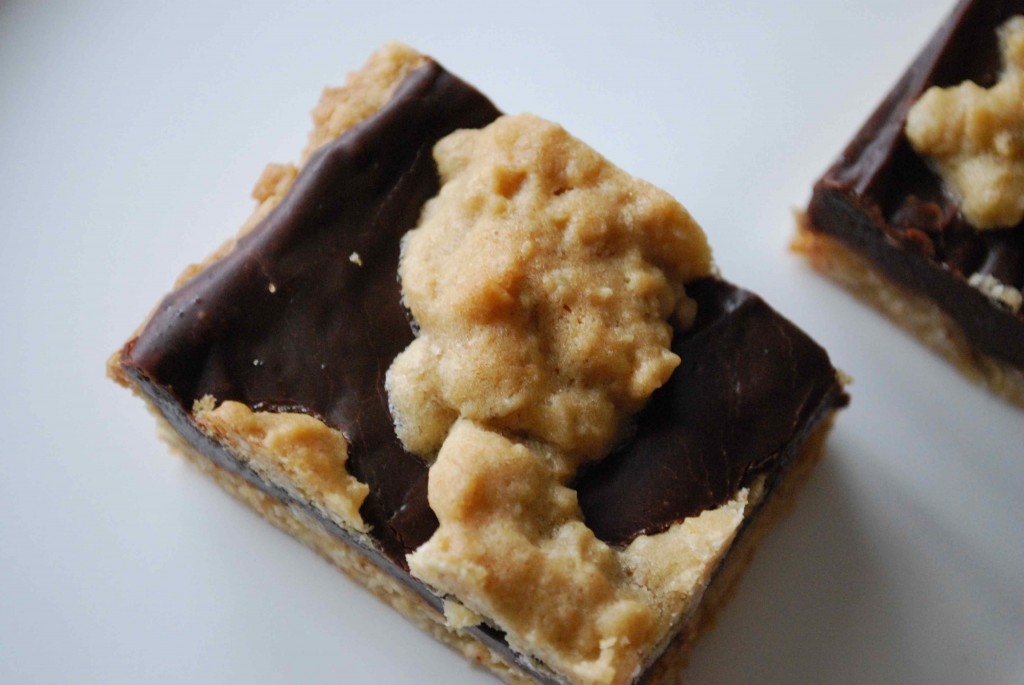
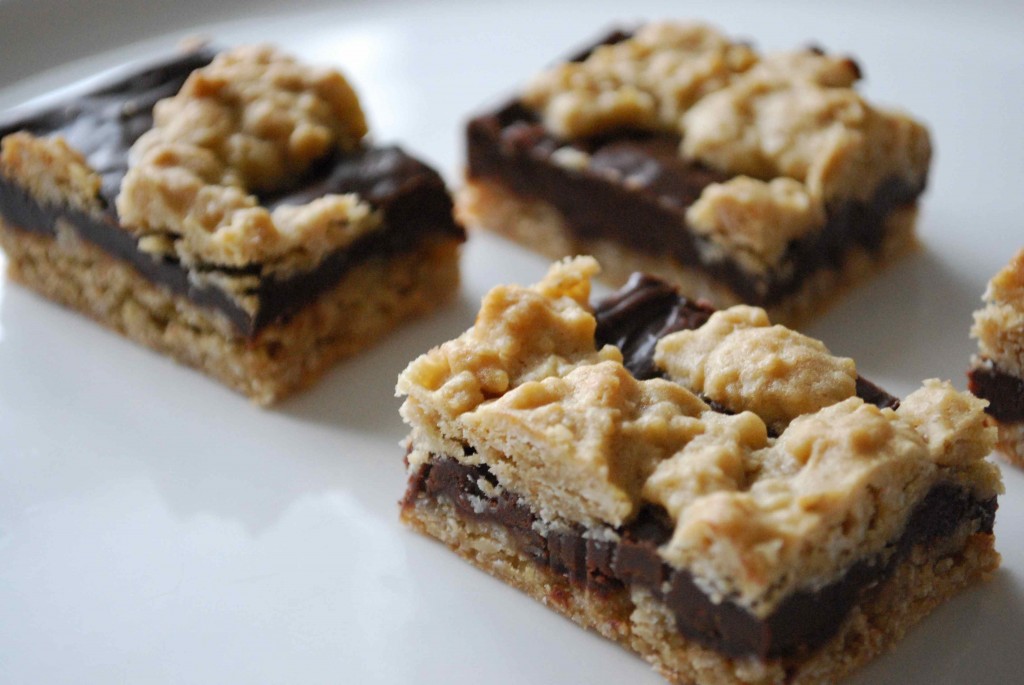
I always try to make an array of things that I know most people will like. Not only that, but if it is a casual gathering I also try and make something that is simple to grab and munch on at each guest’s leisure. While searching for a new recipe for one of the many gatherings we attended this summer, I found a delicious recipe from The Baking Blonde. Oatmeal Fudge Bars! That is a combination that most people would not snub their nose at. Not only that, but it was a recipe from her grandma, so how could you go wrong with that??

These bars were rich and delicious. They were a definite hit at the barbeque we attended. So if you are looking for a sweet treat that is finger friendly, I would definitely give this a shot.

oatmeal fudge bars 3

oatmeal fudge bars 2

Oatmeal Fudge Bars

Courtesy of The Baking Blonde

2 1/2 cups flour
1 teasponn baking soda
1 teaspoon salt
1 cup butter, softened
2 cups brown sugar
2 eggs
2 teaspoons vanilla
3 cups quick cooking oatmeal.

2 cups semi-sweet chocolate chips
1 can sweetened condensed milk (15 oz.)
2 tablespoons butter
1 teaspoon salt
2 1/2 teaspoons vanilla

Preheat oven to 325.
Grease and flour a 10×15 jelly roll pan.

In a large bowl, sift together flour, baking soda and salt. Set aside.
In a large mixing bowl, beat together softened butter and brown sugar until light and fluffy.
Add eggs, one at a time and beat until combined. Add vanilla and mix well.
Slowly add the sifted flour mixture and mix until combined. Stir in oatmeal.
Gently spread 2/3 of the mixture into the bottom of the prepared pan. Reserve the rest for topping.

Making the filling:
Over Medium-Low heat, melt together chocolate chips, sweetened condensed milk, 2 tablespoons butter, and salt. Stir until smooth. Remove mixture from heat and stir in vanilla.
Evenly pour filling mixture over the crust but keep the filling about a 1/4 inch away from the side of the pan so it does not stick to the pan while baking. Evenly dollup the remaining oat mixture on top of filling. Bake for 25-30 minutes or until topping is light brown and fudge layer is set but not solid. Don’t overbake these bars or they can become dry.

Cool in pan on rack until set. You can chill them if you need them to set up faster.

Keep stored in an airtight container either room temp or in the fridge.

Cold, Sweet and Delicious

Every month I try to make sure I go over to Joelen’s Culinary Adventures to see what she has planned for her monthly Tasty Tools event. Of course I visit her wonderful blog more than once a month, but sometimes I get busy and completely forget to check out what events she has going. Well, I managed to remember this month and found out that the June’s choice tool was the ice cream maker. After thinking about it, I thought that I wouldn’t get around to making any ice ream this month and I would wait and see what she would choose for next month.

Fast-forward to the end of the month; I made a delicious strawberry cake for Father’s Day and had quite a bit of leftover strawberry puree. I was originally planning on freezing it into small portions for smoothies. Well, as I was portioning it out, I decided that a strawberry sorbet would be divine for these hot summer days. Of course it then dawned on me that it would give me the opportunity to use my ice cream maker. Yay, I would get to participate in Tasty Tools after all!

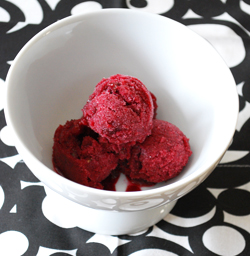
I began searching for sorbet recipes and found a great one over at Epicurious by Bon Appétit. I did realize that I didn’t have quite enough strawberries though, but I did have a bag of blueberries in the freezer. So my strawberry sorbet quickly turned into a “berry” sorbet. Well, what are berries without a little chocolate? To me, the mixture of a berry ice cream or sorbet with semi-sweet or dark chocolate chips is heaven. Okay, so now I have a berry chocolate chip sorbet. Yum!

Oh, and YUM is right! I got to work on my concoction and I was NOT disappointed. Greg snubbed his nose at the thought of the blueberries when I first told him what I was doing. Ha, that snub didn’t last long after he took a bite that night. The outcome was delicious. A sweet tartness with a hint of chocolate, what more could a girl ask for?

Sorbet-1

frozen-machine-rev1

Berry Chocolate Chip Sorbet

Adapted from Bon Appétit

1 1/3 cups water
2/3 cup sugar

10 ounces strawberries, hulled
6 ounces blueberries
2.5 tbs. fresh orange juice
2.5 tbs. fresh lemon juice
1 tsp. lemon zest
1/3 cup mini semi-sweet chocolate chips

Stir 1 1/3 cups water and sugar in heavy medium saucepan over high heat until sugar dissolves. Boil 5 minutes.

Puree strawberries and blueberries in food processor until smooth. Add the berry puree, orange and lemon juices and lemon zest to sugar syrup; stir to blend. Cover and refrigerate until cold, about 2 hours.

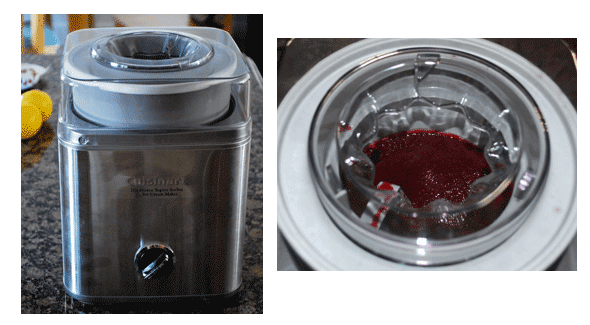
Process berry mixture in ice cream maker according to manufacturer’s instructions; adding the chocolate chips during the last 5 minutes.

-The sorbet does become very solid after freezing overnight. You may choose to add a tablespoon of vodka to the mix to help keep the sorbet from getting too solid. You can also let it sit out about 15 minutes before serving.

Daring Bakers’ June Challenge: Bakewell Tart

The June Daring Bakers’ challenge was hosted by Jasmine of Confessions of a Cardamom Addict and Annemarie of Ambrosia and Nectar. They chose a Traditional (UK) Bakewell Tart… er… pudding that was inspired by a rich baking history dating back to the 1800’s in England.

Daring Bakers’, you ask? Yup, Daring Bakers’ is a group that I recently joined in hopes of being exposed to and learning new baking styles, techniques, traditions, etc. I will be participating in it monthly and I will reveal my latest challenge outcomes on the 27th of each month, so keep an eye out for my new adventures. I am very excited to see what’s to come!

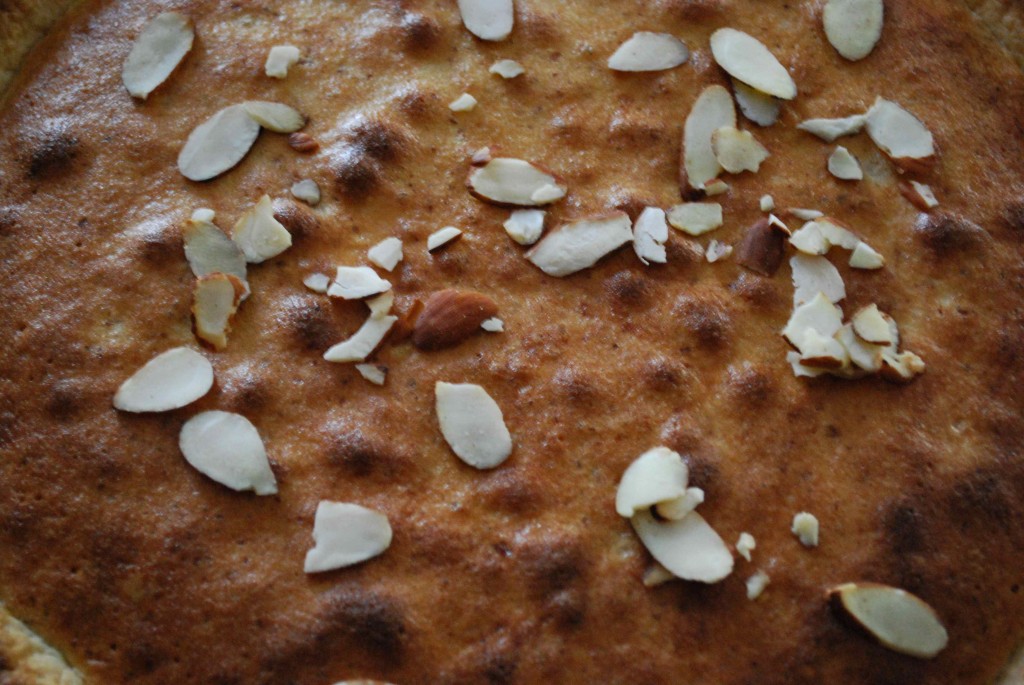
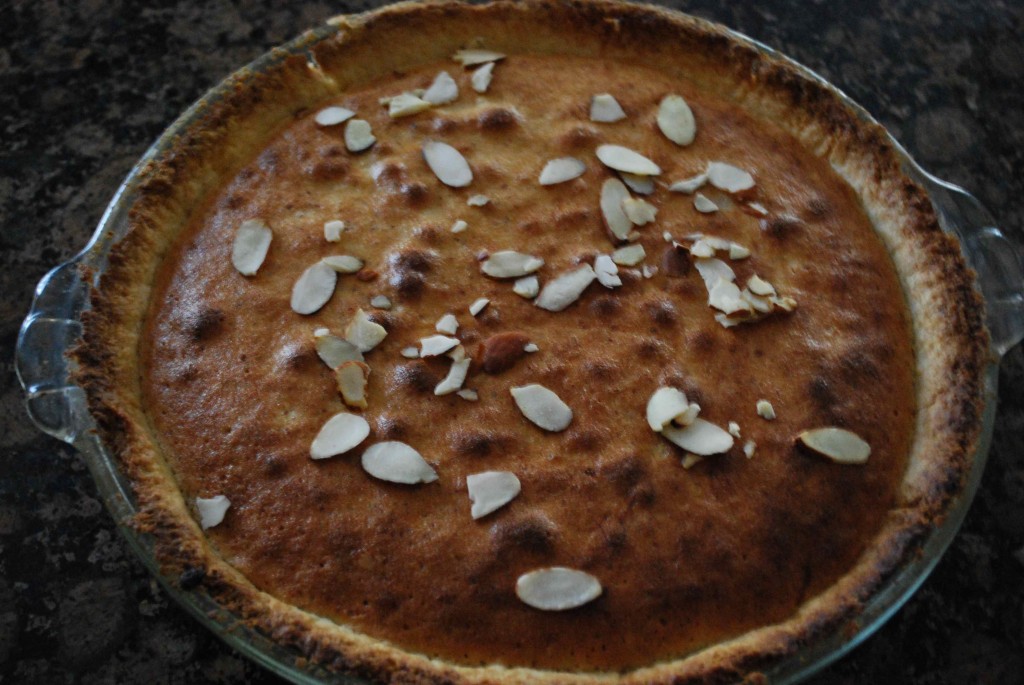
Okay, so as mentioned above, June’s challenge was a Bakewell Tart. I honestly had never even heard of this style tart before, let alone ever tried it. So this was definitely a whole new experience for me and my love of baking. Oh, and an experience it was! I must admit that my first challenge outcome was a bit of a flop. I mean, it’s edible and it tastes pretty good, but I had a tad bit of trouble with the baking time and the crust browning too quickly. Not to mention that the center of the frangipane was not quite cooked all of the way. Ooops! But hey, that is what this Daring Bakers experience is all about; learning about things I have never tried before and taking a stab at it. Practice makes perfect, right? In the end though I was pretty much able to fix my problems and end up with quite a yummy little dessert. It couldn’t have been too bad since Greg liked it and he isn’t really even a fan of those types of desserts.

Although I ran into a couple snafus, I must admit that this really isn’t that difficult of a dessert to make. There are a number of steps, but they are all quite simple. I think my biggest issue was the fact that I can’t for the life of me judge this oven we have. As an outcome, the outside cooked quicker than the inside, making me think that my oven had just cooked it faster (since that is normally what it tends to do). Next time I will just cover the top with foil if it browns too quickly. Rookie mistake!

Okay, so on to the tart…
DB 3

DB 4

Bakewell Tart…er…pudding

Makes one 23cm (9” tart)
Prep time: less than 10 minutes (plus time for the individual elements)
Resting time: 15 minutes
Baking time: 30 minutes
Equipment needed: 23cm (9”) tart pan or pie tin (preferably with ridged edges), rolling pin

One quantity sweet shortcrust pastry (recipe follows)
Bench flour
250ml (1cup (8 US fl. oz)) jam or curd, warmed for spreadability
One quantity frangipane (recipe follows)
One handful blanched, flaked almonds

Assembling the tart

Place the chilled dough disc on a lightly floured surface. If it’s overly cold, you will need to let it become acclimatised for about 15 minutes before you roll it out. Flour the rolling pin and roll the pastry to 5mm (1/4”) thickness, by rolling in one direction only (start from the center and roll away from you), and turning the disc a quarter turn after each roll. When the pastry is to the desired size and thickness, transfer it to the tart pan, press in and trim the excess dough. Patch any holes, fissures or tears with trimmed bits. Chill in the freezer for 15 minutes.

Preheat oven to 200C/400F.

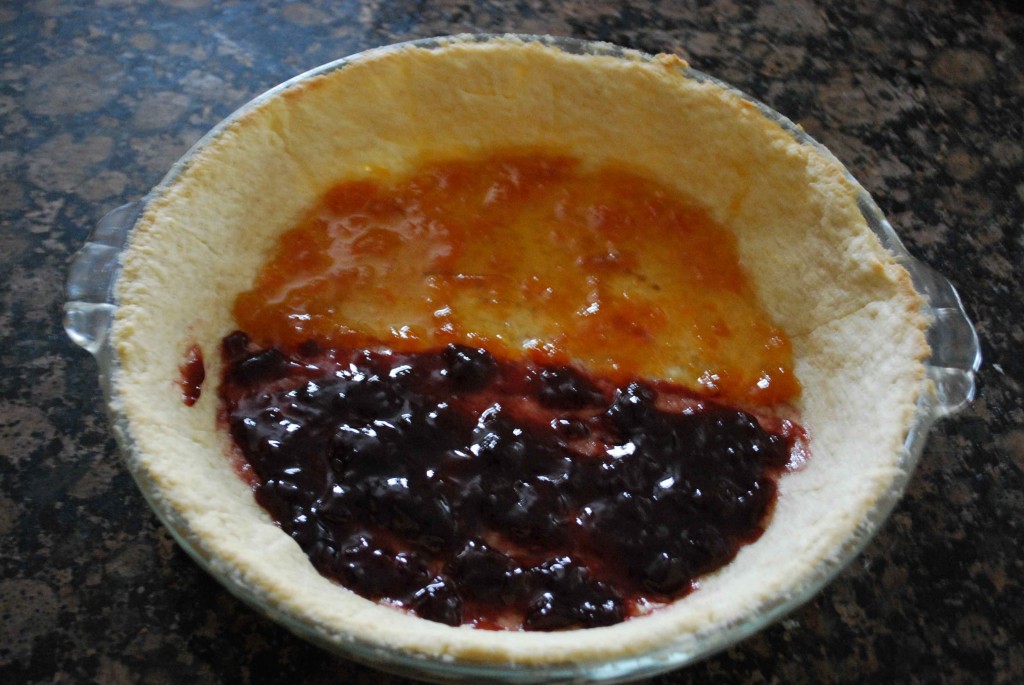
Remove shell from freezer, spread as even a layer as you can of jam onto the pastry base. Top with frangipane, spreading to cover the entire surface of the tart. Smooth the top and pop into the oven for 30 minutes. Five minutes before the tart is done, the top will be poofy and brownish. Remove from oven and strew flaked almonds on top and return to the heat for the last five minutes of baking.

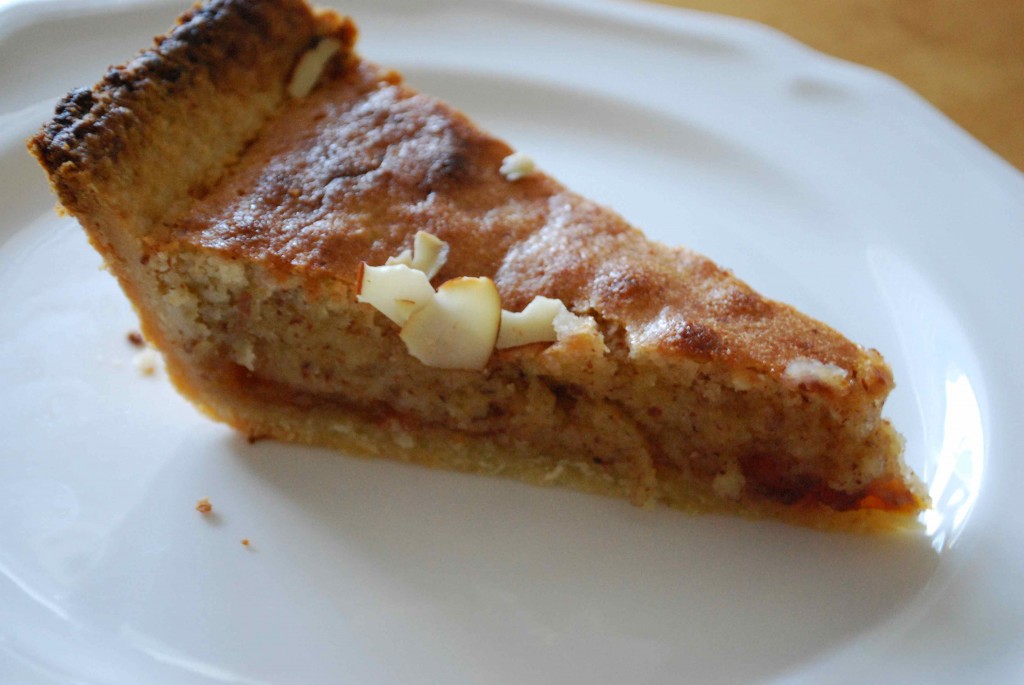
The finished tart will have a golden crust and the frangipane will be tanned, poofy and a bit spongy-looking. Remove from the oven and cool on the counter. Serve warm, with crème fraîche, whipped cream or custard sauce if you wish.

When you slice into the tart, the almond paste will be firm, but slightly squidgy and the crust should be crisp but not tough.
cook

Sweet Shortcrust Pastry

Prep time: 15-20 minutes
Resting time: 30 minutes (minimum)
Equipment needed: bowls, box grater, cling film

225g (8oz) all purpose flour
30g (1oz) sugar
2.5ml (½ tsp) salt
110g (4oz) unsalted butter, cold (frozen is better)
2 (2) egg yolks
2.5ml (½ tsp) almond extract (optional)
15-30ml (1-2 Tbsp) cold water

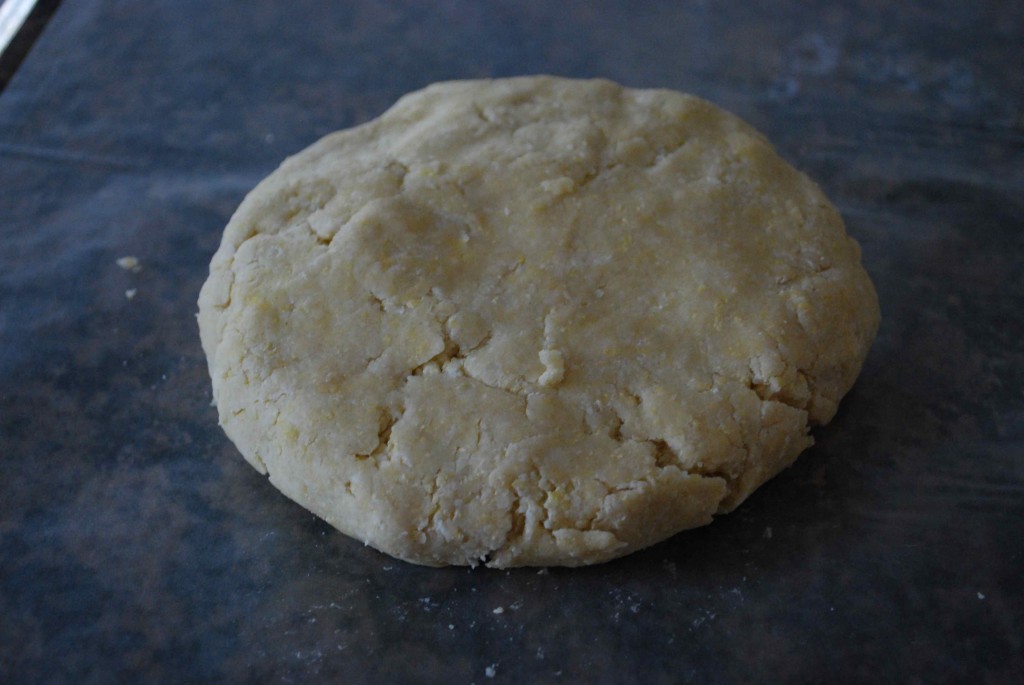
Sift together flour, sugar and salt. Grate butter into the flour mixture, using the large hole-side of a box grater. Using your finger tips only, and working very quickly, rub the fat into the flour until the mixture resembles bread crumbs. Set aside.

Lightly beat the egg yolks with the almond extract (if using) and quickly mix into the flour mixture. Keep mixing while dribbling in the water, only adding enough to form a cohesive and slightly sticky dough.

Form the dough into a disc, wrap in cling and refrigerate for at least 30 minutes.
DB 2

This time I chose to use store bought raspberry and apricot jam.

Frangipane

Prep time: 10-15 minutes
Equipment needed: bowls, hand mixer, rubber spatula

125g (4.5oz) unsalted butter, softened
125g (4.5oz) icing sugar (powdered sugar)
3 (3) eggs
2.5ml (½ tsp) almond extract (or vanilla extract)
125g (4.5oz) ground almonds
30g (1oz) all purpose flour

Cream butter and sugar together for about a minute or until the mixture is primrose in color and very fluffy. Scrape down the side of the bowl and add the eggs, one at a time, beating well after each addition. The batter may appear to curdle. Don’t worry, that is the way it should look. After all three are in, pour in the almond extract and mix for about another 30 seconds and scrape down the sides again. With the beaters on, spoon in the ground nuts and the flour. Mix well. The mixture will be soft, keep it’s slightly curdled look (mostly from the almonds) and retain its pallid yellow color.
DB 5

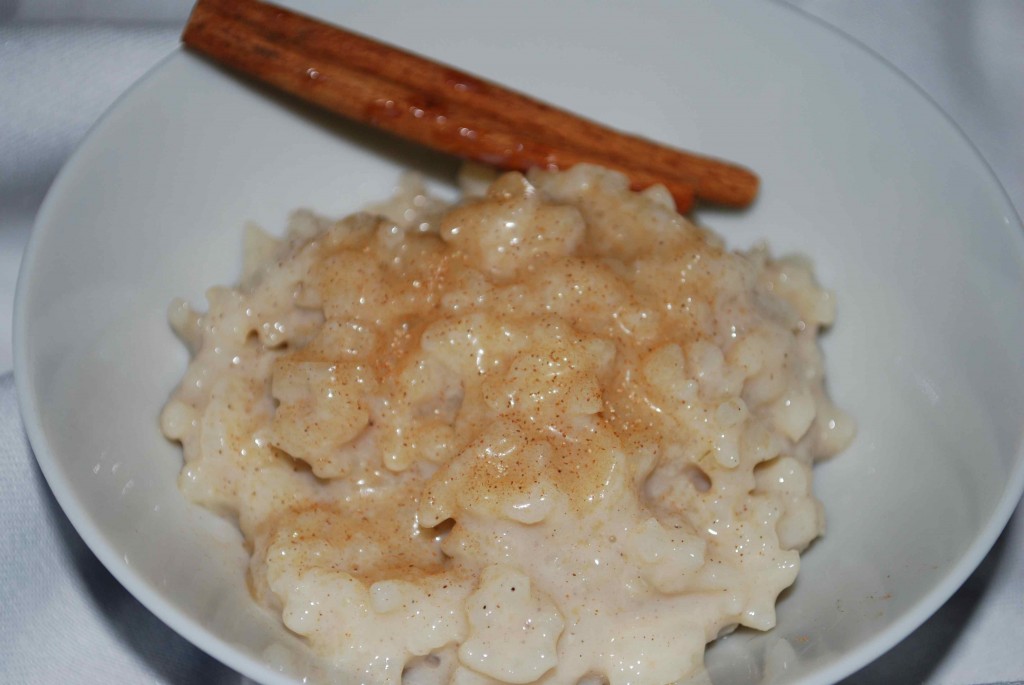
Lightened Up Rice Pudding

It is absolutely no secret that I have a sweet tooth. Unfortunately you mix that with the fact that I gain 10 pounds by just looking at dessert and it doesn’t make for a great combination. At least my waistline doesn’t think so. With that said, I am always looking for sweet treats that I don’t have to feel guilty about.

When we lived in Clearwater we used to frequent a little Greek restaurant that we loved. A few times I indulged in their rice pudding and thought it was delicious. I never really thought to make some of my own until I recently saw a recipe for a lightened up version. I figured that it was nutritious and would tame my sweet tooth, so I couldn’t go wrong.

The recipe was very easy to make and it could feed quite a few people. I actually took some over to my grandmother and she really enjoyed it. It is light and slightly less sweet than your traditional rice pudding. It’s perfect for an evening treat when you are craving a little something sweet.

rice-pudding1

Very Vanilla Rice Pudding

Courtesy of The Food You Crave by Ellie Krieger

2 cups water
1 cup Arborio rice
3 cups vanilla soy milk
¼ cup sugar
Pinch of salt
1 cinnamon stick
½ tsp. vanilla extract
¼ tsp. ground cinnamon, plus more for dusting
¼ tsp. ground nutmeg, plus more for dusting

Preheat oven to 375 degrees.

Bring the water to a boil in a medium, heavy, ovenproof saucepan. Add the rice, cover, reduce the heat to low, and simmer until the rice is nearly cooked, about 20 minutes.

In a large bowl, whisk together the soy milk, sugar, and salt. When the rice is cooked and still hot, add the soy milk mixture and cinnamon stick. Cover, place in the oven, and cook for 45 minutes.

Remove from the oven, uncover, and remove the cinnamon stick. Stir in vanilla, ground cinnamon, and nutmeg. The pudding will be slightly liquidy; the liquid will continue to absorb into the rice and thicken as the pudding cools. Distribute among 8 bowls. Dust with more cinnamon and nutmeg. Serve warm or at room temperature. The pudding will keep in the refrigerator in an airtight container for about 3 days.

Yields: 8 servings

Nutrition Facts (according to book)
Serving size: 2/3 cup
Calories: 154
Total Fat: 2 g
Cholesterol: 1.7 mg
Sodium: 59 mg
Carbohydrates: 36 g
Dietary Fiber: 0.7 g
Protein: 5 g

A little late, but worth it!

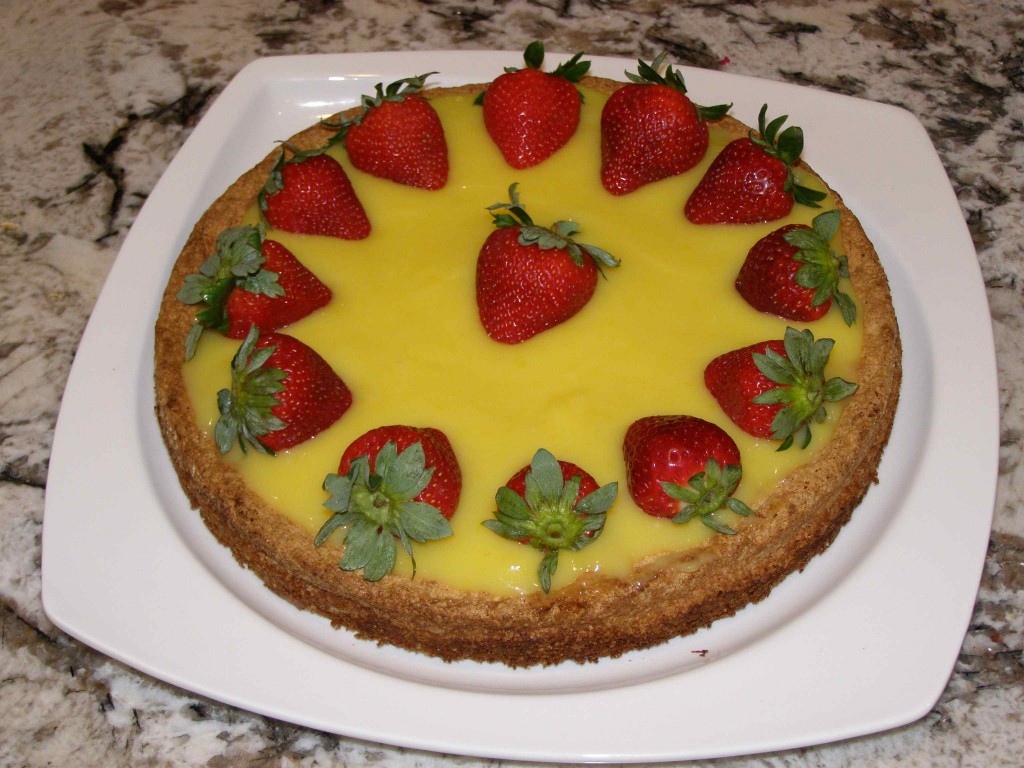
Passover has come and gone once again, but at least this year I was able to leave a lasting impression with dessert! I know this is a bit late, but better late then never….especially with this dessert! Passover desserts can be tricky and can become a bit redundant because there tends to be a few standbys that most people turn to. On top of that, no one really likes to bake in Greg’s family so I challenge myself to always make a wonderful dessert to bring, especially for Passover. The past couple of years I have just thrown together simple things last minute, but this year I really wanted to find a great recipe. All I can say is that Cooking Light has come through for me once again. I had been eying this beautiful lemon curd cake for a while and decided to finally make it sine it was Passover friendly.

This cake was AMAZING!! Everyone raved over it. Halfway through serving it Greg’s cousin started rationing the pieces and then horded the remaining bits for herself and practically licked the plate clean. It not only looked pretty but it was lemony and refreshing with a touch of cake. I will definitely make this recipe again and it will not be stored away for just Passover, as the matzo cake meal can easily be switched out with whole-wheat flour. It is perfect for any spring or summer gathering.

lemon-cake

Lemon-Almond Cake with Lemon Curd Filling

Courtesy of Cooking Light
Cooking spray
2 tsp. matzo cake meal (I ground up matzo meal)
4 large egg yolks
1 cup sugar
1/4 cup matzo cake meal
1 1/2 tsp. water
1/2 tsp. grated lemon rind
1 tsp. fresh lemon juice
1/4 tsp. salt
1/4 cup blanched almonds, ground
4 large egg whites
1 cup Lemon Curd (recipe follows)
2 cups fresh raspberries (I garnished with fresh strawberries)

Preheat oven to 350°.

Coat a 9-inch spring-form pan with cooking spray. Dust pan with 2 teaspoons matzo cake meal.
Place the egg yolks in a large bowl, and beat with a mixer at high speed for 2 minutes. Gradually add 1 cup sugar, beating until thick and pale (about 1 minute). Add 1/4 cup matzo cake meal, 1 1/2 teaspoons water, 1/2 teaspoon grated lemon rind, fresh lemon juice, and 1/4 teaspoon salt; beat just until blended. Fold in the almonds.

Place egg whites in a large bowl. Using clean, dry beaters, beat egg whites with a mixer at high speed until stiff peaks form. Gently stir one-fourth of egg whites into egg yolk mixture; gently fold in remaining egg whites. Spoon batter into prepared pan.

Bake at 350° for 35 minutes or until golden brown and set. Cool for 10 minutes in pan on a wire rack. Run a knife around edge of cake. Remove cake from pan. Cool completely on a wire rack. (Cake will sink in center as it cools.) Spread 1 cup Lemon Curd in center of cake, and top with raspberries (or whatever berries you prefer). Cut cake into wedges using a serrated knife. Serve immediately.

Lemon Curd

1/2 cup sugar
3 large eggs
2 tablespoons grated lemon rind
3/4 cup fresh lemon juice
2 tablespoons unsalted butter

Place sugar and eggs in a medium bowl; beat with a mixer at medium speed until blended. Gradually beat in rind and juice. Spoon mixture into a heavy-duty saucepan over medium heat. Add butter to pan; cook 5 minutes or until thick, stirring constantly (do not boil). Spoon mixture into a bowl. Cover surface with plastic wrap. Chill thoroughly.

Yields: 8 servings

Nutrition Facts 
Serving size: 1/8 of cake
Calories: 238
Total Fat: 6.6 g
Cholesterol: 149 mg
Sodium: 123 mg
Carbohydrates: 41.4 g
Dietary Fiber: 2.7 g
Protein: 5.9 g

Pearlicious

People who know me know that I love to cook, but I’m really passionate about baking. I don’t get to do it as much as I would like because I try not to keep too many sweets in the house. Many times I only bake if we have someplace to go and share it with others. I still have a sweet tooth though and I get an itch every once in a while to really want to bake something. So I try to find recipes that are low in calories and that Greg will eat. Yes, Greg is my other obstacle because he doesn’t really like cakes and such. As mentioned before, he loves brownies and cookies, but you can only make so many brownies and cookies.

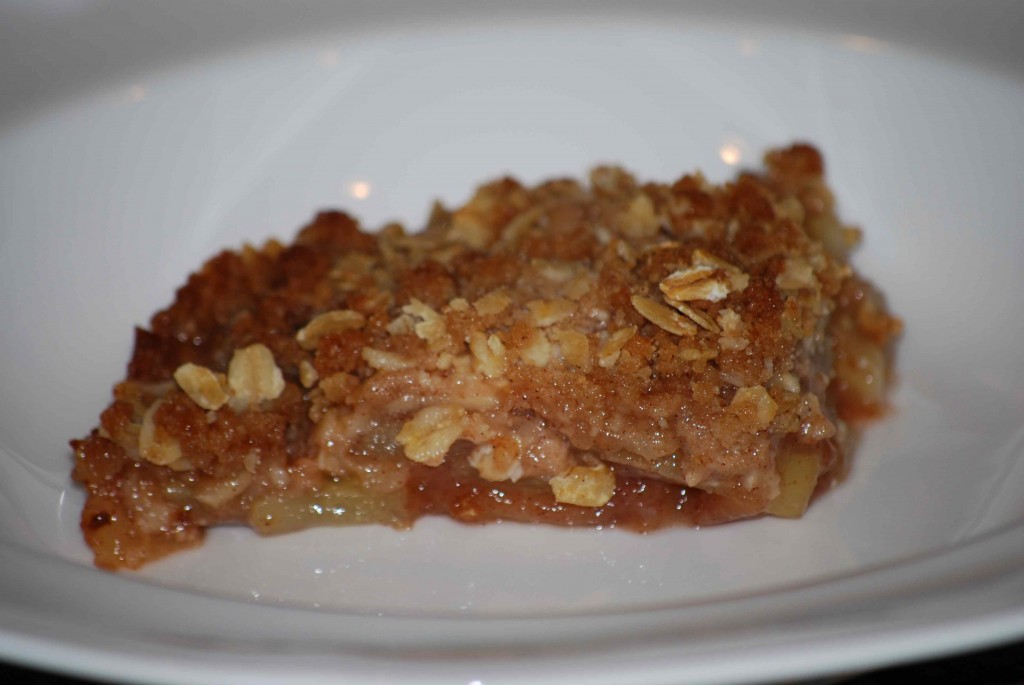
Well, during one of my urges to bake I came across a recipe for Harvest Pear Crisp. I figured there would be a 50/50 chance with Greg agreeing to this one. The disadvantage, he doesn’t really like pie type desserts. The advantage, he LOVES pears. I passed my first hurdle when he saw the recipe and said, yeah that looks good. With that said I proceeded with my dessert making.

The end verdict you ask? He loved it! Not only that, but I don’t like pears and I also loved it. I would like to try making it with apples or a apple/pear mix next time. This will definitely be a standby on the dessert list.

pear-crisp

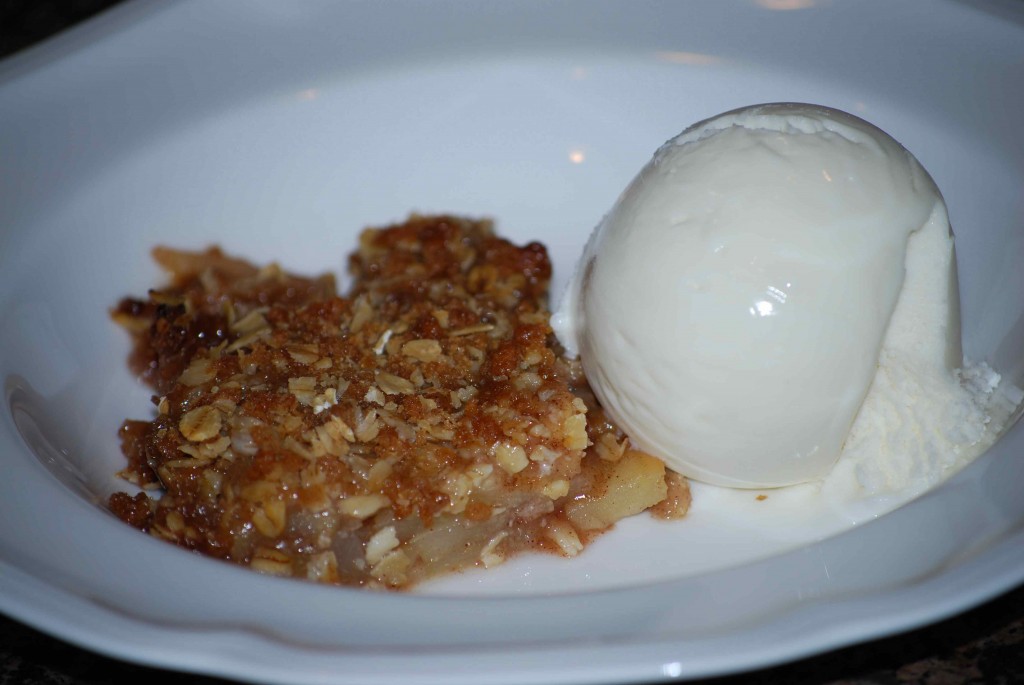
pear-crisp-2

Harvest Pear Crisp

courtesy of Cooking Light

6 cups of pears (your choice), cored and cut lengthwise into ½-inch-thick slices (about 3 pounds).
1 tbs. fresh lemon juice
1/3 cup granulated sugar
1 tbs. cornstarch
1 ½ tsp. ground cinnamon, divided
1/3 cup all purpose flour
½ cup packed brown sugar
½ tsp. salt
3 tbs. chilled butter, cut into small pieces
1/3 cup rolled oats
¼ coarsely chopped walnuts (I left these out)

Preheat oven to 375 degrees.

Combine pears and lemon juice in a 2-quart baking dish; toss gently to coat. Combine granulated sugar, cornstarch, and 1 teaspoon cinnamon; stir with a whisk. Add cornstarch mixture to pear mixture; toss well to coat.

Lightly spoon flour into a dry measuring cup; level with a knife. Place flour, 1/2 teaspoon cinnamon, brown sugar, and salt in a food processor; pulse 2 times or until combined. Add chilled butter; pulse 6 times or until mixture resembles coarse meal. Add oats and walnuts (if desired); pulse 2 times. Sprinkle flour mixture evenly over pear mixture.

Bake at 375° for 40 minutes or until pears are tender and topping is golden brown. Cool 20 minutes on a wire rack; serve warm or at room temperature.

I highly recommend serving it with a scoop of vanilla ice cream!

Sweets from the heart.

As I mentioned in my previous post, we made a special Valentine’s dinner in this year. It was fabulous and we enjoyed every minute of cooking and eating it. Along with the side dishes, I was also in charge of the dessert. Of course I wanted to make something special that we wouldn’t have everyday. Sometimes the dessert decision can be a bit of a challenge since Greg and I have different tastes. I love pretty much any kind of dessert, especially cakes and things that are incredibly indulgent. Greg on the other hand, he would be happiest with a cookie, brownie or bowl of ice cream. So, what was I to do??

Well, my original thought was to make individual chocolate lava cakes, as that is one of my all time favorite desserts. The more I thought about it though, I realized that this was not something Greg would enjoy as much. Valentines Day dessert had to be something we would both enjoy equally.

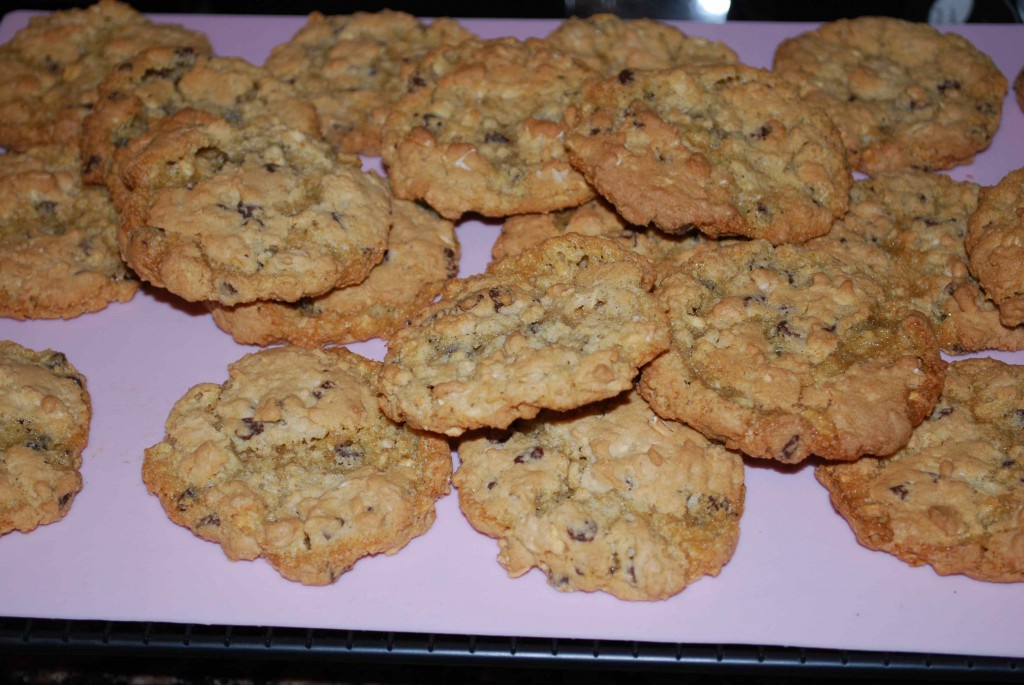
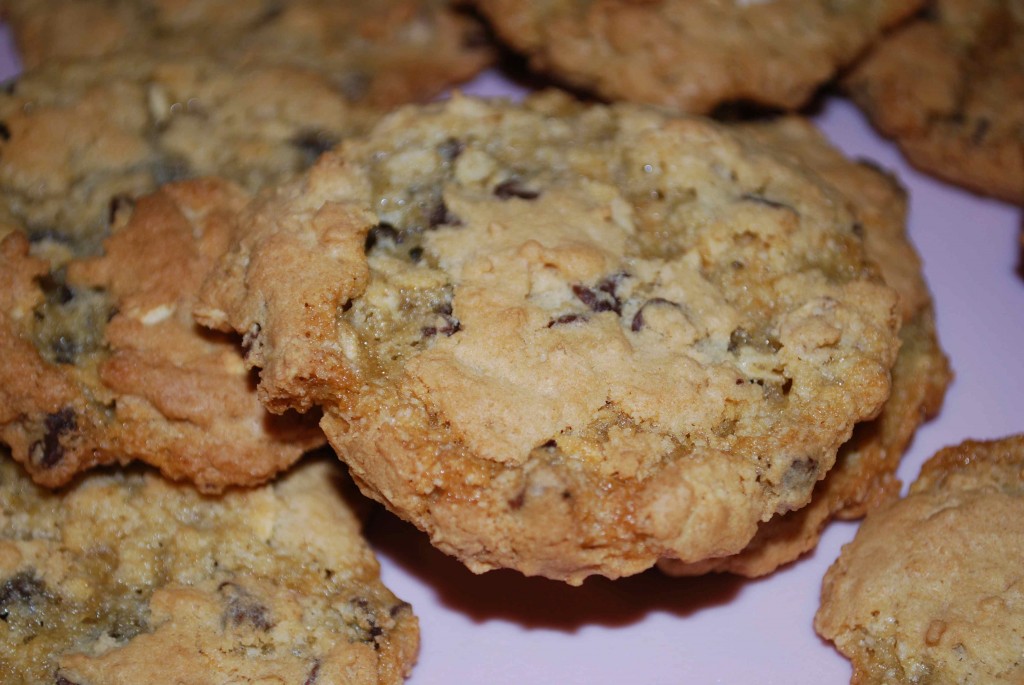
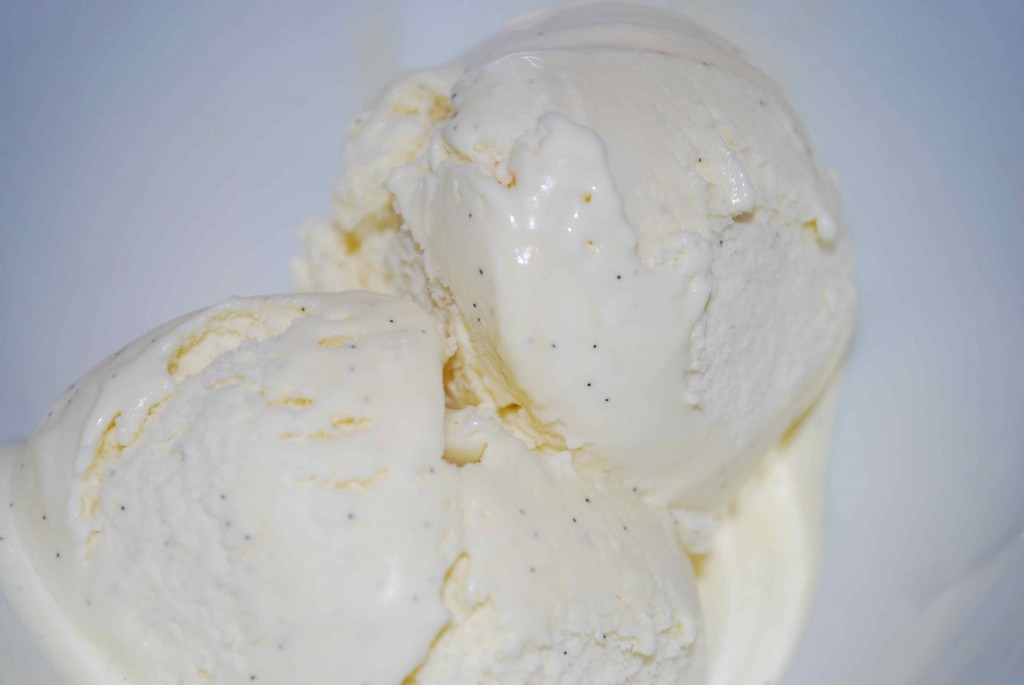
I don’t quite remember what triggered this thought in my head, but after much debate I finally figured out the perfect dessert that Greg would especially enjoy. Ice cream sandwiches made with oatmeal chocolate chip cookies (Greg’s favorite) and homemade vanilla bean ice cream. I had some vanilla beans in the closet that I have been meaning to use and we hadn’t put our ice cream machine to much use since we got it as a wedding gift.

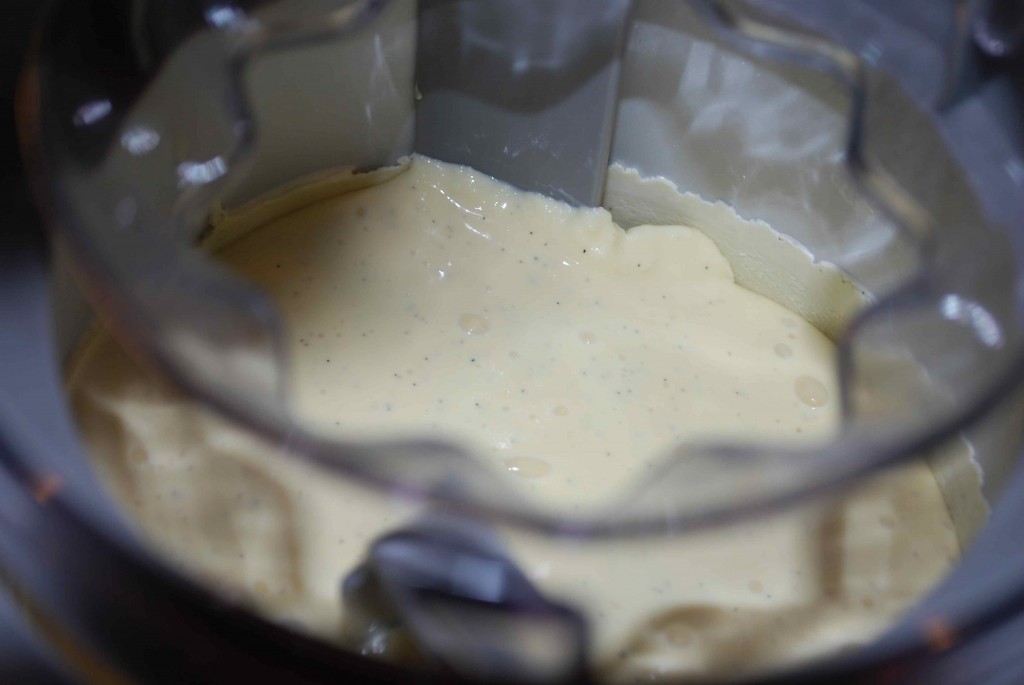
After realizing I couldn’t go wrong with this choice, I went to scrounge up some recipes. The cookie recipe I found on Cooking Light and adapted it. Honestly, I think they were the best homemade oatmeal chocolate chip cookies we have ever had. That is a major score since they are also lower in calories than most. I also came across an incredible vanilla bean ice cream recipe in the blog, Amber’s Delectable Delights, where she credits The Perfect Scoop by David Lebovitz. It was amazing and better than any store bought vanilla ice cream. By the way, I highly recommend a visit to Amber’s blog because she has tons of great recipes.

So we put these two great recipes together and had some yummy ice cream sandwiches. They were a bit messy when you bit into them, but they were worth the mess.

Unfortunately I never got a picture of the actual sandwiches, but I was able to snap some of the individual ingredients.

dsc_0036

dsc_0038

Oatmeal-Chocolate Chip Cookies

adapted from cookinglight.com
1 ¼ cups all-purpose flour (about 5 ½ ounces)
1 cup regular oats
¾ tsp. baking powder
½ tsp. baking soda
½ tsp. salt
¾ cup granulated sugar
½ cup packed brown sugar
1/3 cup butter, softened
1 ½ tsp. vanilla extract
1 large egg
½ cup semi-sweet minichips (next time I will probably add a few more)

Preheat oven to 350 degrees.

Lightly spoon flour into dry measuring cups; level with a knife.  Combine flour and next 4 ingredients (through salt), stirring with a whisk; set aside.

Place sugars and butter in a large bowl; beat with a mixer at medium speed until well blended.  Add vanilla and egg; beat until blended.  Gradually add flour mixture, beating at low speed just until combined.  Stir in the minichips.

Drop dough by tablespoons 2 inches apart onto baking sheets lined with parchment paper.  Bake at 350 degrees for 12 minutes or until edges of cookies are lightly browned.  Cool on pans 2 minutes.  Remove cookies from pans; cool on wire racks.

Yields: 3 dozen

dsc_0034

dsc_0009

Vanilla Ice Cream

courtesy of Amber’s Delectable Delights
1 cup whole milk
¾ cup sugar
2 cups heavy cream, divided
pinch of salt
1 vanilla bean, split in half lengthwise
6 large egg yolks
¾ tsp. vanilla extract

Warm the milk, sugar, 1 cup of cream, and salt in a medium saucepan. Scrape the seeds from the vanilla bean into the warm milk and add the bean as well. Cover, remove from the heat, and let steep at room temperature for 30 minutes.

Pour the remaining 1-cup cream into a large bowl and set a mesh strainer on top. In a separate medium bowl, whisk together the egg yolks. Slowly pour the warm mixture into the egg yolks, whisking constantly, then scrape the warmed egg yolks back into the saucepan.

Stir the mixture constantly over medium heat with a heatproof spatula, scraping the bottom as you stir, until the mixture thickens and coats the spatula. Pour the custard through the strainer (into the remaining 1-cup cream) and stir until cool over an ice bath.

Chill the mixture thoroughly in the refrigerator. When ready to churn, remove the vanilla bean, and then freeze the mixture in your ice cream maker according to the manufacturers instructions.

Lemony Sunshine

Back in January we had Greg’s mom and grandparent’s over to celebrate his mom’s birthday as well as mine. The thing is, my mother-in-law and I share the same birthday, January 7th (Greg and my sister also share the same birthday-Oct. 12th). I know, it is strange. Anyway, since Greg took me out to dinner on my birthday, we wanted to do something for his mom the following weekend.

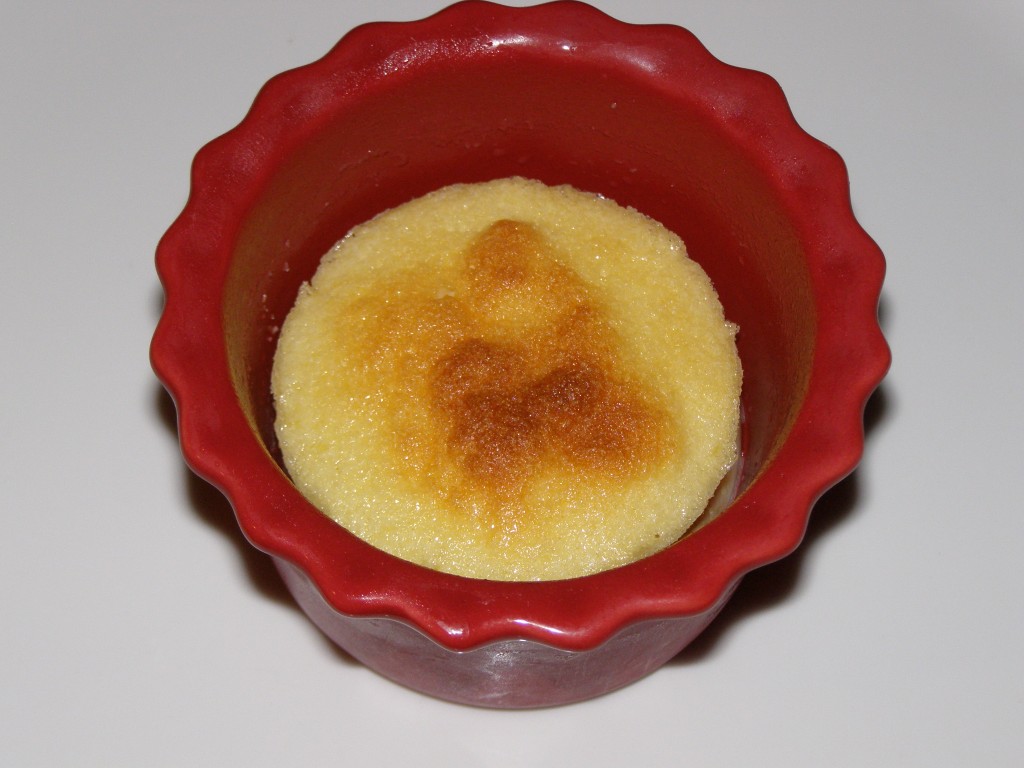
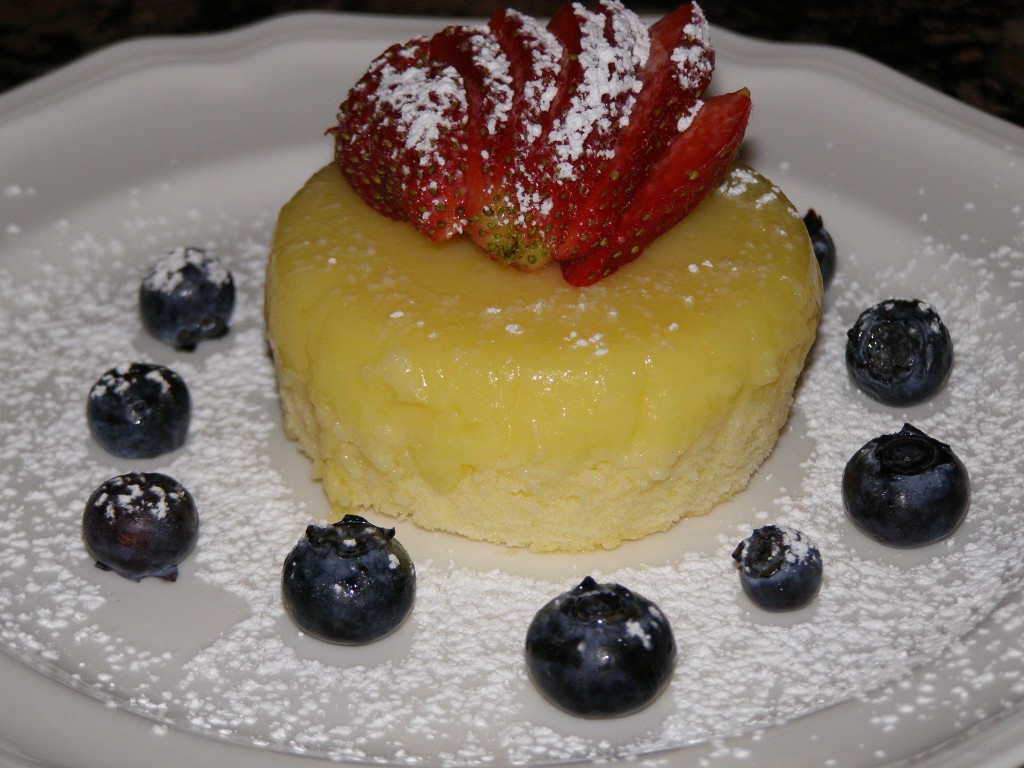
To our happiness, this “family” dinner with his side was also a success. Of course my main concern was the dessert. With the holidays just coming to a close, I was really tired of all the heavy desserts and was looking for something lighter, almost summery. When I found a Tyler Florence recipe for Lemon Pudding Cake with Fresh Mixed Berries, I knew that would be perfect. I also thought it would be fun to have individual servings of dessert, which this recipe was designed for, so it worked out great.

This recipe is so light and refreshing. I will definitely be making it again as spring and summer approach. It is a fairly easy dessert to put together but it really has the “wow” factor. It looks like you spent a lot more time than you actually did, but that can be your little secret. ;o)

p1010014

p1010019

Lemon Pudding Cake with Fresh Mixed Berries

courtesy of Tyler Florence and Food Network
1 tbs. unsalted butter
2/3 cup superfine sugar
2 eggs, seperated
2/3 cup reduced fat buttermilk
2 tbs. lemon juice
1 tbs. lemon zest
1/4 cup all-purpose flour
1/4 tsp. salt

Garnish:
Feel free to switch out the berries with whatever kind you choose. I used strawberries and blueberries.
1 cup fresh raspberries
1 cup fresh blueberries
1 cup fresh blackberries
2 tbs. confectioners’ sugar

Preheat oven to 325 degrees. Butter and lightly sugar 4 ramekins (about 1-cup size).

In a mixer, add egg yolks, buttermilk, lemon juice and lemon zest and beat until well combined. Reduce the speed to low and sift in flour, sugar and salt. Continue to mix until combined. Beat egg whites until you get stiff peaks then combine the 2 mixtures by gently folding them together, a little at a time. Divide evenly amongst ramekins then bake in a water bath – set ramekins in a roasting tray and fill with water halfway up the sides of the ramekins.

Bake for 60 minutes until the top springs back when gently pressed and the cakes have a nice golden brown color. Allow to cool slightly, then carefully invert onto a plate. Serve with fresh berries and dust with powdered sugar.

Yields 4 servings.

A few of my favorite things..

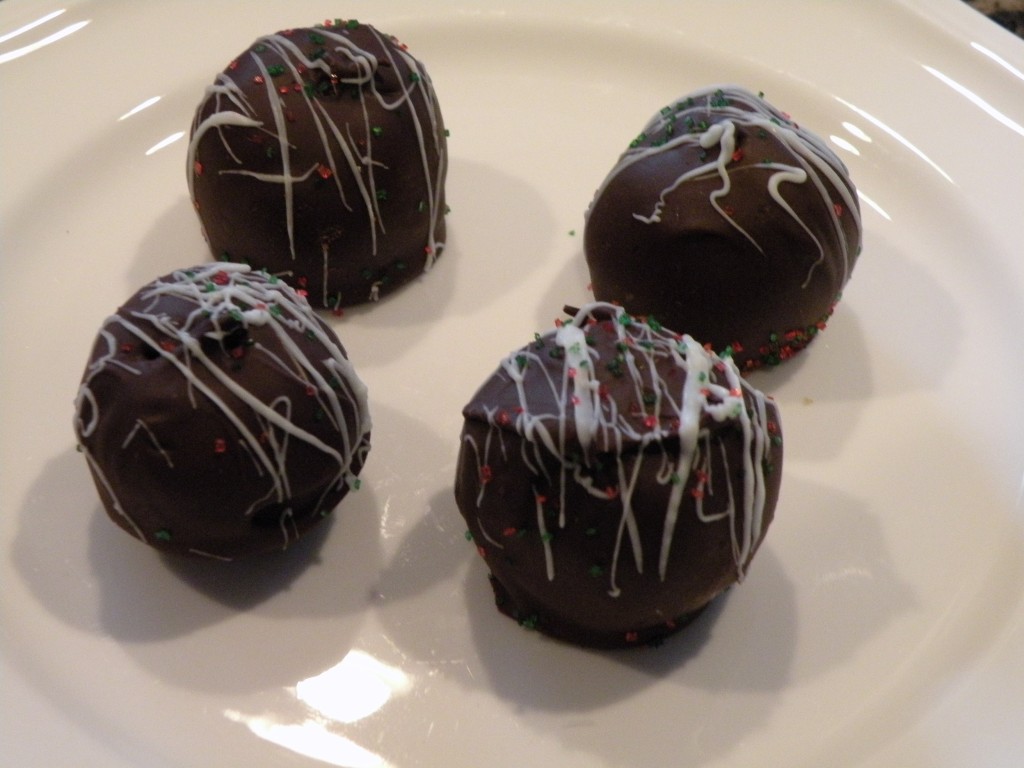
During the holidays I saw Oreo Truffles mentioned on the What’s Cooking board numerous times. You mention truffles and I am immediately intrigued. So I decided to look into these truffles that everyone spoke of. Pretty much crushed Oreos and cream cheese covered in chocolate….what more could a girl ask for? These definitely had to go on my “to make” list. I decided to whip a batch up for Christmas day. We would be going over to visit with family and I thought it would be the perfect treat. They are so incredibly easy to make, but they look like you purchased them at a high end chocolate store. Oh, did I forget to mention that they are also DELICIOUS!! I highly recommend these for any occasion. You can used whatever type of chocolate you prefer and you can change up the decorations. Just be prepared for them to disappear very quickly! :o)

dscn0104

Oreo Truffles

courtesy of lovestoeat’s weblog, originally from recipezaar.com

1 lb. Oreo cookies (3 sleeves) 8 ounces cream cheese, room temperature 1/2 tsp. vanilla extract 1 lb. milk chocolate 1/2 lb. white chocolate Using a food processor, grind cookies to a fine powder.

With a mixer, blend cookie powder, cream cheese and vanilla extract until thoroughly mixed (there should be no white traces of cream cheese).

Roll into small balls and place on wax-lined cookie sheet. (As suggested, I used my cookie scoop, refrigerated for a while, then rolled them and this made it a lot less messy).

Refrigerate for 45 minutes.

Line two cookie sheets with wax paper.

In a double-boiler, melt milk chocolate (I used a Pyrex dish over a pot).

Dip balls in chocolate and coat thoroughly.

With slotted spoon, lift balls out of chocolate and let excess chocolate drip off. (I used toothpicks to do this instead).

Place on wax paper lined cookie sheet.

In a separate double-boiler, melt white chocolate.

Using a fork, drizzle white chocolate over balls. (You may also choose to use decorative sprinkles or sugars for decorating).

Let cool.

Store in airtight container, in refrigerator.

Yields approximately 40 truffles.

Cookies n’ Cream Cake

As I mentioned in my last entry, we hosted a birthday dinner for my dad. I really wanted to make it special since not only was it his birthday, but it was the first time I had that side of my family over for a real dinner. I love to bake, so that is usually my favorite part of a meal. I was so excited about making him a cake.

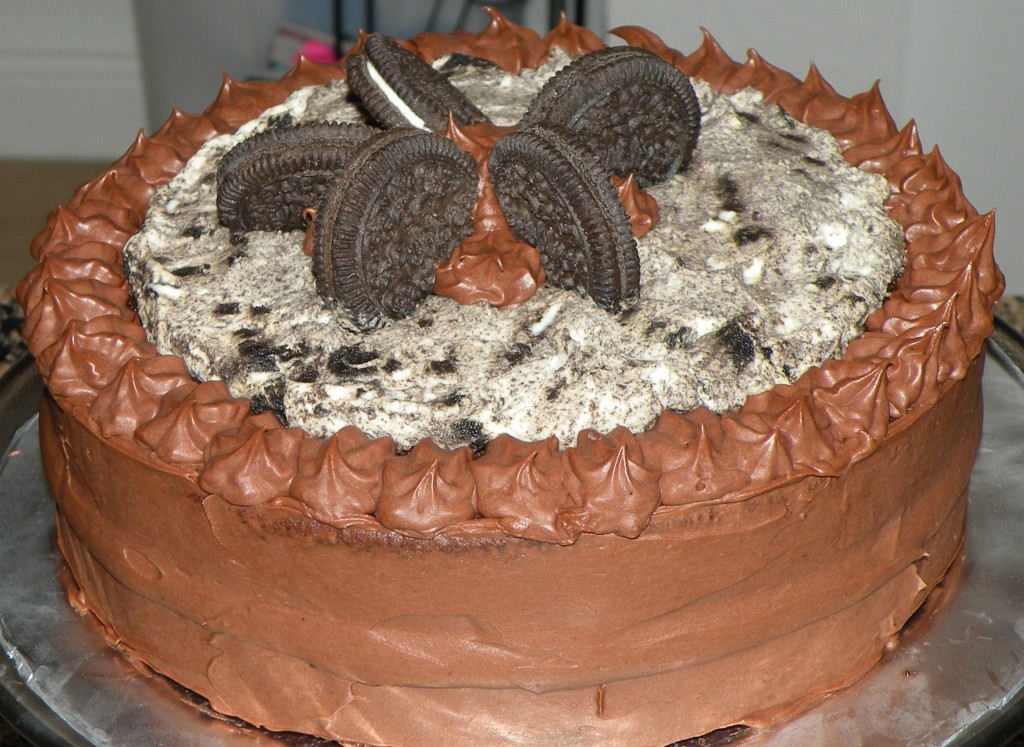
I had seen a few posts on the What’s Cooking board for a Cookies n’ Cream Cake. When I originally saw it I bookmarked it because I didn’t really have a reason to bake a cake at the time. When I decided to host the birthday dinner I knew that the Cookies n’ Cream cake would be THE cake.

Greg admitted after the fact that he never thought I could pull it off. HA, I guess I showed him! He was very impressed, not to mention the reaction I got out of my family. Everyone loved it!

dscn0079

Cookies n’ Cream Cake

courtesy of Just2Good, cake and frosting originally from Hershey’s.
Cake:
2 cups sugar
1 3/4 cups all-purpose flour
3/4 cup cocoa powder
1 1/2 tsp. baking powder
1 1/2 tsp. baking soda
1 tsp. salt
2 eggs
1 cup milk
1/2 cup vegetable oil
2 tsp. vanilla extract
1 cup boiling water

Filling:
1 1/4 cups heavy cream
1/8 cup confectioners’ sugar
1/4 tsp. vanilla extract
10 chocolate sandwich cookies, chopped

Frosting:
1/2 cup unsalted butter
2/3 cup cocoa powder
3 cups confectioners’ sugar
1/3 cup milk
1 tsp. vanilla extract

Preheat oven to 350 degrees and grease two 9 inch round baking pans.

In a large bowl, stir together sugar, flour, cocoa, baking powder, baking soda, and salt. Add eggs, milk, oil, and vanilla. Beat on medium speed for 2 minutes. Stir in boiling water (batter will be very thin). Pour batter into round baking pans.

Bake 30-35 minutes, or until a toothpick inserted comes out clean. Cool for 10 minutes before removing from pans. Once removed place on baking racks until completely cooled.

To make the filling, combine cream, confectioners’ sugar, and vanilla in the bowl of a stand mixer fitted with the whisk attachment. Beat on low until sugar is incorporated, then beat on high until stiff peaks form (do not over beat). Gently fold in chopped cookie pieces.

To make the frosting, melt butter in a medium bowl. Stir in cocoa. Alternately add confectioners’ sugar and milk, beating to spreading consistency. If needed, add additional amount of milk. Stir in vanilla.

To assemble the cake, place one layer of cake on a cardboard circle. Pipe a border of frosting along th rim of the cake. Spread a thick layer of cookies n’ cream filling inside the circle. Top with the other layer of cake. Frost the side of the cake with the frosting. Pipe a decorative border of chocolate frosting along the border of the cake. Fill the inside of the decorative border with a thick layer of cookies n’ cream filling. Garnish with cookies and frosting as desired.