Jelly Roll

While my mom and stapdad were visiting over Thanksgiving weekend, there was a lot of cooking going on! I was determined to make a Pumpkin Roll since my mom and I love pumpkin and I saw it so many times on the What’s Cooking board. I made that for Thanksgiving day and to my happiness, it was a success. The thing is, my stepdad and Greg do not like pumpkin; I know what a shame. My stepdad had mentioned how he loved jelly rolls. So one evening I decided to find a jelly roll recipe and make him a dessert he would eat.

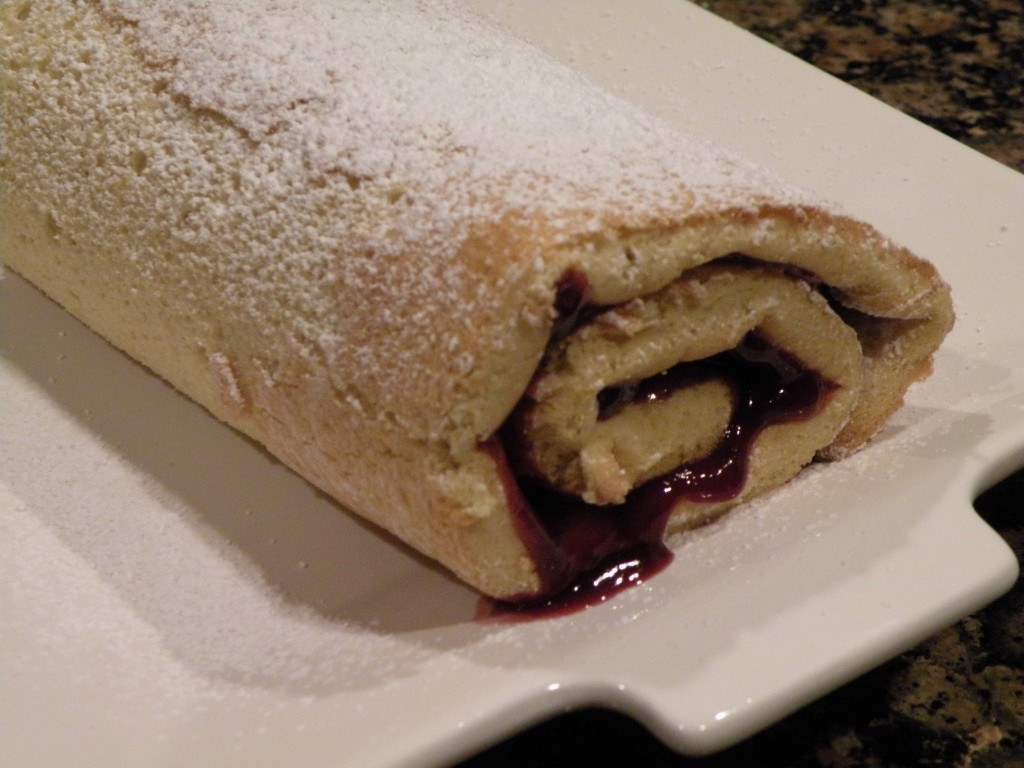
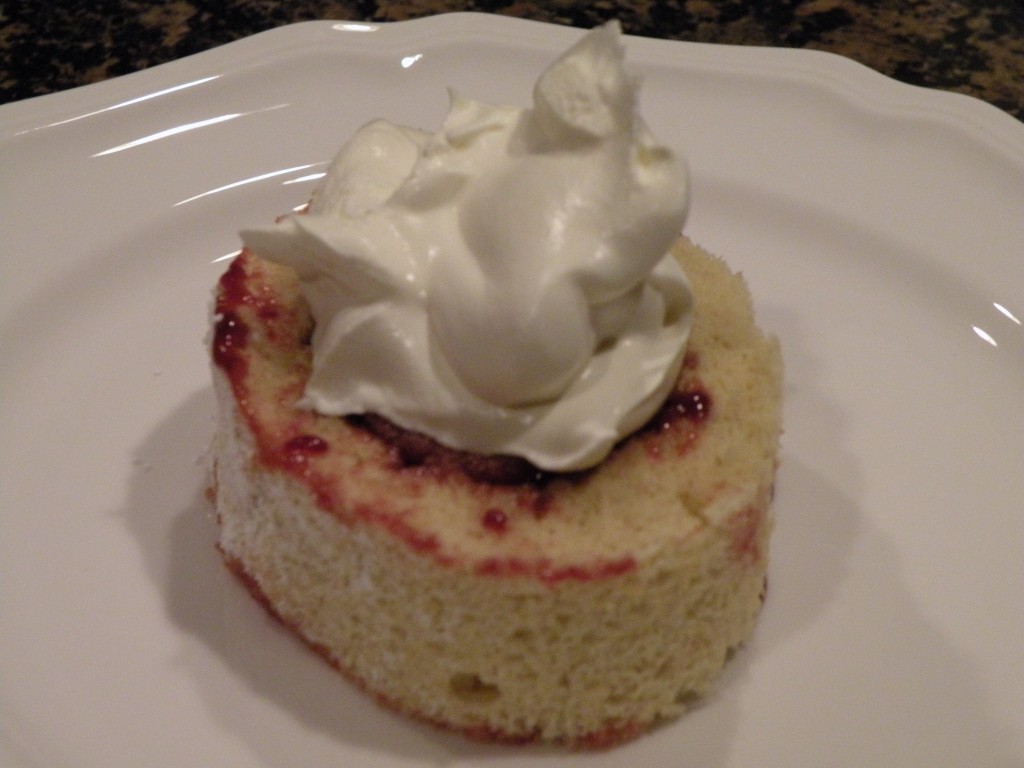
My stepdad is a southern boy so when I came across a recipe by Paula Dean, I knew I couldn’t go wrong. I just happened to have all of the ingredients, so I threw it together. It was quite delicious and everyone loved it.
dscn0051

dscn0053

Old South Jelly Roll Cake

courtesy of Paul Dean and Food Network
4 eggs, separated
3/4 cup sugar
1 tbs. vanilla
3/4 cup cake flour, sifted
3/4 tsp. baking powder
1/4 tsp. salt
1 cup jam or jelly, stirred well
whipped cream (for topping)
confectioners’ sugar (for dusting)

Preheat oven to 400 degrees.

In a small bowl beat egg whites until stiff but not dry and set aside. In another bowl, beat the egg yolks until light. Gradually add the sugar and vanilla, and mix well. Sift together the flour, baking powder, and salt. Add the sifted flour mixture to the egg yolk mixture. Fold the egg whites into the egg mixture and pour the batter into a 15 x 10 x 1 inch jelly roll pan lined with parchment paper. Bake for 8 to 10 minutes or until cake is golden brown.

Loosen edges of cake, invert cake onto a towel dusted with confectioners’ sugar. Gently peel parchment paper off cake. Trim 1/4 inch of hard crust off each long side of the jelly roll cake. Begin with the narrow side and roll the cake and towel up together. Cool cake on rack, seam side down, for 10 to 15 minutes.

Once cake has cooled, gently unroll and spread cake with jam or jelly and re-roll (without the towel). Sprinkle with confectioners’ sugar or cover with whipped cream.

Yields 8 to 10 servings.
Guilt Free Brownies

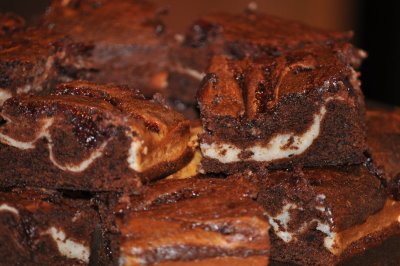
There is no denying that Greg and I love sweets. I tend to be more of the dessert person (i.e. cakes, pastries, etc.) while Greg prefers candy and ice cream. He isn’t much of a cake person, but he loves cookies and brownies. So, that brings me to our dilemma….if there are sweets in the house, we will eat them! Unfortunately our waistlines don’t enjoy the treats as much as our taste buds do.

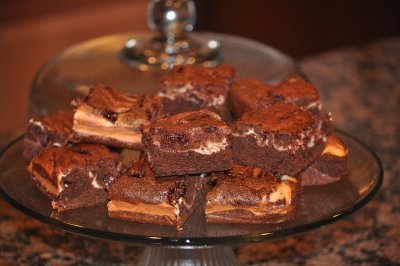
Thankfully there is this wonderful website/magazine called Cooking Light that lets us feed our sweet tooth without increasing our clothing size. I frequent this site quite a bit to find healthy or at least semi-healthy treats. I wanted to make brownies but I wanted something a bit different. When I came across the Raspberry-Cream Cheese Brownies I knew I found a winner. Chocolate and raspberry are a match made in heaven and then you add cream cheese…..what more could you want?

These were definitely a winner and there is no doubt I will make them again. The best part….they are delicious and I don’t even have to feel guilty while indulging.

brownies11

brownie21

Raspberry-Cream Cheese Brownies

courtesy of cookinglight.com
Filling:
1/3 cup sugar
1/3 cup (3 oz.) 1/3 less fat cream cheese, softened
2 tsp. all-purpose flour
1/2 tsp. vanilla extract
1 large egg white

Brownies:
Cooking Spray or Parchment Paper
3/4 cup all-purpose flour
1/4 tsp. baking powder
1/4 tsp. baking soda
1/8 tsp. salt
1 cup sugar
2/3 cup unsweetened cocoa
1/4 cup of butter or stick margarine, melted
1 tbs. water
1 tsp. vanilla extract
1 large egg
2 large egg whites
3 tbs. raspberry preserves

Preheat oven to 350 degrees.

To prepare the filling, mix the first 5 ingredients at medium speed of a mixer until well blended, then set aside.

To prepare the brownies, coat the bottom of an 8 inch baking pan with cooking spray (I prefer to line the pan with parchment paper for easy release). Lightly spoon 3/4 cup flour into dry measuring cups, and level with a knife. Combine flour, baking powder, baking soda and salt in a medium bowl. Combine (in another bowl) 1 cup sugar with cocoa, butter, water vanilla extract, egg and egg whites, mixing until smooth. Add the flour mixture to the wet ingredients, stirring just until moist. Spread 2/3 of the mixture into the bottom of the prepared pan. Pour the cream cheese filling over the batter, spreading evenly. Carefully drop the remaining batter and raspberry preserves by spoonfuls over the filling. Swirl together using the tip of a knife to make a marble effect.

Bake at 350 degrees for 40 minutes or until a toothpick inserted in the center comes out almost clean. Cool on a wire rack and then ENJOY!

Grandma Smalley’s Brownies

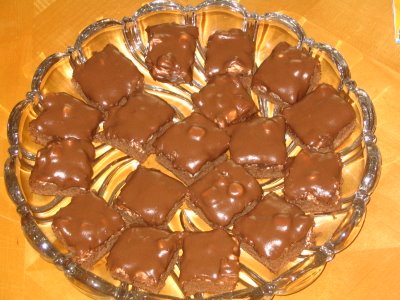
We had a family gathering at my husband’s grandparent’s house this weekend. When I asked if she wanted me to bring something of course his grandmother said no, we just needed to bring ourselves. Well, I haven’t really done any baking since we moved and I was really itching to get in the kitchen and do what I love most. I decided to make my grandma’s “famous” brownies. I had asked her for the recipe quite a while ago but never got around to making them. For as long as I can remember she has always made these brownies for pretty much every holiday or family gathering. We all always look forward to these brownies (hence why I called them “famous”)! Needless to say they were a hit with my husband’s family as well. The tray was more than half empty before it was even time for dessert.

I am really glad that everyone enjoyed them as much as I always have. It is always fun to share a recipe that has been passed down. Next time around I may even try to put my own twist on them….Greg has already put his request in for adding chocolate chips. :o)

gbrownie1

Marshmallowy Goodness!!

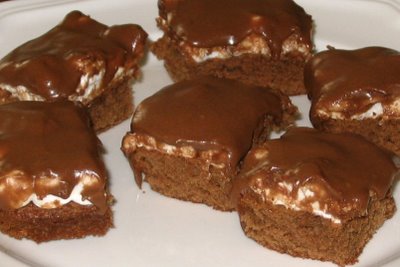
Time for a close-up.  It really doesn't get much better than brownies topped with marshmallow and chocolate icing.  I must say my grandma usually adds nuts as well but since Greg isn't a fan I decided to leave them out.   Oh and I guess the "it doesn't get much better than this" comment is up for debate due to Greg wanting to add chocolate chips next time.

Time for a close-up. It really doesn't get much better than brownies topped with marshmallow and chocolate icing. I must say my grandma usually adds nuts as well but since Greg isn't a fan I decided to leave them out. Oh and I guess the "it doesn't get much better than this" comment is up for debate due to Greg wanting to add chocolate chips next time.

gbrownies3

Grandma Smalley’s Brownies

1 cup sugar
1/2 cup butter (softened)
3/4 cup flour
2 eggs
2 tbs cocoa
1 cup nuts (optional – I left them out)
pinch of salt
small marshmallows (about a half a bag)

Preheat oven to 350 degrees. Cream sugar and butter. Add the eggs and mix until combined. Sift the flour, salt and cocoa together and then add to the egg mixture. Mix in nuts (if desired). Line a square cake pan with parchment paper (this isn’t necessary but it makes for easy removal – otherwise make sure to grease your pan). Pour batter into the pan.

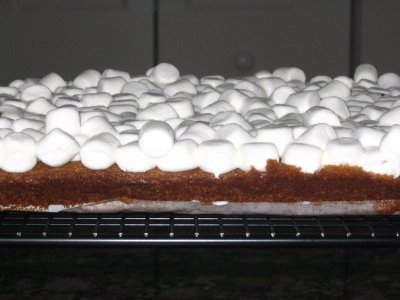
Bake at 350 degrees for about 25 minutes (33 minutes for a glass pan). When brownies are done remove them from the oven and immediately spread the marshmallows on the top. You can add a tin foil tent over the pan for a few minutes to make the marshmallows melt nicely but it isn’t necessary.
Let cool and cover with icing (recipe follows).

Chocolate Icing
1/4 cup butter (softened)
2 cups confectioners sugar
2 tbs cocoa
2-4 tbs half & half (I didn’t have any so I used milk and it worked fine)

Mix the butter sugar and cocoa in a bowl until it starts to combine. Add two tbs. of half & half and mix well. Add additional half & half until you reach the correct consistency.

Chocolate and Raspberry…I am in Love

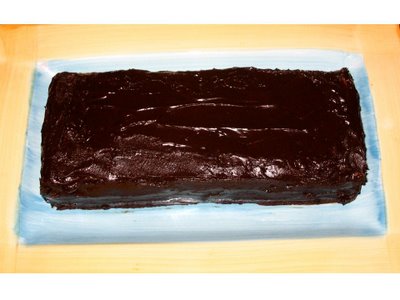
Lately my whole family has been trying to watch what they eat in hopes of taking off a few pounds. Nowadays who isn’t, right? A few weeks ago I came across this recipe on cookinglight.com and was hoping to find a reason to try it. This past weekend we celebrated my mom’s birthday and of course I volunteered to make a cake. I am always looking for a valid excuse to bake but not have to keep it in my house. :o) I remembered this cake and of course it took me forever to find the recipe again. Finally I found it and went to work on creating my masterpiece. It was fairly easy to make and it was oh so good. My mom later told me that my step-dad raved over it, she had to send a second piece home with my sister’s boyfriend and she herself snuck back out to the kitchen in the middle of the night to have a second piece. I guess it was a hit! The plus side is that it was a tad bit healthier than your typical cake. The recipe was originally for a Raspberry-Almond Torte but when I saw the price for the almond paste I quickly decided to make it Raspberry-Vanilla instead, lol. I was planning on taking a picture of a cut piece but I completely forgot once we got to my parent’s house. Sorry, but this is the only crummy picture that I have. If you click on the link for the cooking light recipe you can see the pretty picture that they have.

choc-rasp-cake

Raspberry-Vanilla Torte with Chocolate Ganache

adapted from cookinglight.com
Cake:
Cooking spray
6 tbs. butter, softened
1 1/2 tsp. vanilla extract
1 cup granulated sugar, divided
3 large eggs
3/4 cup all-purpose flour
1/4 tsp. salt
4 large egg whites

Filling:
1/4 cup fresh lemon juice
1 (10-ounce) jar seedless raspberry jam
1/2 cup powdered sugar, sifted

Ganache:
1/2 cup granulated sugar
1/4 cup unsweetened cocoa
1/3 cup fat-free milk
1 (4-ounce) bar semisweet chocolate, chopped
Preheat oven to 350°.

Coat a 15 x 10-inch jelly roll pan with cooking spray (it took me a little while to realize that this was basically a cookie sheet); grease the pan and then line bottom with parchment paper. Coat parchment paper with cooking spray.

To prepare cake, place butter and vanilla extract in a large bowl; beat with a mixer at medium speed 2 minutes or until blended. Add 1/2 cup granulated sugar, beating until well blended (about 3 minutes). Add eggs, 1 at a time, beating well after each addition.
Lightly spoon flour into dry measuring cups; level with a knife. Combine flour and salt, stirring with a whisk. Add flour mixture to butter mixture, beating just until combined.
Place the egg whites in a large bowl. Using clean, dry beaters, beat egg whites with a mixer at high speed until foamy. Gradually add 1/2 cup granulated sugar, 1 tablespoon at a time, beating until stiff peaks form. Fold egg whites into batter; pour batter into prepared pan.

Bake at 350° for 18 minutes or until cake springs back when touched lightly. Cool. Invert cake onto a wire rack. Remove parchment paper. Cut cake into 4 (10 x 3 3/4-inch) rectangles.

To prepare filling, combine juice and raspberry preserves, stirring with a whisk. Add powdered sugar, stirring until smooth. Reserve 3/4 cup raspberry mixture. Place 1 cake rectangle on a cake platter; spread with 1/4 cup raspberry mixture, leaving a 1/4-inch border. Repeat procedure with remaining cake and 1/2 cup raspberry mixture, ending with cake.

To prepare ganache, combine 1/2 cup granulated sugar, cocoa, and milk in a medium saucepan over medium heat; bring mixture to a boil, stirring frequently. Cook 1 minute, stirring constantly. Remove from heat, and add chocolate, stirring until smooth. Spread ganache evenly over top and sides of cake; let stand 20 minutes or until set. Serve reserved raspberry mixture with torte.

Is it a brownie or a cookie? Who Cares!

Recently we found out that my husband, Greg, would be getting a promotion and we would be relocating from Tampa to Miami. Well, he had their poor office coordinator scanning the calls from the moving companies he was getting estimates from. Greg told her he would make it up to her by buying her snacks from the vending machine the rest of the week. Men!! When he told me this I quickly volunteered to make her a homemade treat instead. Not really knowing what she liked, except for chocolate, I began going through my recipes. I came across Double Chocolate Brownie Cookies in my Martha Stewart Baking Handbook. I had already made one successful cookie from her book so why not try another.

I went through the whole process of following the recipe exactly. After getting all of my ingredients combined I had a nice semi-thick batter. The only problem was….the recipe said to take spoonfuls and roll them into balls. If I took what I had and did that I would have had a big blob of batter in my hand and there was no way it was going to roll into a ball. I went back and re-read the recipe to be SURE that I did everything correctly and that it didn’t say to let the batter stand or refrigerate. I did everything right and there was nothing that said to do anything more with the batter after it was all combined. Hmmmm….now what?

I decided to try and refrigerate it for a little while. It helped a bit but not much. I let it sit on the counter for a little while and it also helped a bit but there was still no way it was going to be rolled into balls. Well, what did I have to lose at this point? I decided to just plop the batter down into little mounds on the cookie sheet and see what happened.

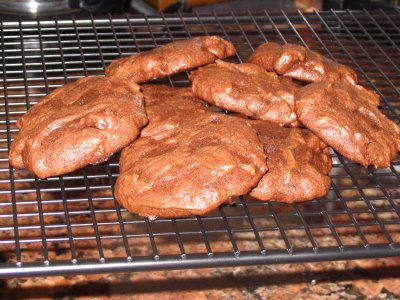
I was very pleased to see that they turned out fine. They were delicious (very decadent) and had that nice soft consistency of a brownie, YUM! In the end I had a success and everyone at Greg’s work loved them! They wanted me to make more over the weekend for Monday, lol.

chocolate-cookies

Double Chocolate Brownie Cookies

courtesy of Martha Stewart’s Baking Handbook
9 oz. semi-sweet chocolate, chopped into 1/4 inch chunks
3 oz. unsweetened chocolate, coarsely chopped
6 tbs. unsalted butter
1 cup sugar
3 large eggs
1/2 tsp. pure vanilla extract
1 cup sifted all-purpose flour
1/4 tsp. salt
3/4 cup (about 3 oz.) chopped walnuts (optional) – I chose to omit these

Preheat your oven to 375 degrees. Line two large baking sheets with parchment paper and then set aside. In a heatproof bowl set over (but not touching) simmering water, melt 5 ounces of the semisweet chocolate, all of the unsweetened chocolate and the butter. Stir until smooth. Set mixture aside to cool for about 5 minutes.

In the bowl of an electric mixer fitted with the paddle attachment, beat the chocolate mixture and sugar on medium speed until well combined, about 3 minutes, scraping down the sides of the bowl as needed. Add the eggs and mix until completely combined. Beat in the vanilla. Add the flour and salt, and beat until just incorporated. Stir in the remaining 4 ounces of semi-sweet chocolate and the nuts, if using.

Shape 2 tablespoons of dough at a time into 1 1/2 inch balls and place about 1 1/2 inches apart on the prepared baking sheets. Bake, rotating sheets halfway through, until edges are set and centers are still a bit soft, 9 to 11 minutes. Transfer parchment and cookies to a wire rack to cool completely.

Note: I used a hand mixer which may be why the consistency didn’t turn out the way it should have.

Peanut Butter + Bananas = Tasty Muffin

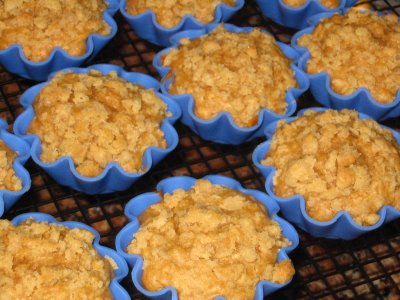
I had two pitiful bananas dangling from their little banana hanger in my kitchen. Normally I would be wasteful and throw them away because as much as I would like to, I don’t bake on a regular basis due to the fact that I don’t need the indulgent food in my house. As I have mentioned before, the skinny gene is not a friend of my family. So, I am not one of those people who generally holds onto their ripe bananas. Well, I guess the What’s Cooking board that I frequent must be wearing off on me because instead of tossing them I was determined to find a recipe to use them in. I figured I would treat my coworkers to a Friday sweet. I searched for banana bread recipes (of course the first thing that came to mind) but most of the recipes I found called for more than two bananas. Just when I thought I was going to have to get really creative I logged onto the WC board and there just happened to be a blog update from angelashley titled Peanut Butter Banana Muffins. I checked out the recipe and to my delight it only called for two bananas, YAY! My two little bananas wouldn’t have to go to waste. It was obviously meant to be that I make these lovely little muffins. I was also itching to use my new silicone baking cups. :o)

If you aren’t a fan of super sweet things in the morning then this recipe is perfect. They have a very mild sweetness even with the streusel topping. My coworkers loved them.

muffins

Peanut Butter Banana Muffins

courtesy of angelashly, Ashley’s Attempts in the Kitchen
1 cup all purpose flour
3/4 cup quick cooking oats
1/3 cup packed brown sugar
1 tbs. baking powder
1 cup milk
1/2 cup peanut butter
1/2 cup mashed ripe banana
1 egg, beaten
2 tbs. vegetable oil
1 tsp. vanilla extract

1/4 cup all purpose flour
2 tbs. butter, melted
2 tbs. packed brown sugar

Preheat your over to 375 degrees. Grease 12 muffin cups or line with muffin liners (I used silicone cups and they were great). Combine 1 cup of flour, quick cooking oats, 1/3 cup brown sugar and baking powder. Whisk together milk, peanut butter, mashed banana, egg, oil and vanilla.

Add banana mixture to dry ingredients, mixing just until moistened. Fill the prepared muffin cups 3/4 full.
In a small bowl, stir together 1/4 cup flour, melted butter and 2 tbs. of brown sugar. Sprinkle the topping evenly over the muffins.

Bake in preheated oven for 18 minutes, until golden brown. Best served warm (but everyone enjoyed them room temperature as well).

Note: I actually got about 15 or 16 muffins out of the batter.

Cookie with a Zing

We were having a Memorial Day potluck at work and I wanted a great dessert. After a winter season of heavy, rich desserts I really wanted something light and fruity. I also wanted something that wasn’t too time consuming or labor intensive since I would have to prepare it when I got home from work.
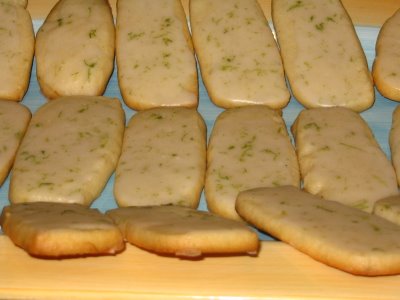
During this same time I had just purchased a new baking cookbook, Martha Stewart’s Baking Handbook. While flipping through it I found just the recipe I was looking for, Lime-Glazed Cookies. Sweet, tart and oh so good.

Lime-Glazed Cookies

– makes about 3 dozen
Martha Stewart’s Baking Handbook

lime

Bring on the Cheesecake Bars!

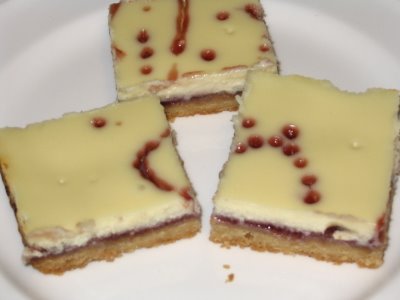
Raspberry and cheesecake combined…it doesn’t get much better than that! Or does it? How about adding a shortbread crust into the mix. All I can say is, YUM. This is a great dessert for Spring and Summer, or any time of the year for that matter. It’s simple, easy to transport and it tastes great. Sounds like my kind of dessert.

cheesecake

Raspberry Cheesecake Bars

adapted from Food Network
16 oz. cream cheese, softened
2 large eggs
3/4 cup sugar
1 tsp. vanilla
3/4 cup raspberry preserves (you can switch this out with your favorite flavor)
hot shortbread base (recipe follows)

Preheat oven 350 degrees.

In a bowl whisk cream cheese until smooth then whisk in eggs, sugar and vanilla. Evenly spread preservers over hot shortbread and pour cream cheese mixture over it. You may also choose to melt a small amount of the preserves in the microwave and drizzle over the top for a little extra visual. Bake in the center of oven until slightly puffed, about 30 minutes. Cool completely in pan and then cut into 24 bars.
*Note: I lined my pan with parchment paper to make for easy removal.

Shortbread Base

1 1/2 sticks (3/4 cup) unsalted butter
2 cups all-purpose flour
1/2 cup packed like brown sugar
1/2 tsp. salt

Preheat oven 350 degrees.

Cut butter into 1/2 inch pieces. In a food processor, process all ingredients until mixture begins to form small lumps. Sprinkle mixture into a 13 by 9 by 2 inch baking pan, press evenly onto bottom. Bake shortbread in the center of the oven until golden brown, about 20 minutes.